

Simon Says Stamp - Yay You Release Blog Hop, Day 1
- Keisha Diann

- May 12, 2022
- 4 min read

Hi Lovelies!
Thank you for joining us for Day 1 of Simon Says Stamp's Yay You Release Blog Hop! Guess who is falling in love with foiling??? I'm not really sure why I have not done more of it, but I'm not looking back now!
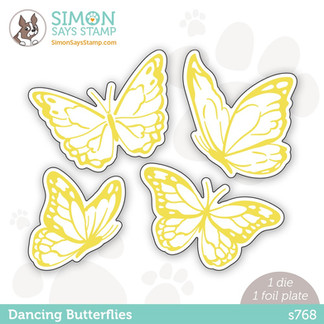
I shouldn't play favorites, but the Dancing Butterflies and Intricate Floral Background gorgeous with or without foil and versatile enough to become a craft room staple for me.

Let's review the key supplies for today's card and as usual, the full supply list is linked for your convenience here and in the Supply Gallery at the end of this post.


If you haven't dipped your toes into foiling yet, you will also need the machine and some foil:


When you shop for the items you want, remember to use the BEAUTY code when you check out to snag the Beautiful Die Set FREE with ANY purchase! This promotion will expire on 5/15 at 11:59 pm EDT or while supplies last.
I'm ready to foil Lovelies, what about you?
YOU DID IT CARD - Foiling, Ink-blending, Die-cutting
A2 Card Base: 4 1/4" x 5 1/2"
Foiled/Inked Layer: 3 3/4" x 5"
Featuring:
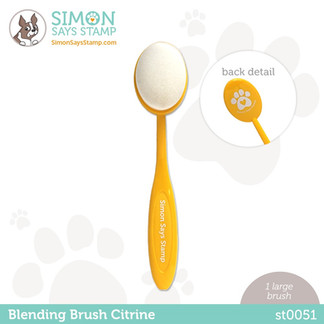
Simon Says Stamp Blending Brushes - Teal, Watermelon, Citrine
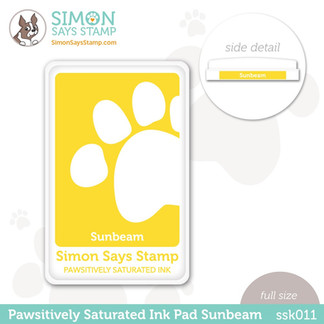
Simon Says Stamp Pawsitively Saturated Ink - Surf, Peony, Sunbeam
Spellbinders Glimmer Hot Foil - Gold, Black

I hope that you love a good butterfly card as much as I do! However, before we get to the butterflies, we must foil and ink!
Foiling

Press the black Power Button at the back of the machine so that it can begin warming up.
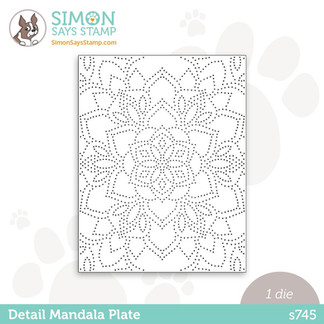
Cut gold foil slightly larger than Intricate Floral Background Foil Plate.
When the Platform Ready button goes green, place the foil plate, design side up on the heated surface of the machine and press the Timer button.

Once the Timer button stops flashing green, place foil, gold side down on the plate and add 110lb white cardstock, the thin shim (green) and the clear plate on top in that order.
Carefully remove this "sandwich", including the heated base and run through your die-cutting machine. I used a Sizzix Foldaway.

Remove the foil and cardstock carefully from the plate and heated base.

Gently peel back the foil to reveal the foil-pressed design.

Set aside the foiled cardstock for the next step and do not discard your used foil, you can get another impression out of it.

Repeat the above process using the solid Dancing Butterflies Foil Plate and the black foil.

Once you start foiling, its hard to stop so, I actually did the butterflies in 3 foils, Black, Gold and Rainbow.
Die-cutting

Once foiled, use the matching Dancing Butterflies outline die to cut them out.
Die-cut the Glossy Black Cardstock and White Cardstock using the "You did It" Die.


Layer and adhere slightly offset as shown below.
Ink-Blending

Retrieve the foiled background, inks and brushes.

Start with Surf ink

Follow with Peony (overlapping the two to create a pretty purple)

Continue with Sunbeam, overlapping with the Peony to create an orange and then into the Surf ink to create a fresh green

Add more Peony to the Sunbeam to deepen the orange.

Add more Surf to the Sunbeam ink to expand the green area.
Keep going until you are happy with the result; this was my stopping point.

Layering and Embellishing

Layer and adhere the Detail Mandala die-cut onto the card base.

Adhere the black foiled butterflies with glue and adhesive foam strips.
Look at the positioning below for final placement; I kept fiddling with where I wanted them.

Before adhering the final butterfly, add the You Did It sentiment, popped up with foam.
Place gold sequins as shown without glue to get their positioning right.


Use Craft Tacky Glue to adhere the sequins.
Feast your eyes on the gorgeous ink-blending that you can do!

Glossy Black cardstock is a perfect complement to the black-foiled butterflies!

There are many beautiful possibilities for this foil plate.

Gold Sequins for the win!!!

I can't wait to give this to someone :-)

All done!

I hope you had fun here and saw something you liked and may try. I want to make sure that you get the most of today's blog hop, so please take note Lovelies:
Be sure to explore the AMAZING Gallery that is packed with inspiration from this release!!!
Speaking of inspiration, since this is Day 1 of the Blog Hop stay tuned for all the awesomeness that will be shared on Day 2
Check out the full supply list below for your shopping convenience
When you shop for the items you want, remember to use the BEAUTY code when you check out so that you can get the Garden Party Sticker Set FREE with purchase! This promotion will expire on 5/15 at 11:59 pm EDT or while supplies last.
Comment to on this post to be eligible to win a $25 coupon from Simon Says Stamp. Winners will be chosen and posted on the Simon Says Stamp blog on Wednesday, the 18th of May. Winner should email Simon Says Stamp to claim his/her prize
I'd love to hear from you in the comments about which card was your favorite.
Thanks again for stopping by and I hope to see you again soon Lovelies! Now, do go and check out what Heather Ruwe has in store for you!
HOP ORDER:
SUPPLIES:
I listed the products that I have used below. Please note that these are compensated affiliate links used at no cost to you. I really appreciate your support. Simon Says Stamps Yay You Release products were provided as part of my Design Team package. Click on the icons below each product picture to shop with SimonSaysStamp.com.


Beautiful card Keisha, I love the coloured background and the simple white and white butterflies on top. Thank you so much for sharing, stay safe and have a wonderful day.
Those dancing butterflies are going to be flying off the shelves...hehe
Thanks for sharing your lovely card! What fun colors.
Beautiful...
The butterflies in this release definitely caught my eye! Your card is gorgeous.