

Celebrate DieCember with a Colorful Striped Holiday Card
- Keisha Diann

- Dec 21, 2025
- 2 min read
Updated: Jan 31
Hello Lovelies! Christmas is almost here, and it’s DieCember at Simon Says Stamp! I’m all about die-cutting techniques this month. One of my favorites? Double down on die-cutting by adding embossing for emphasis. Today, we’ll create a stunning Christmas Sayings Striped Holiday Card together!
Techniques to Try
We’ll explore four main techniques in today’s card:
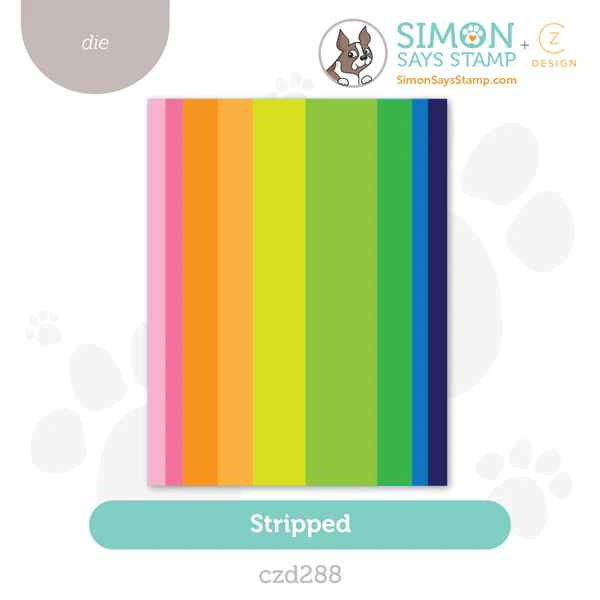
Die-cutting - Making stripes with CZ Design's Stripped Die and layering the Merry Christmas sentiment.
Coloring - Creating a vibrant rainbow by coloring our stripes with Copic markers.
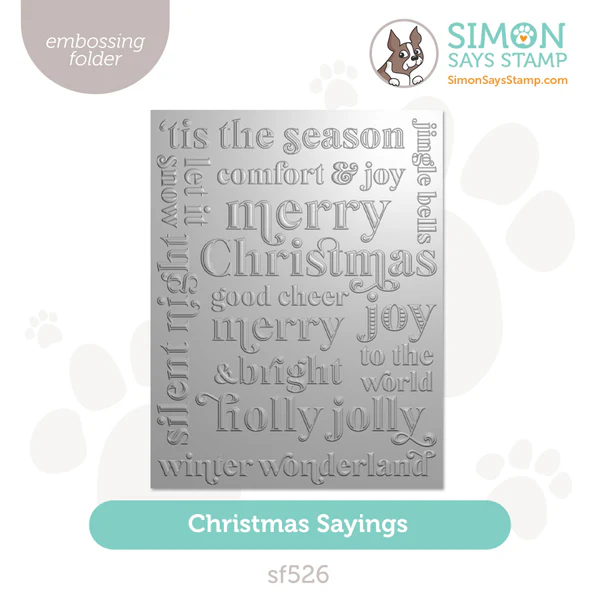
Embossing - Adding festive words to our rainbow stripes using the Christmas Sayings Embossing Folder.
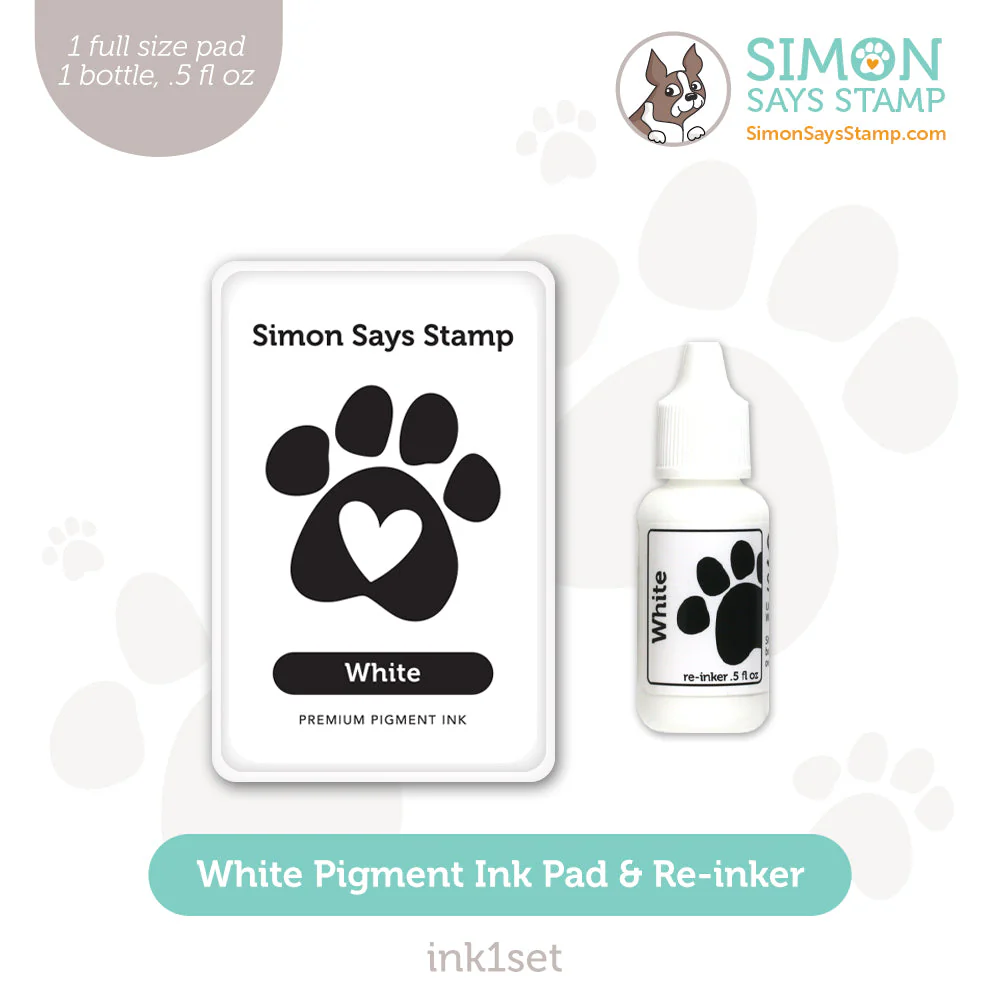
Highlighting - Helping the words pop by gently rubbing White Pigment Ink over the raised surface of the embossing.
Key Supplies for the Striped Merry Sayings Christmas Card

Click HERE for the full list!
Today's GIF!
I’m definitely in full Christmas mode! Check out this fun GIF!
Like this card and my corny GIFs? Click the button below to sign up for blog updates!
CHRISTMAS SAYINGS STRIPED CARD - Die-cutting, Coloring, Embossing, and Highlighting
Card Size: ~4 1/2" x 5 1/2"

COLOR PALETTE
Neenah Solar White 110lb Cardstock
Simon Says Stamp White Pigment Ink Pad
Copic Markers - BG57, BG12, YG13, YG21, YR24, YR02, RV24, R27, R59

CARD HIGHLIGHTS
Die-cutting - Die-cut the Neenah cardstock using CZ Design's Stripped Die and the sentiment layer of the Bouncy Merry Christmas Die.
Coloring - Use the selected Copic markers to color the white strips.
Embossing - Take an 80lb 4 1/4" x 5 1/2" piece of white cardstock (or lighter if you have it). Adhere the colored strips in your preferred rainbow order and emboss using the Christmas Sayings Embossing Folder.
Highlighting - Gently rub White Pigment Ink over the raised surface of the embossing. Let it dry and repeat if needed.
UP CLOSE AND CRAFTY


LAST LOOK

Thanks for stopping by today! Drop me a comment and say hi!
SUPPLIES
I’ve listed the products I used below. Please note that these are compensated affiliate links, used at no cost to you. I really appreciate your support! All stamps used today were part of my DieCember maker package from Simon Says Stamp. Click on the icons below each product picture to shop with SimonSaysStamp.com.


A structured learning path can make a noticeable difference when building technical skills, especially in a field that combines multiple disciplines. Choosing something like a Full Stack Developer Course in Hyderabad can provide a balanced introduction to both front-end and back-end concepts, helping learners understand how different parts of an application work together. This kind of approach is often useful for those looking to develop practical knowledge and improve their overall problem-solving abilities in software development.
Many people exploring career growth in tech are considering options like an AI Course in Kolkata as part of their learning journey. With the increasing role of AI across industries, gaining foundational knowledge in this area can help individuals better understand how automation, data analysis, and intelligent systems are shaping modern workplaces.
Many professionals and students are exploring ways to enhance their online skills, and enrolling in a Digital Marketing Course in Kochi can provide structured guidance. Such courses often help participants understand industry practices, improve practical abilities, and stay updated with current trends in the digital space. Continuous learning in this area can be valuable for personal growth and career opportunities.
If someone is considering expanding their skills in analytics or technology, enrolling in a Data Science Course in Kolkata could be one of several options worth exploring. It’s generally helpful to look for programs that balance theory with practical application, while also fitting individual learning preferences and schedules.
Finding the right learning path can be important for building practical skills in software development, and many people consider enrolling in a Full Stack Developer Course in Kochi to gain a structured understanding of both front-end and back-end technologies. Such programs are often discussed in online communities as one of several ways learners try to organize their study approach and stay consistent with practice.