

Turn Your Cardstock Scraps into Rainbow Christmas Cards with Simple Trees


Hi Lovelies!
Today I’m putting my cardstock scraps to work on a cheerful Christmas card featuring the Simple Trees Die Set from the Sending Cheer release.
I loved the idea of a non-traditional rainbow palette and easy-to-create die-cuts for making multiples. This project combines simple cutting, a little collage and dimensional adhesive—giving those saved scraps their festive moment! I’ll show you how to prepare the textured panel, arrange the trees and organize your components for assembly.

Key Supplies for the Simple Trees Christmas Card
Click HERE for the full list!
Click the photo below to see the entire Sending Cheer release!

Today's GIF!
My Simple Trees don't dance but they are still pretty cute!
Like this card and my CORNY GIFs? CLICK THE BUTTON BELOW
to sign up for blog updates:
SIMPLE TREES CHRISTMAS CARD - Die-cutting and Collage
Project Snapshot
Finished size: 4 1/4” x 5 1/2”
Skill level: Beginner—simple die-cutting, collage and adhering
Active time: 15-20 mins for 1 card
Waiting time: 0 mins
Main technique: Die-cutting Christmas cards from cardstock scraps, with assembly-line preparation for multiples

COLOR PALETTE
I chose mostly jewel-toned cardstock scraps because it felt fun for Christmas crafting than a traditional rainbow.
The finished card has orange, golden-brown, yellow-green and lime trees above the sentiment, with magenta, lavender, blue and turquoise trees below. Black accents coordinate with the black-and-white sentiment strip. You can coordinate or choose your favorite scraps
PROJECT DETAILS
Key Supplies
Simple Trees Die Set
Pinpoint Circle Background Die
Reverse Christmastime EZ Strips
Fog Grey Cardstock and white cardstock
Assorted cardstock scraps and black cardstock
Craft Glue and Foam Squares
🛠️ Card Assembly
Cut and Score the Card Base
Cut your Fog Grey base cardstock to 5 1/2” x 8 1/2” using a Paper-cutter or Guillotine.
With your scoring board and scoring tool, score at 4 1/4”, then fold to create a 4 1/4” x 5 1/2” card base.
Die-Cut the Textured Front Panel
Prepare a 4” x 5 1/4” white cardstock front layer. Run it through your Die-cutting machine with the Pinpoint Circle Background Die.
The pinpoint pattern adds visual interest and detail behind the trees without introducing another color.
Turn Your Scraps into Trees and Accents
Using the Simple Trees Die Set, cut eight trees from assorted cardstock scraps. Mix the shapes and sizes to follow the pictured design.
Cut one bow and two stars from black cardstock, then die-cut the “VERY MERRY” sentiment from Reverse Christmastime EZ Strips using the XL EZ Strips Die.

Cardstock scraps, reporting for Christmas-tree duty! Arrange Your Forest Around the Sentiment
Position the sentiment across the middle of the 4” x 5 1/4” textured panel.
Arrange four trees above it: orange, golden brown, yellow-green and lime. Place the smaller golden-brown tree in front of its neighbors.
Below the sentiment, arrange the magenta, lavender, blue and turquoise trees. Let the lavender treetop overlap the sentiment’s lower edge, with the blue tree overlapping the lavender tree.
Check your arrangement before adhering. This is the moment to move things around without a glue-related commitment!
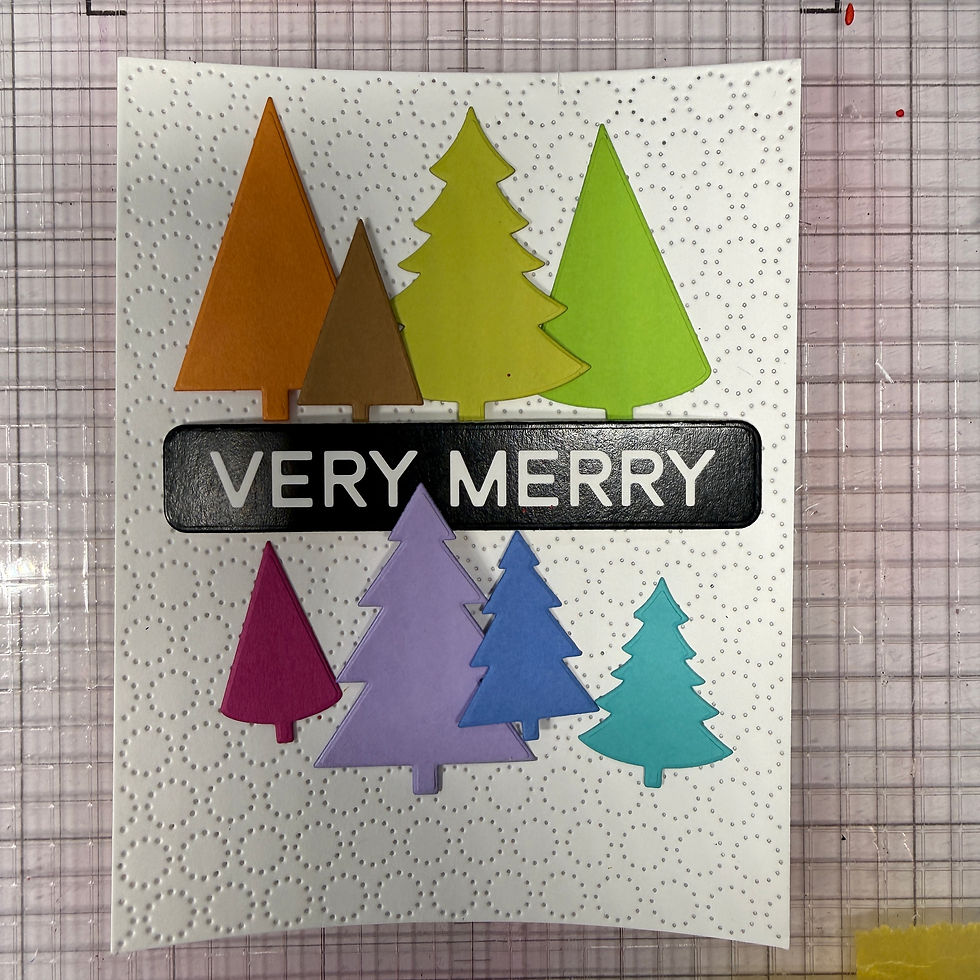
Testing the colorful arrangement before the black finishing touches. Add Dimension and Finish the Card
Apply Foam Squares to the backs of the tree arrangement and sentiment, using the photo below as a placement reference.
Use Craft Glue and the foam adhesive to assemble the panel, card base and embellishments.
Add the black bow near the top of the yellow-green tree, with a black star on the golden-brown tree and another on the turquoise tree.
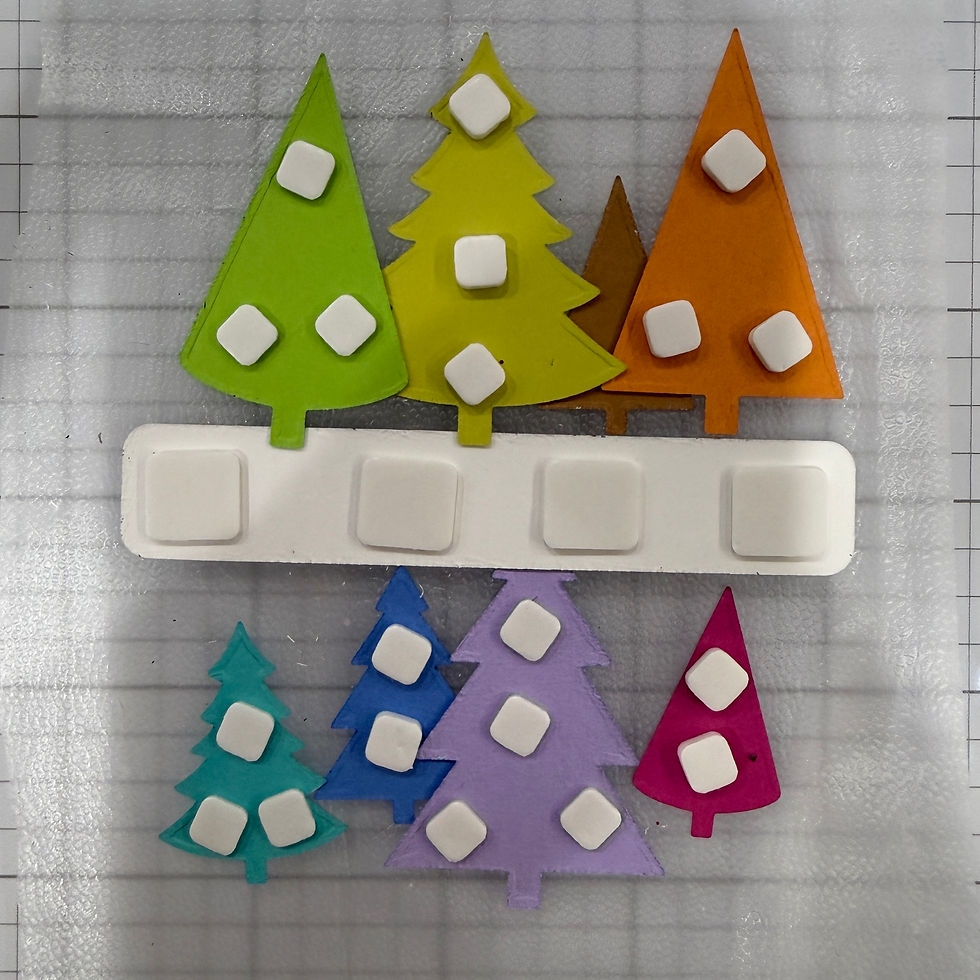
Tips for Making Multiples
I save scraps for small sentiments and die-cuts, tucking them into clear envelopes in front of the matching full-size cardstock.
Use a cupcake tray to store your trees organized by color
When making multiples, I set up an assembly line with completed components in the order they’ll go onto the card. Even a tiny forest benefits from a little organization!
UP CLOSE AND CRAFTY
The different tree silhouettes keep the arrangement interesting, while the pinpoint background supplies the detail. I also like how the black bow and stars tie in with the sentiment.

LAST LOOK
This die-cut Christmas card gives colorful scraps a useful—and very merry—purpose.
Next time, I’d add 3 small clear rhinestones for extra sparkle. That’s an untested finishing idea, rather than a detail on this finished card.

Thanks for stopping by today!
How about you? Which color from your scrap stash would you choose for the bow-topped Christmas tree?
SUPPLIES:
I listed the products that I have used below. Please note that these are compensated affiliate links, used at no cost to you. I really appreciate your support. All stamps used today were part of my Sending Cheer Release maker package from Simon Says Stamp. Click on the icons below each product picture to shop with SimonSaysStamp.com.


Comments