

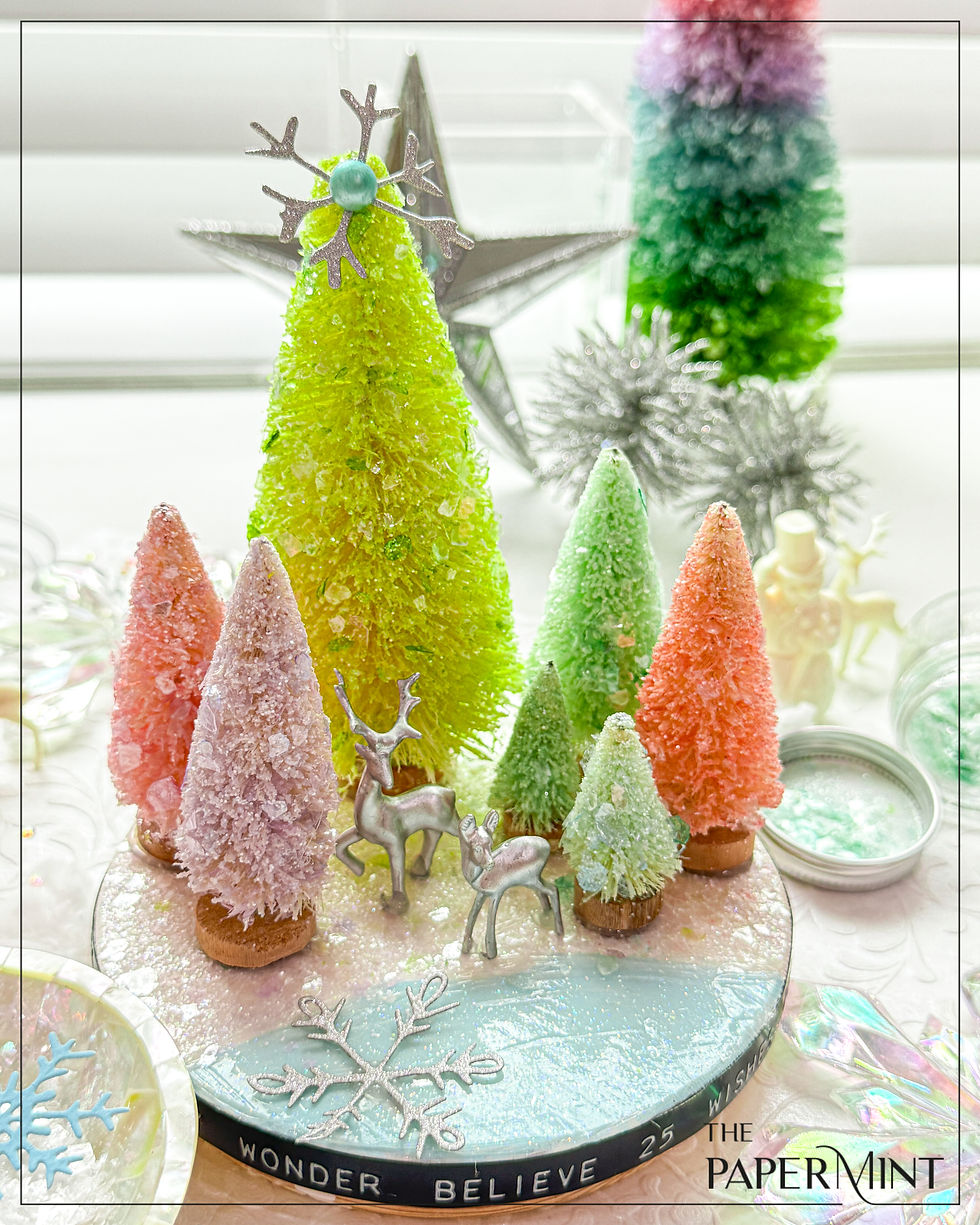
Crafting a Winter Wonderland: Snowy Tree Scene with Tim Holtz Distress Products
- Keisha Diann

- Aug 31, 2025
- 2 min read

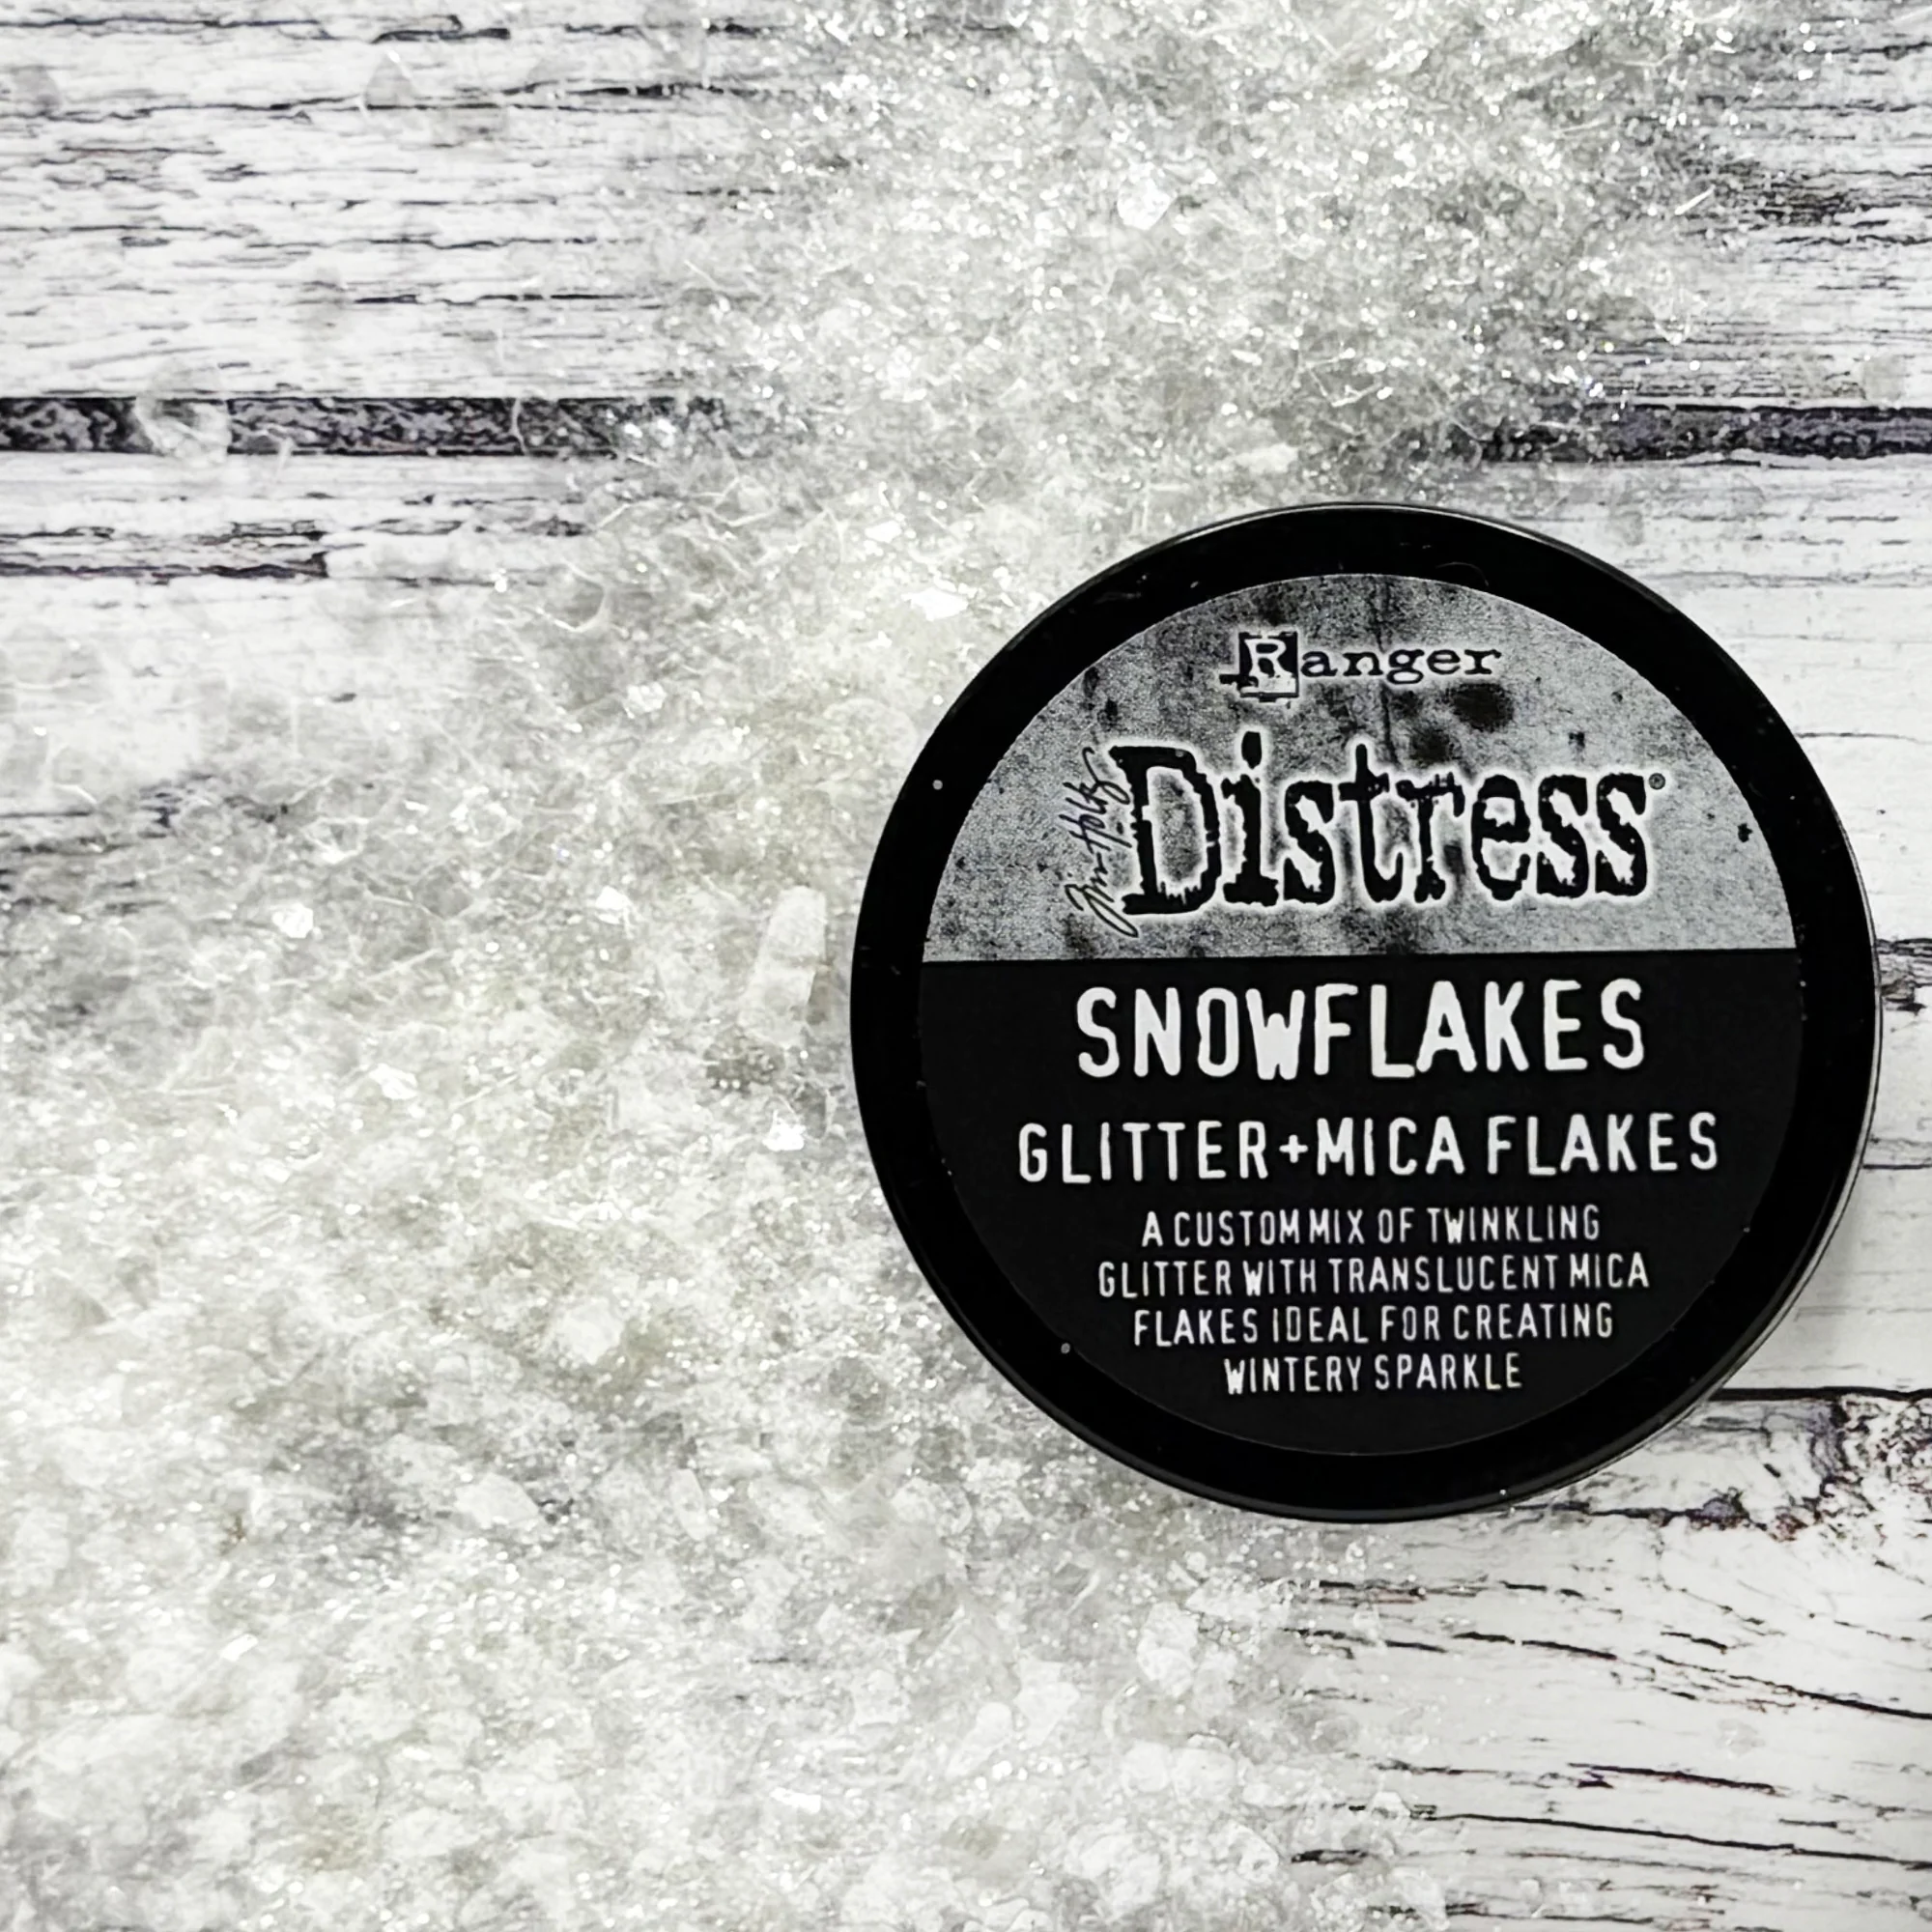
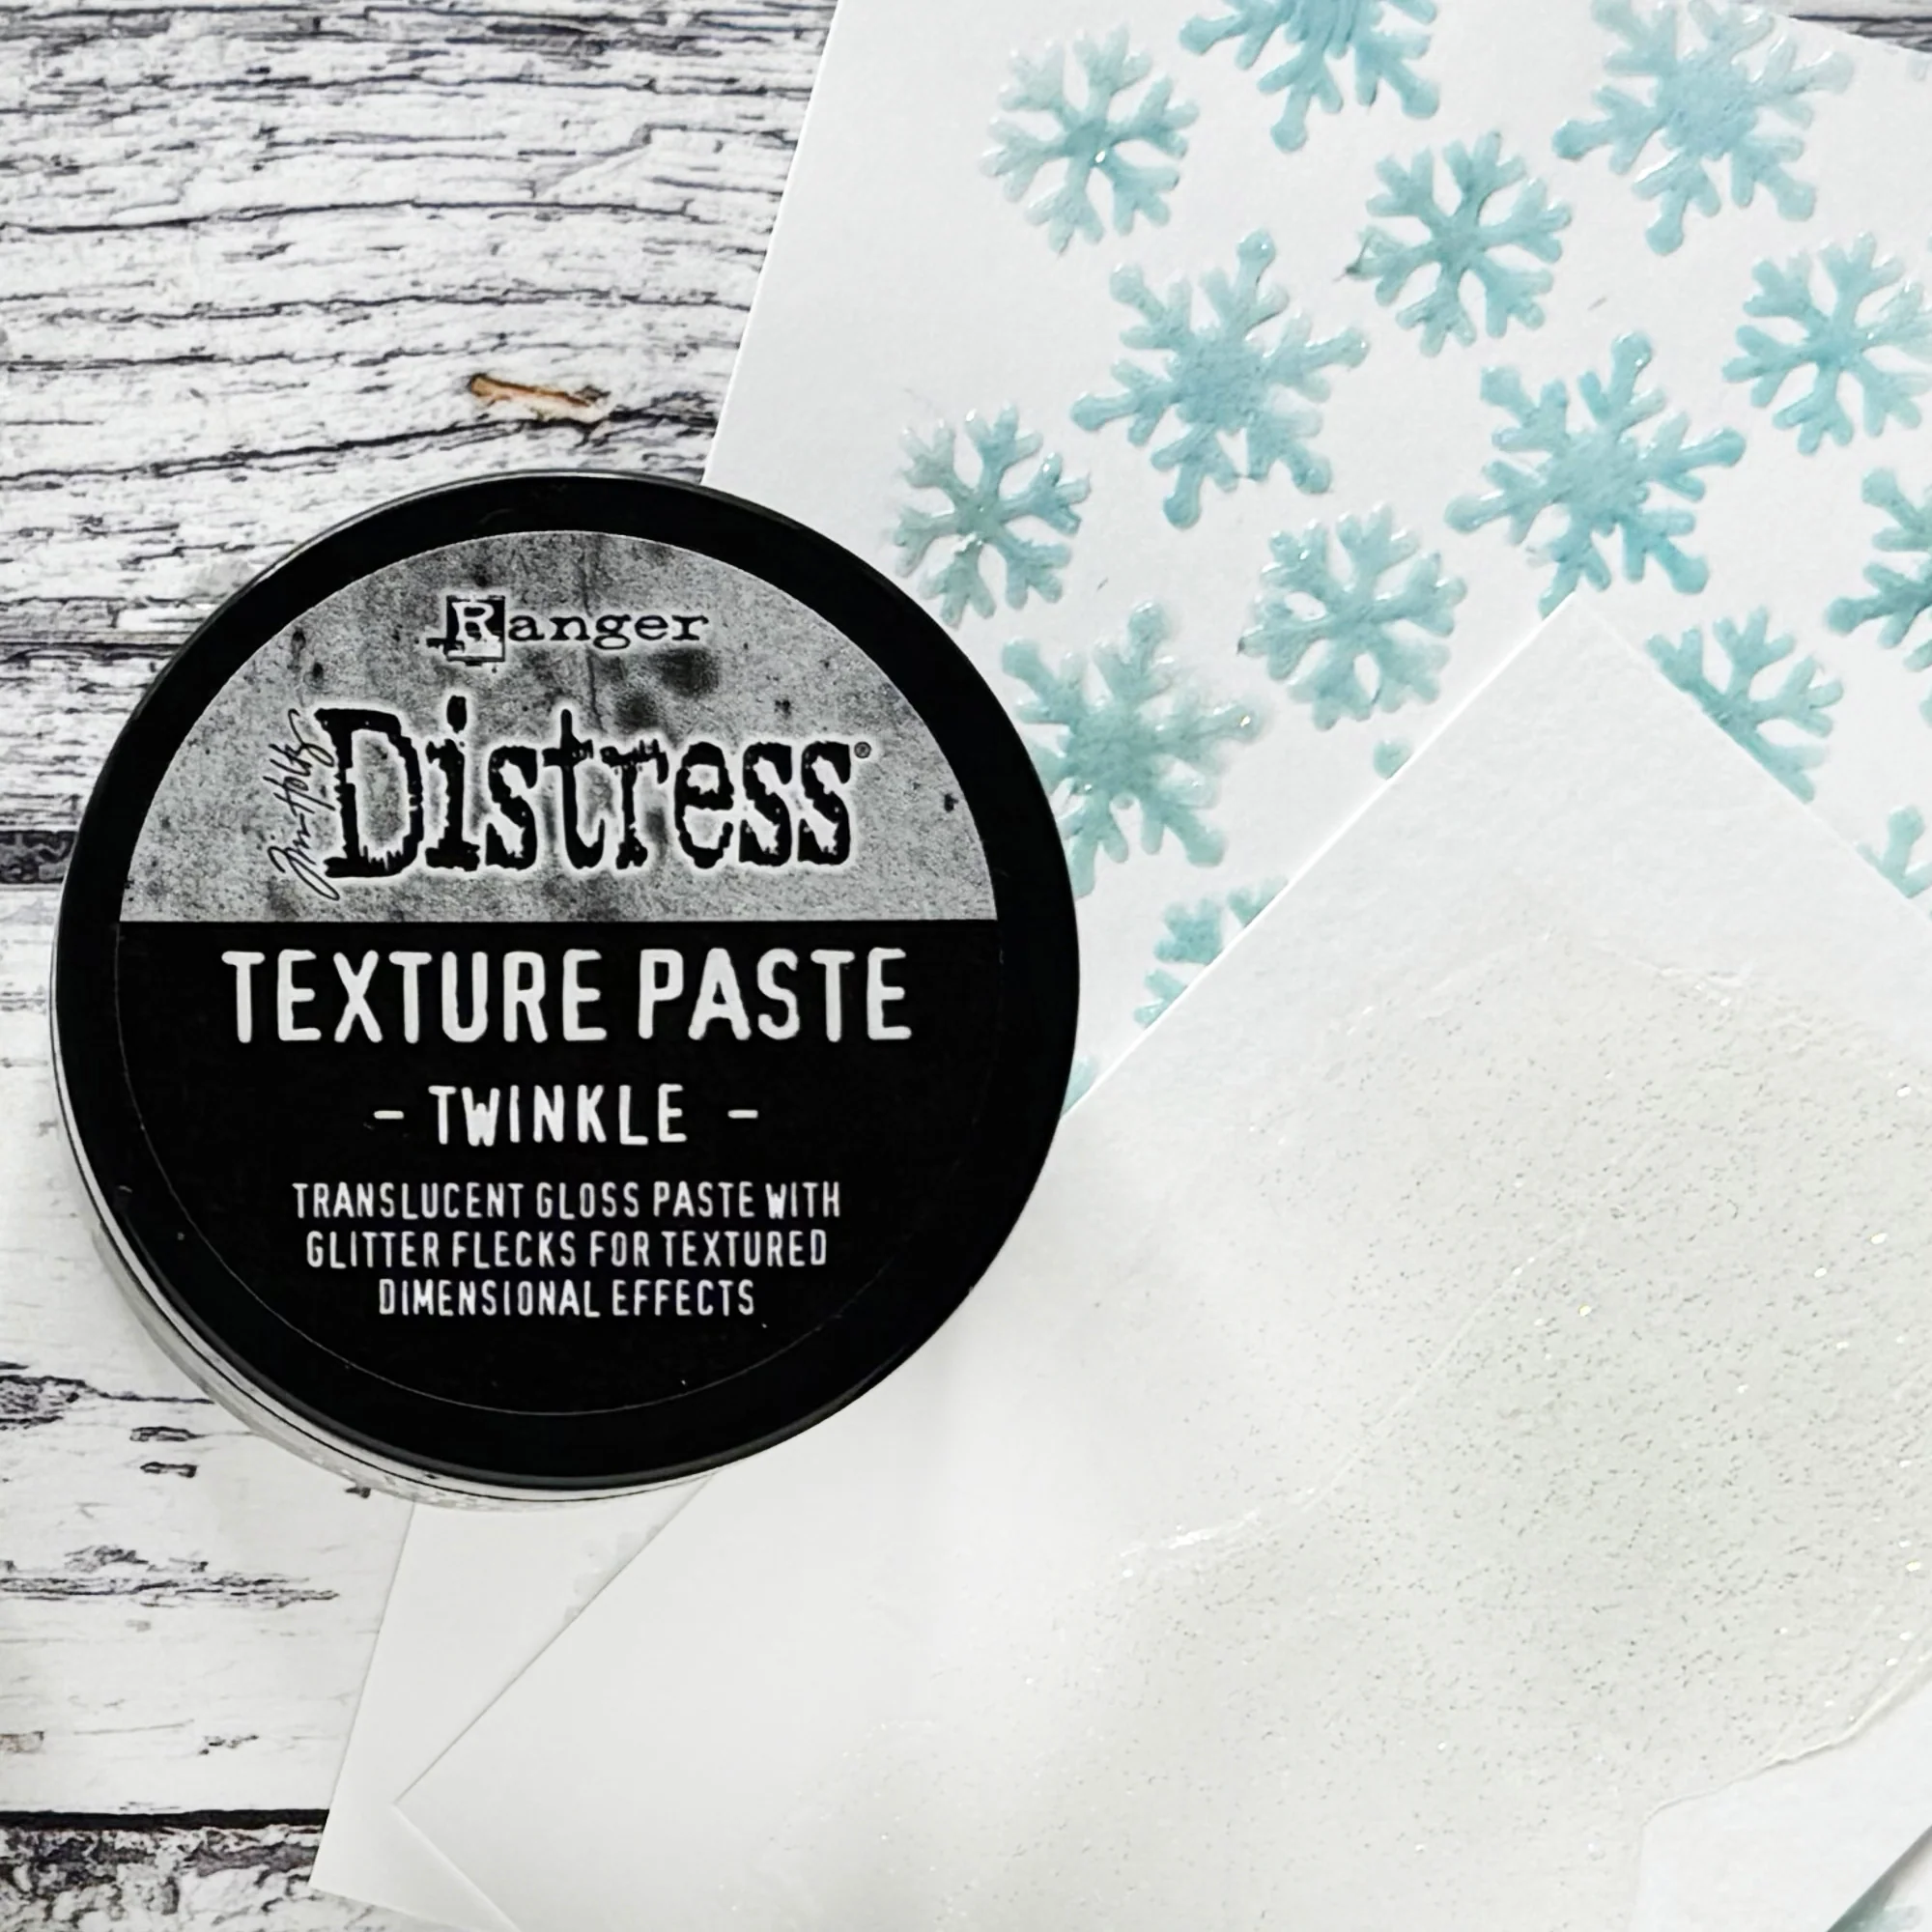
Hello Lovelies! I'm waaay out of my comfort zone with this project and couldn't be happier! Tim Holtz and Ranger Ink released new treats earlier this month and we got Distress Twinkle Texture Paste and Snowflakes made of mica and glitter.
I've had to resist the urge to add sparkly things to my craftroom, but needed to make an exception here as I was determined to try DIY-ing a glitter rainbow using alcohol ink to make a little forest of pastel trees overlooking a "lake".
Key Supplies for the Snowy Tree Scene!


Today's GIF!
This in one way to enjoy the snow :-)
Like this card and my CORNY GIFs? CLICK BUTTON BELOW
to sign up for blog updates:
SNOWY RAINBOW TREE SCENE - Tinting Glitter & Mica, Painting, Applying Texture Paste, Coloring with Metallics
COLOR PALETTE
Tim Holtz Ranger Alcohol Ink
Coral, Pink Sherbet, Cool Peri, Cloudy Blue, Pistachio and Limeade

COLORING THE SNOWFLAKES

Tinting Guide


Clean between colors to avoid color cross-contamination:

Ready to "flock" some trees!

PREPARING THE TREE-SCENE BASE
Use Distress Picket Fence Paint to cover the base and let dry. Once dry, cover 2/3 in Distress Twinkle Texture Paste and layer with Distress Snowflakes in semi-circle as shown. Paint the uncovered part with Tumbled Glass Distress Paint for the "lake". When the paint is dry, coat the lake portion with Distress Twinkle Texture Paste.


COLORING THE DEER AND PEARL
Coat the deer in Foundry Wax and heat set.
Preferably outside or in an very-well ventilated room with your surfaces protected, coat the trees in a spray adhesive and then sprinkly generously with the tinted snowflakes. Gently press the snowflakes into the bottle brush texture to help adhere.


Use a glue gun to adhere the trees to the base once dry.

Adhere the festive tape around the wooden base with some double-sided tape to secure it.

UP CLOSE AND CRAFTY


Last Look!
Thanks for stopping by today! Drop me a comment and say hi!
SUPPLIES:
I listed the products that I have used below. Please note that these are compensated affiliate links, used at no cost to you. I really appreciate your support. All stamps used today were part of my maker package from Ranger Ink. Click on the icons below each product picture to shop with SimonSaysStamp.com.


Comments