

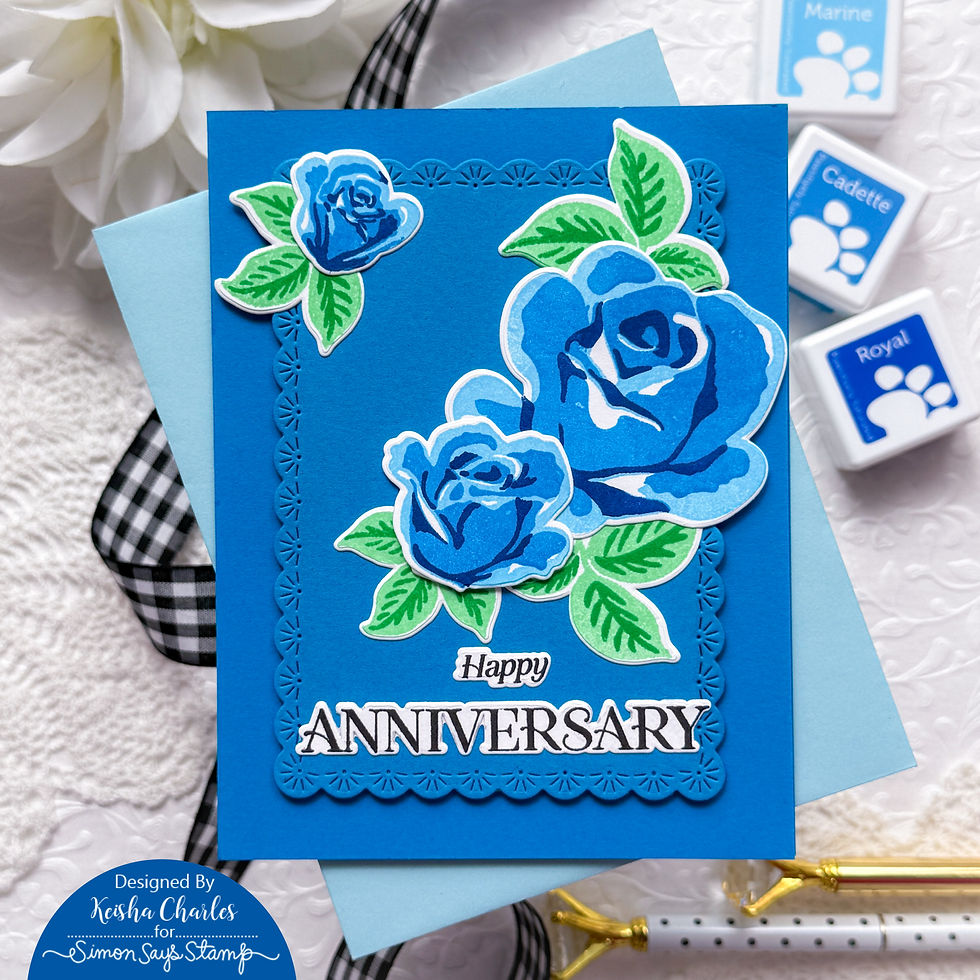
Celebrate A Special Milestone With a Monochromatic Layering Anniversary Card
- Keisha Diann

- May 31
- 2 min read

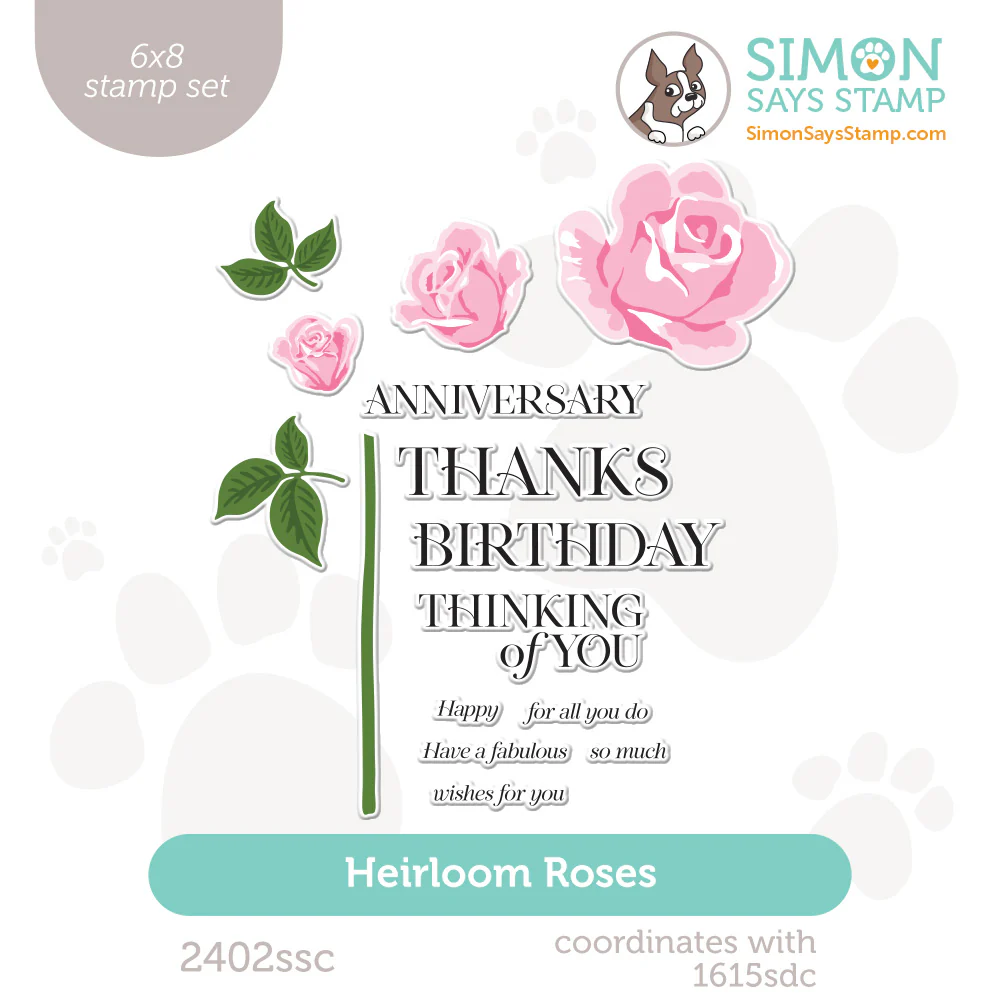
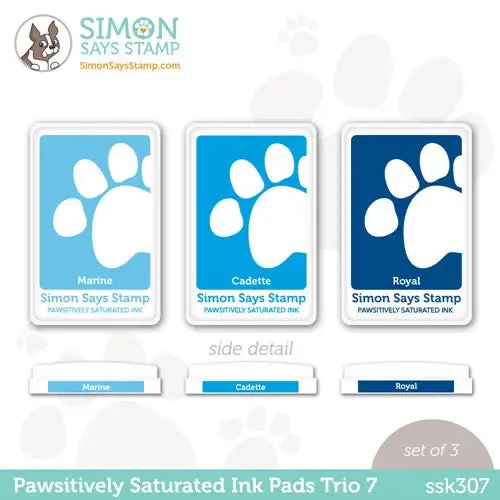
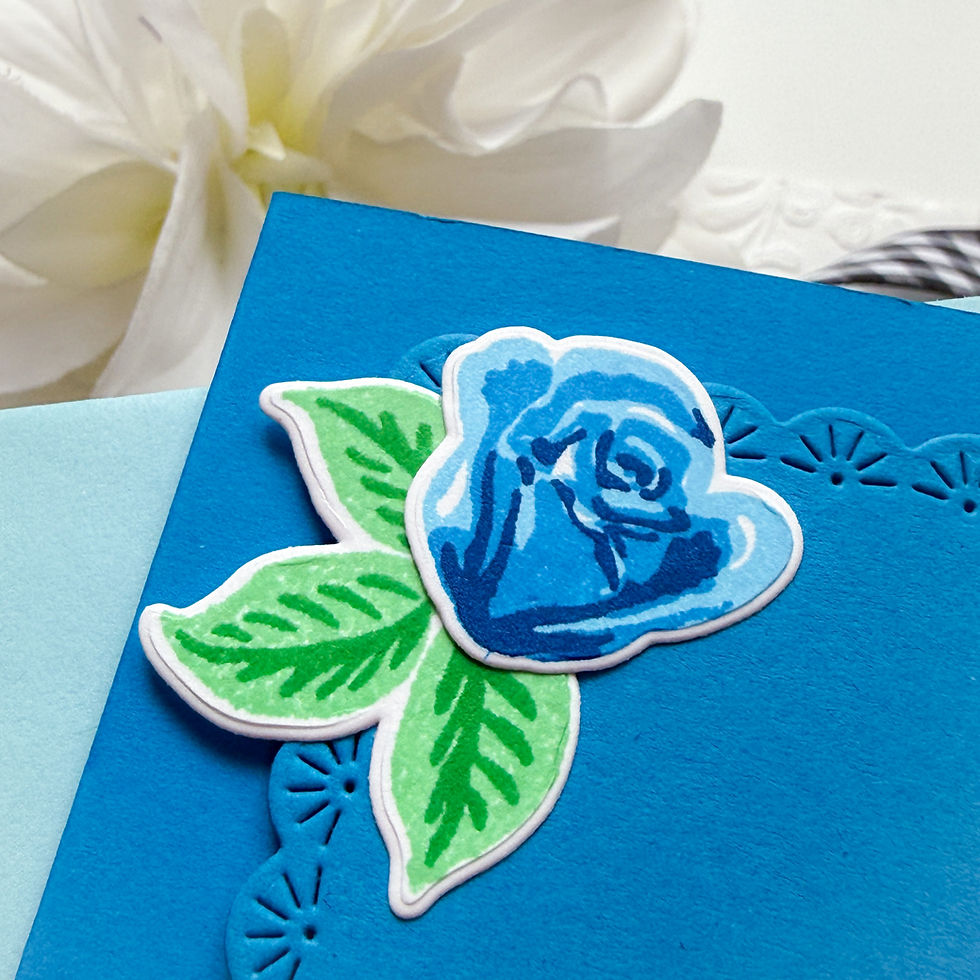
Hello Lovelies! I just realized that I don't make a lot of anniversary cards and thought that the beautiful Heirloom Roses Layered Stamp and Die Set from Simon Says Stamp's Always There Release was the perfect opportunity to build my stash. Using the same family of blue inks for monochromatic layering, I decided to primarily focus on one color and be ready for celebrating the next time that I need an Anniversary Card.
Key Supplies for Monochromatic Layering Anniversary Card

Click HERE for the full list!
Click the photo below to see the entire ALWAYS THERE release!

Today's GIF!
Sending Hugs AND Cards your way.
Like this card and my CORNY GIFs? CLICK THE BUTTON BELOW
to sign up for blog updates:
HAPPY ANNIVERSARY CARD - Layered Stamping and Die-cutting
Card Size: ~4 1/4" x 5 1/2"

COLOR PALETTE
TIM HOLTZ DISTRESS INK: Lost Shadow
PROJECT HIGHLIGHTS
Just two quick tips:
The stamp-layering works light to dark, with your lightest layer as the base/bottom layer.
Glad Press and Seal is one of the favorite craftroom helpers! After you lay out all your die-cut pieces and embellishments on your background, cover them with this film to hold in place for applying glue before adhering to the background when ready.
UP CLOSE AND CRAFTY

LAST LOOK

Thanks for stopping by today! Drop me a comment and say hi!
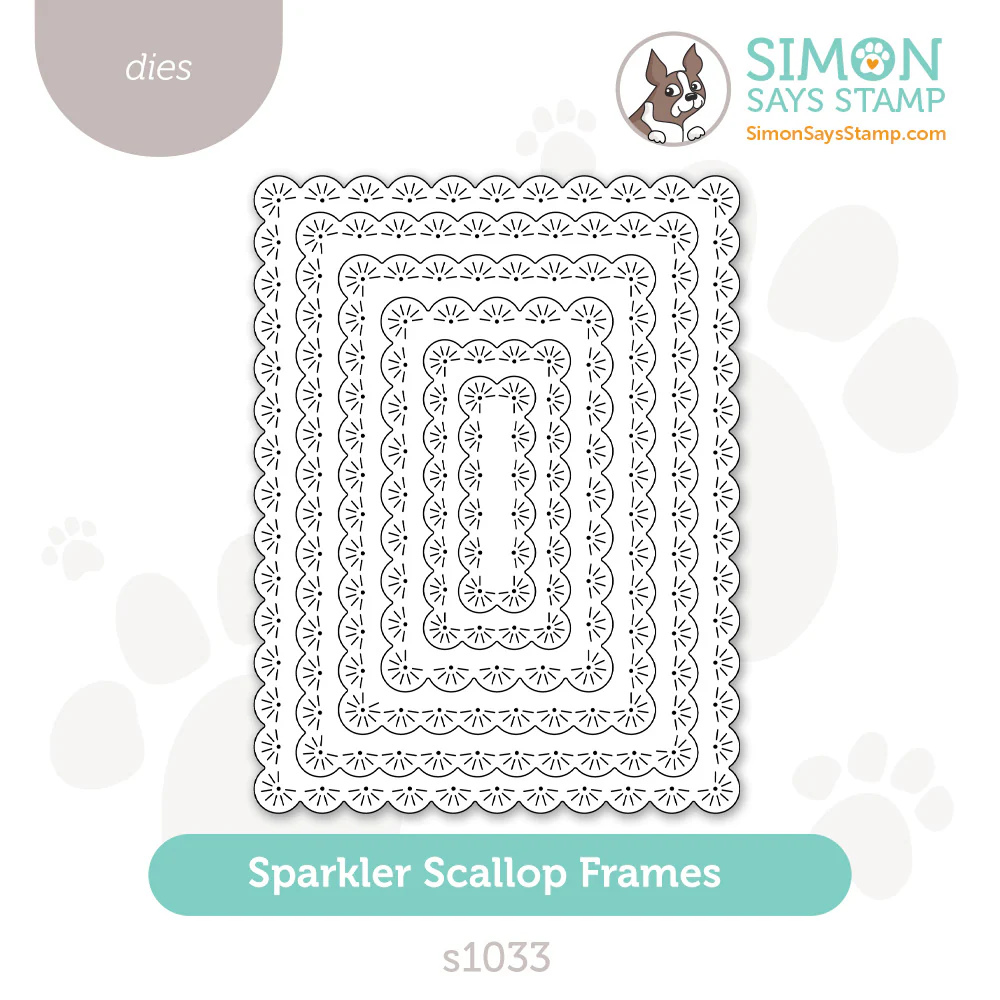
SUPPLIES:
I listed the products that I have used below. Please note that these are compensated affiliate links, used at no cost to you. I really appreciate your support. All stamps used today were part of my Always There maker package from Simon Says Stamp. Click on the icons below each product picture to shop with SimonSaysStamp.com.


This blog the significance of celebrating special milestones with anniversary cards. Anniversaries can remind couples when they first purchase a home together and receive their first electricity rates. Celebrating milestones often generate memories and how every dollar matters for lower costs so that you can share those special moments.
Fantastic showcase of the latest Diecember release. The creativity displayed in these projects is inspiring and offers plenty https://www.burloakcentredentistry.com/ of ideas for fellow crafters. Thank you for sharing your talent and enthusiasm. appreciates creative communities that encourage learning and artistic expression.
What a creative and thoughtful way to celebrate a special milestone. The monochromatic design approach feels elegant, modern, and https://titanresearch.ca/ timeless. The ideas presented are inspiring for anyone looking to create something meaningful. appreciates content that combines creativity with practical guidance.
This post beautifully highlights the significance of celebrating special milestones. The creative ideas and thoughtful presentation line of credit for nonprofit make it an enjoyable read. admires content that combines inspiration with practical suggestions, helping readers create memorable moments for loved ones and special occasions.
This anniversary card idea is both elegant and creative. The monochromatic layering technique adds a sophisticated Pet Transportation Austin touch that makes any celebration feel extra special. we love seeing thoughtful and artistic projects that inspire people to create meaningful memories for their loved ones.