

Tim Holtz and Sizzix Vault - Botanical Embossing Folder Framed Decor
- Keisha Diann

- May 29, 2025
- 2 min read

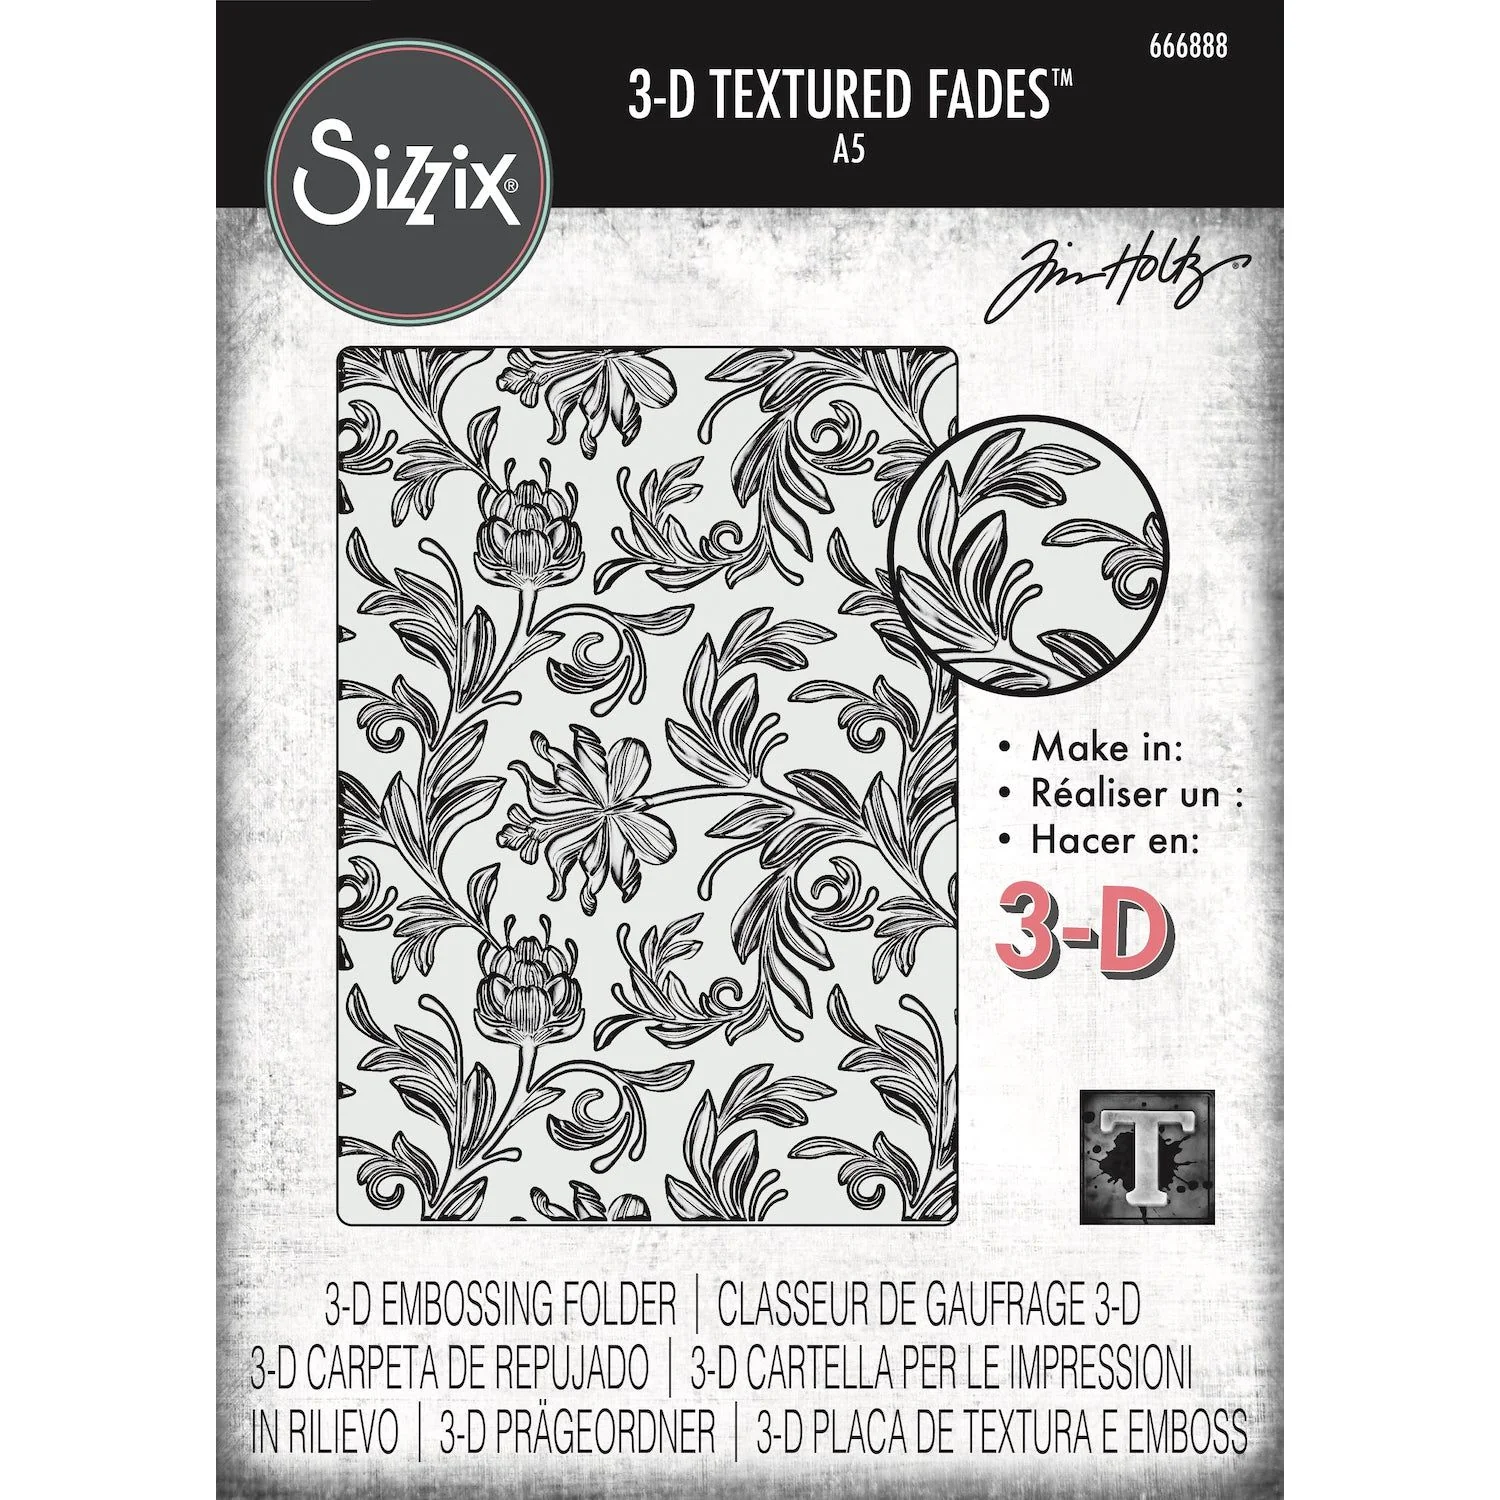
Hello Lovelies! I am all about some Craft Room signage for Tim Holtz and Sizzix's Vault Texture Fades Embossing Folders release! I have a rainbow problem and love flowers so of course I had to make something bold and bright with the Botanical folder.
With the intense color, my "Embrace Beautiful Chaos" needed to be neutral and a bit quieter. As long as I'm explaining how I got to making this Tim Holtz Botanical Framed Decor... I went for the contrast between the vellum and metal butterflies to add both delicacy and "weight" to the make. Apparently there is a method to my madness/chaos!

Key Supplies For Tim Holtz Botanical Framed Decor!


Get Your Supplies!
Click on the image below to SHOP THE ENTIRE TEXTURE FADES RELEASE and
Review the Suppliehttps://ldli.co/e/yep3pmqs section at the bottom of this post for the remaining supplies!

Today's GIF!
So easy to say yes to flowers!
Like this card and my CORNY GIFs? CLICK BUTTON BELOW
to sign up for blog updates:
EMBRACE BEAUTIFUL CHAOS FRAMED DECOR - Embossing, Coloring with Distress Spray Stain, Brayering Paint, Die-cutting and Gilding with Foundry Wax
Frame Size: 6" x 9"

COLOR PALETTE
Tim Holtz | Ranger Distress Spray Stain - Wild Honey, Picked Raspberry, Peacock Feathers

PROJECT HIGHLIGHTS
Trim Distress Watercolor Cardstock to 5 1/2" x 8 1/2" and emboss with the Botanical 3D Texture Fades Embossing Folder.
Place inside a Splat Box and spray generously with Distress Spray Stain and let dry.
Mix a pea-sized amount of Perfect Pearls with water and mist the embossed panel to add a subtle shimmer. Let dry.
Die-cut the letters twice for the sentiment out of white cardstock and the butterflies out of vellum.
Add traces of Foundry Wax to the vellum butterfly and heat set.
Use a paint brush to add more Foundry Wax to the Idea-ology Butterfly and heatset.
Use a nail file or sanding sheet to distress the metal butterfly.
Highlight the embossed texture by brayering Picket Fence Distress Paint. Let one layer dry and then repeat to deepen contrast.
Adhere chipboard behind the embossed panel to make it more sturdy and then attach to 6" x 9 white cardstock panel and place in the frame to finish.
COLORING WITH SPRAY STAIN / MISTING WITH PERFECT PEARLS


PREPPING DIE-CUTS


GILDING METAL EMBELLISHMENT


BRAYERING WITH PAINT


Last Look!
Thanks for stopping by today! Drop me a comment and say hi!
SUPPLIES:
I listed the products that I have used below. Please note that these are compensated affiliate links, used at no cost to you. I really appreciate your support. All stamps/stencils used today were part of my Texture Fades maker package from Stampers Anonymous. Click on the icons below each product picture to shop with SimonSaysStamp.com.


Comments