Simon Says Stamp - Villainous Potion Blending Swatches & Card
- Keisha Diann
- Oct 30, 2021
- 3 min read

Hello Lovelies! I think that y'all know that I like making swatches of my pretties and after being inspired by the talented Jessica Frost-Ballas, I've recently gotten into the habit of trying to come up with blending and color combos every time I get a new Distress Ink color.
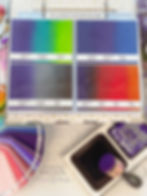
I shared my most recent swatches for Tim Holtz's newest color, Villainous Potion on Instagram and I thought I would share a few details on how they come together.

Here are some of the key supplies you'll need if you want to start your own blending swatch binder:
110lb Neenah Solar White Cardstock
Simon Blending Brush OR
Ranger Mini Ink-Blending Tool
Distress Ink and Distress Oxide Pads
You don't have to make a binder, you can put your swatches on a ring, in a box, whatever works for your organization style. :-) I use both Simon Blending Brushes and Mini Ink Blending Tools in my craft room and both are fabulous. I will confess though that I adore that the Simon Orchid Blending Brush coordinates awesomely with Villainous Potion! LOL
Full supply list at the end of this post.
PEACE JOY AND WONDER CARD - Die-cutting Distress-Inked Cardstocks
Swatch Size: 3" x 4"
Featuring:
Distress Ink and Distress Oxide Pads

Sometimes just looking at a color, I will have several ideas of color combos/blends that I want to experiment with. However after those ideas run out, one of the things that I do is to grab my color wheel and use it to guide me on picking out new selections.
About 1/2 of what I come up with is workable, the other half goes to my die-cutting scrap bag to be reinvented later. LOL!!!
Making the Swatches
Cut the cardstock into 3" x 4" pieces
Grab your blending tool of choice and ink the paper with your selected inks or oxides, blending one color into another
Note the colors in pencil on the back of the swatch for labelling later
Repeat 1-3 until you have run out of ideas or paper :-)
Insert the 1/2" label tape into the Brother Labelling Machine following the instructions on the packaging
Type the first row of color names, counting an equal number of spaces between each word, press enter and type the second row, aligning the start of the second word of the color name (if applicable) with the first word of the color name
Print out a tester and align about 1/4" from the bottom of your swatch to see if the color names are generally lining up with the color changes in your swatch. Make adjustments as needed to increase or decrease the space between color names and print again if necessary.
Adhere the label about 1/4" from the bottom of the swatch

Though you can blend inks and oxides with one another, I choose to make a completely different set of swatch for my Distress Oxides versus my Distress Inks. They are shown above.
Though some colors may not melt smoothly one into the other, I keep the ones that are the most interesting to me as they can become the color palette that I will use on a project even if I do not choose to blend the inks together.
CREEPIN' IT REAL CARD - Embossing Distress Ink-Blended Cardstock
Card Size: 4 1/4" x 5 1/2"
Silver Layer: 3 3/8" x 5 1/2
Embossed Ink Blended Layer: 3 1/4" x 5 1/2"
Featuring:
Distress Oxide Ink Pads - Villainous Potion, Seedless Preserves, Hickory Smoke, Black Soot

Since I'm sharing this on Halloweekend, I can't help showcase the little magic that happens when you combine an ink-blended card panel with one of Simon Says Stamp's awesome embossing folders!

There are no mysteries on this card so I will just leave you with a quick tip that the Sentiment Strips are inked with Distress Oxides in Seedless Preserves, Villainous Potion and Hickory Smoke to dye them and coordinate with the card.
Lovelies, I am wishing you all the Halloween candy if you are celebrating in your neck of the woods!
Thank you again for visiting. See you soon!
SUPPLIES:
I listed the products that I have used below. Please note that these are compensated affiliate links used at no cost to you. I really appreciate your support. Villainous Potion Inks used today were part of my maker package from Simon Says Stamp. Click on the icons below each product picture to shop with SimonSaysStamp.com.


