Simon Says Stamp - August 2021 Card Kit, Toadally Unfrogrettable
- Keisha Diann

- Jul 14, 2021
- 3 min read

Announcement, I now like frogs, or at least the frogs in Simon Says Stamp's Toadally Unfrogettable Card Kit. It's bursting with cuteness and froggies!

All of the card kit goodies came with another Mesh Bag (I got one in the July Kit too), so you know my little storage loving heart is happy. :-)

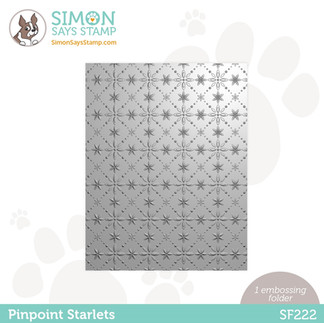
This kit is packed with cuteness: a Toadally Unfrogettable Stamp Set, a Pinpoint Starlets Embossing Folder, a Build A Frog Pond Stencil, patterned paper, solid cardstock, acetate, adhesive foam, embellishments....must I say more!
I got brave a made a shaker card and a pair of cards that showcase the fun Fern & Willard Custom Paper Pad that comes in the kit. I took a few photos along the way to guide you if you want to give these cards a try.

Toadally Awesome Card - Embossed Shaker Card with Copic Colored Focal Point
Size: 4 1/4" x 5 1/2"
Featuring:
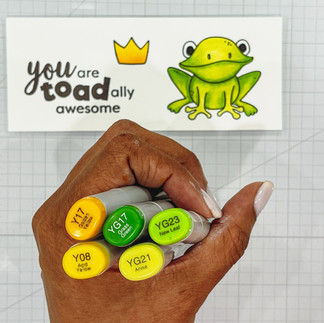
Copic Markers - Y08, Y17, YG17, YG21, YG23, RV52, RV55
Additional supplies and Copic Markers linked in the Supplies Gallery at the end of this post

Key Steps:
Emboss a piece of 4" x 5 1/4" green cardstock using the Pinpoint Starlets Embossing Folder
Highlight the embossed pattern by gently running a white pigment ink pad like Hero Hues Unicorn Ink over the raised surface
Position the Nested Heart die about 1/2" from the right edge of the embossed cardstock and diecut as shown
Place 1/4" Scor-Tape Crafting Tape around the perimeter of a piece of acetate measuring 3 3/4" x 5"
Adhere the acetate panel to the back side of the green embossed cardstock
On the reverse side of the green embossed cardstock, place a border of foam tape around the heart
Place some of the Trinity Frog Sprinkles on a 4 1/4" x 5 1/2" piece of the yellow checkered patterned paper to gauge how much you want to see behind the acetate panel
Mount the green embossed cardstock to the yellow patterned cardstock to create the shaker and adhere to a card base
Stamp the frog, bow, and sentiment in Memento Tuxedo Black Ink and color with Copic Markers. (In the pics, I also stamped the crown but decided not use it)
Fussy cut the stamped images
Apply foam tape to the back of the fussy cut images and to the small hearts diecut out of patterned paper
Adhere all of the fussy-cut components and diecut to the card base as shown
Steps 1 - 3
Steps 4 - 8
Steps 9 - 10
Step 11
Step 12
All done!

You Make Me Smile Card - Copic Colored Stamped Images Layered on Patterned Paper
Size: 4 1/4" x 5 1/2"
Featuring:
Simon Says Stamp Toadally Awesome Card Kit
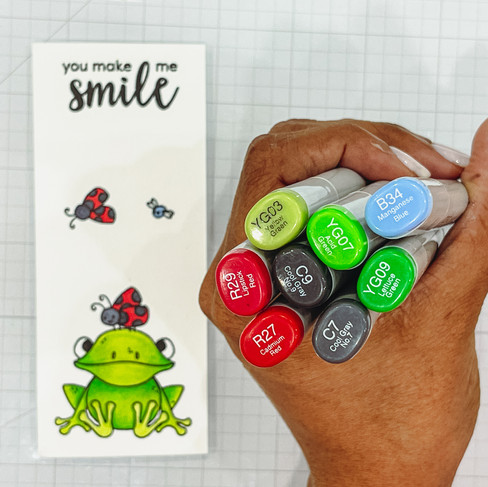
Copic Markers - YG03, YG07, YG09, B34, R27, R29, C7, C9
Additional supplies and Copic Markers linked in the Supplies Gallery at the end of this post

After all that talking you for the previous card, the good news is that this card is as easy as it looks so I will share the the coloring combinations and a few pictures to guide you here instead of words.
Fussy cut and foam tape mount the 3 butterflies and adhere to the card front. Add a couple of dashes to create a path linking all the cute bugs.

Hugs Card
Aside from the measurement provided below the picture, I didn't do a walkthrough for this card because it does not get any simpler than this.
Additional supplies linked in the Supplies Gallery at the end of this post

Measurements:
Frog-print pattern cardstock - 3 1/8" x 4 3/8"
Navy solid cardstock - 3 1/4" x 4 1/2"
Striped pattern cardstock - 4 1/4" x 5 1/2"
How can you not like cute froggies?

Thank you for visiting my blog today!

Let me know in the comments which card is your favorite today.
Full supply list below for your shopping convenience.
See you soon Lovelies!
SUPPLIES:
I listed the products that I have used below. Please note that these are compensated affiliate links used at no cost to you. I really appreciate your support. Simon Says Stamps Card Kit products were provided as part of my Design Team package. Click on the icons below each product picture to shop with SimonSaysStamp.com.
















Kaiser OTC benefits provide members with discounts on over-the-counter medications, vitamins, and health essentials, promoting better health management and cost-effective wellness solutions.
Obituaries near me help you find recent death notices, providing information about funeral services, memorials, and tributes for loved ones in your area.
is traveluro legit? Many users have had mixed experiences with the platform, so it's important to read reviews and verify deals before booking.
Awesome cards and soooo adorable! I'm totally in love with those cute frogs, I think the second card is my favorite, just because of the sweet and cute lady bug on his head. Thank you so much for always sharing how you make your awesome cards,
stay safe and have a wonderful day.