

Tim Holtz Sizzix Halloween 2022 Release - Myron Colorize Card
- Keisha Diann

- Aug 6, 2022
- 5 min read

Hello Lovelies! I am waaayyyy too HOPPY about the 9 new Die Sets and 2 Embossing Folders in Tim Holtz's Sizzix Halloween 2022 Release! And if you fell in love with it ALL, you can count on Simon Says Stamp for a bundle with all the goodies!

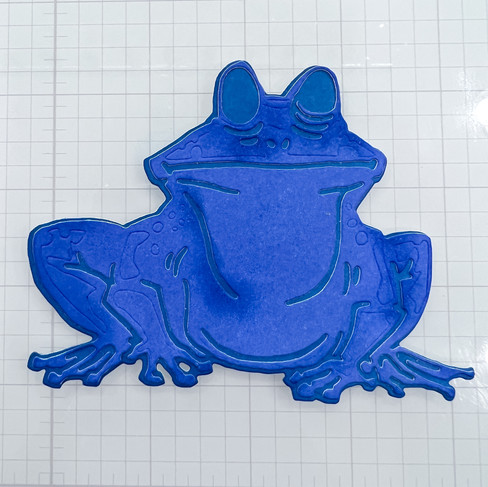
Today's card is a celebration of one of the latest additions to the Colorize dies collection featuring our new froggy friend Myron! He is an absolute sweetheart and a joy to assemble. You can trust me on this, as I am super clumsy and if it gets too fussy to assemble, there is a meltdown in my craft room.

This card is all about Myron, but I used some new and older Tim Holtz Sizzix friends to bring him to life:
Essential Card Supplies:


Click here to view the full supply list or check it out the one linked in the gallery at the bottom of this post when you have finished exploring this card.
Today's GIF!
Ok, the little froggy below is friendly, but Myron is WAAAYY cuter!
Like this card and my corny GIFs? CLICK BUTTON BELOW
to sign up for blog updates:
HOPPY CARD - Inking, Die-cutting and Scene-Building
Card Base: 4 1/2" x 6 1/4"
Featuring:
Tim Holtz Ranger Distress Ink - Prize Ribbon, Blueprint Sketch, Salty Ocean, Tumbled Glass, Speckled Egg, Stormy Sky, Mermaid Lagoon, Weathered Wood, Salvaged Patina, Barn Door, Fired Brick, Mowed Lawn, Twisted Citron, Antique Linen, Pumice Stone, Frayed Burlap
Tim Holtz Ranger Distress Spray Stain - Twisted Citron, Squeezed Lemonade

CARD PALETTE
I wanted a rather exotic frog, so I searched for "pretty frog" on Google and was inspired by some beautiful blue frogs...and that's how Myron got the blues!

CARD WALKTHROUGH
INKING
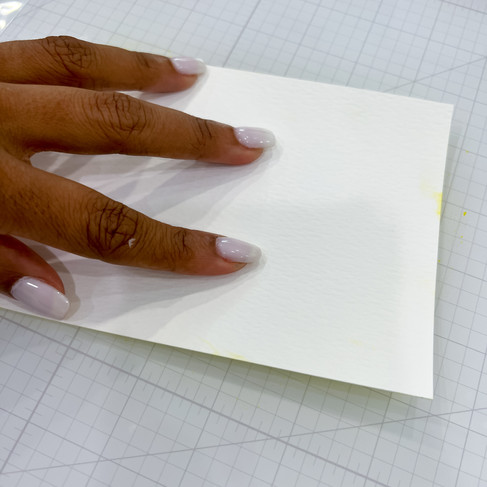
Ink 4 1/4" x 5 1/2" pieces of white cardstock in all the selected colors, by applying the ink-pad directly to the cardstock until all the white is covered. Tip: I used Simon Says Stamp 120lb White Cardstock as it has a smooth surface that is easy on the ink pad and accepts the color evenly.
Set aside to dry after inking; any unevenness in the ink tone will usually even out once dry.
DIE-CUTTING
Organize the Myron dies into groups to make it easier to match them to the inked cardstock for each layer.


Note: To guide you for the die-cut layers, I will generally start with sharing a large picture s the:
selected die
ink pad used to color the cardstock for that layer
the inked cardstock that will be cut by the die for that layer
Frog Body 1 (Prize Ribbon, Blueprint Sketch, Salty Ocean)


Secure each die to the cardstock using Low Tack Tape.
Note: My dies always get the wiggles going through the die-cutter and I don't want to waste my pretty inked cardstock.

Remove any negative pieces from the die-cuts and set aside.
Frog Body 2 (Tumbled Glass, Speckled Egg, Stormy Sky)


Secure dies to cardstock

Remove any negative pieces from the die-cuts

Arrange the layers neatly and in order on your work-space so layering is easy when it's time to assemble.
Mushroom Top (IVORY Cardstock, Barn Door, Fired Brick)


Secure dies to cardstock, diecut, clean and set aside carefully so you don't lose these littles! (speaking from experience!)
Mushroom Base (Antique Linen, IVORY Cardstock)

Rinse and repeat with securing the dies to the cardstock, die-cutting and and cleaning out the unwanted pieces.
Frog Eyes (Salty Ocean, IVORY Cardstock, BLACK Cardstock)

Large pic so you can see the pieces clearly!

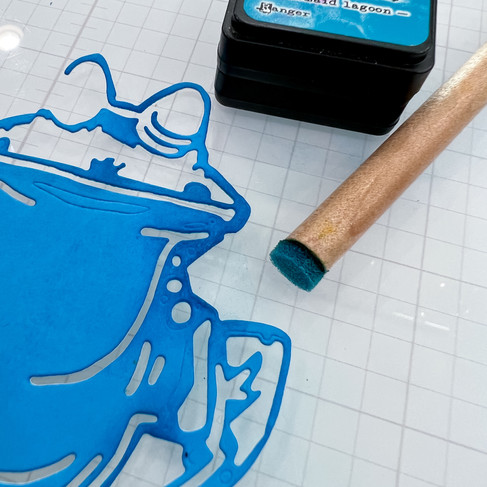
SECOND INKING
For Myron I wanted the layers to blend together a little and add some shadows and depth in certain areas, so I inked the diecut cardstock again in deeper tones using the color of the inked layer below.
Ink the Blueprint Sketch layer with Prize Ribbon in the areas shown using a Ranger Detail Blending Tool.


Ink the Salty Ocean Myron layer with Mermaid Lagoon in the areas shown using the Tool.


Ink the Tumbled Glass Myron layer with Salvaged Patina in the areas shown using the Tool.


Ink the Speckled Egg Myron layer with Salvaged Patina in the areas shown using the Tool.


LAYERING
Adhere the layers with a wet glue like Bearly Craft Glue, that needle tip will come in handy on Myron's skinny bits.


SPRITZING FOR TEXTURE
Before adhering the eyes to Myron's body, spritz the body with large water using the Distress Sprayer to add texture to Myron's blueness. Adhere the eyes once dry.


CREATING MUSHROOMS (Make 3 mushrooms)


Set aside Myron and his mushrooms so you can work on the background layers next! I put him in little plastic envelope to protect him from any unintended crafting mishaps!

CREATING BACKGROUND BASE
Place 4 1/4" x 6" Distress Watercolor Cardstock into a Splat Box and mist with Squeezed Lemonade Distress Spray Stain.
Smoosh the color a bit by placing face-down on the craft mat and twisting.
Put the yellow background back into the Box while wet and spray little puddles of Twisted Citron Distress Spray Stain in bottom left, top middle and bottom right as shown and dry with a Heat Tool.


All dry and ready for layering!

CREATING BACKGROUND FOLIAGE (Mowed Lawn, Twisted Citron, Pumice Stone)
Die-cut the Flower Field out of Distress Watercolor Cardstock and cut into 2 pieces.
Spray with the Squeezed Lemonade and Twisted Citron Distress Spray Stains as shown and dry.
Use the Ranger Detail Blending Tools to add shadows, depth and texture using the Twisted Citron, Mowed Lawn and Pumice Stone Inks.


Close up, so you can see better where to ink with the different colors:

FROG PLATFORM (Antique Linen, Pumice Stone, Frayed Burlap)
Ink-blend the selected colors onto each layer of the Frog Platform unevenly. Use the darker/contrasting tones to accents certain areas as show using the Detail Tool.
Adhere the layer together and glue Myron on top.


Close up on Frog Platform to better see inking details:

LAYERING COLLAGE
Adhere the Flower Field die-cuts, applying glue to the bottom strips only to the Background Base.
Add Foam Tape to the back of Myron and use wet glue on the back of the Frog Platform.
Tuck mushrooms into the Flower Field, popping up one with Foam Tape as shown. Apply Foam Tape to the back of the whole scene before adhering to a 4 1/2" x 6 1/4" Card Base.


CREATING SENTIMENTS
Die-cut the "Happy Halloween" Die from the Bold Text Halloween Thinlits out of white cardstock twice, layering the appropriate letters to create the word "HOPPY". Select and trim the "you can never have too much happy" as shown, popping up with Foam Tape. Adhere to card.


I love how Tim's dies all work so well together. There are several dies with foliage dies that can work in this scene as well, so also consider experimenting with those in you have them go snag yourself the Flower Field die.

Something about these mushrooms is positively delightful! I want to put them on everything!

I love that we can play with the letters in the Bold Text dies to make other words/sentiments!

In my previous Colorize projects, I didn't double-ink the layers or add texture through water splatters, but I really like the effect her on Myron. The additional inking allows his layer to melt a little into one another and the spots give him more of a froggy look. :-)

To be honest, I wasn't sure that I could pull off a blue frog, but now I'm glad I took the chance and all these different Distress Ink blues are so fun!

How can you not fall for this adorable face?

You can never have too much HOPPY!


I can't thank you enough for stopping by and sticking with me for this long post. Leave me a comment with your thoughts please. It means a lot and I am happy to take any questions.
See you soon!
SUPPLIES:
I listed the products that I have used below. Please note that these are compensated affiliate links used at no cost to you. I really appreciate your support. All stamps used today were part of my maker package from Tim Holtz and Stamper's Anonymous Click on the icons below each product picture to shop with Simon Says Stamp.


Greetings Kesha: I'm loving your work young lady! This is an awesome frog and I will attempt one for my grandson! The detailed steps with pictures and tips on your process are a tremendously big help. Appreciate you and your gif's much, Thank you, Denise
Totally love your card and awesome, adorable blue Myron! Thank you so much for sharing, stay safe and have a wonderful day.
I never in a million years thought I'd want a funky frog die until now - I love him!
Fantastic!!! Thanks for the step by step instructions! ♥️
I love him!! So cool to see that you made your own colored cardstock.