Simon Says Stamp - Mountainous Cover Plate Magnet
- Keisha Diann

- Jul 4, 2023
- 2 min read

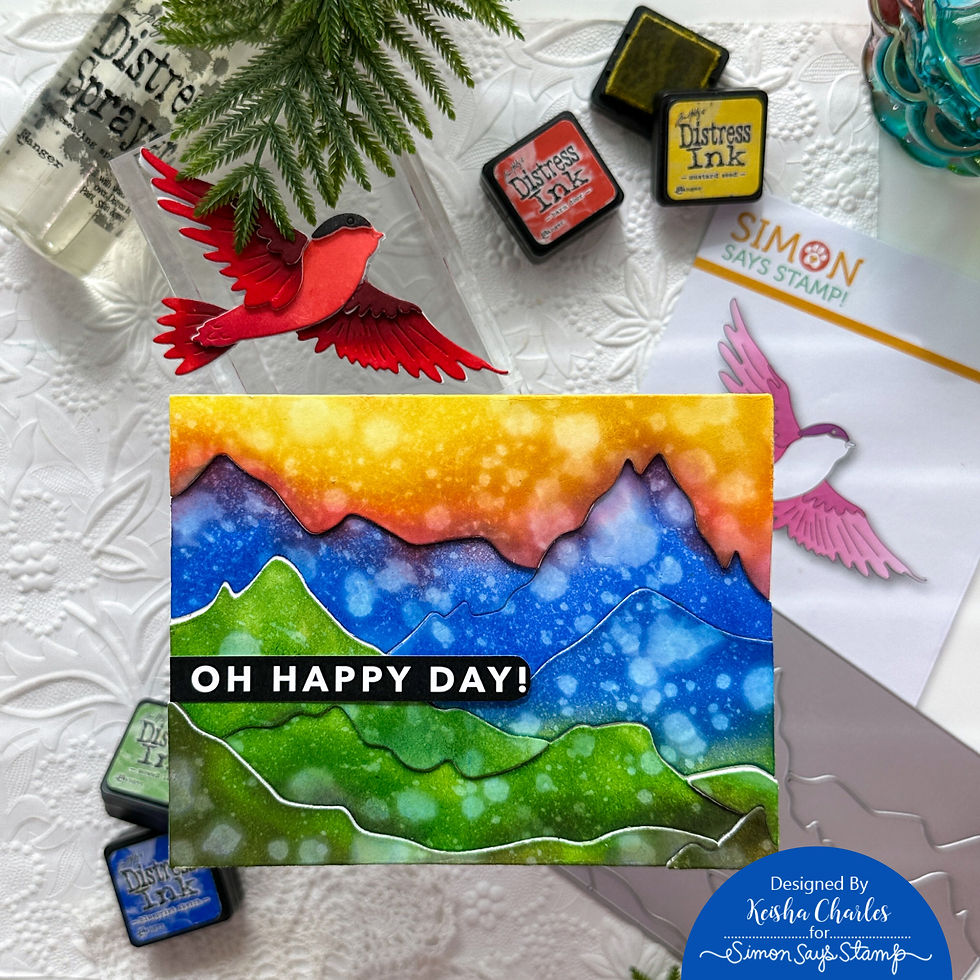
Hello Lovelies! Thank you for joining me for my little experiment! I am using foam to create a lightweight magnet that is layered with Distress-inked cardstock.
I honestly don't remember what made me decide to turn the Mountainous Cover Plate into a magnet, I think it totally started out as a card and then I went off the rails.

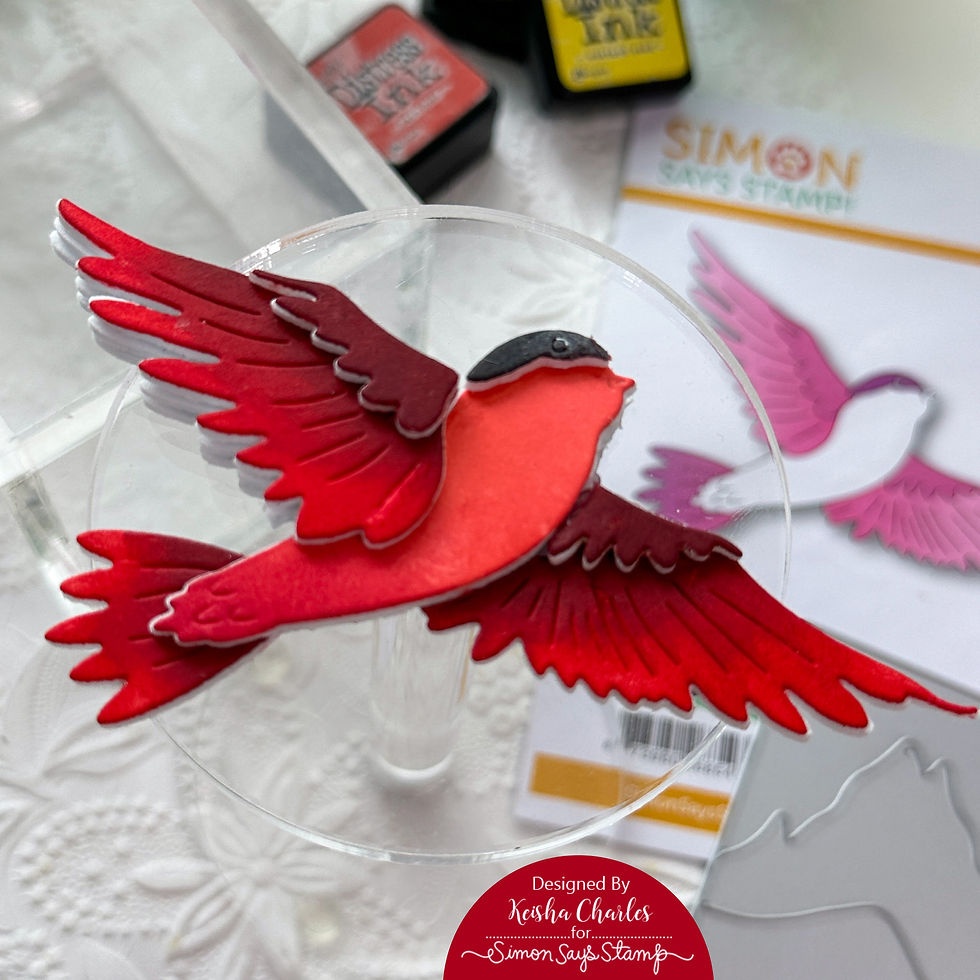
I also made a foam magnet with the Soaring Bird Wafer Die, but because of it's delicate design, it can be a little fussy to assemble and don't think it's ready for prime-time. LOL
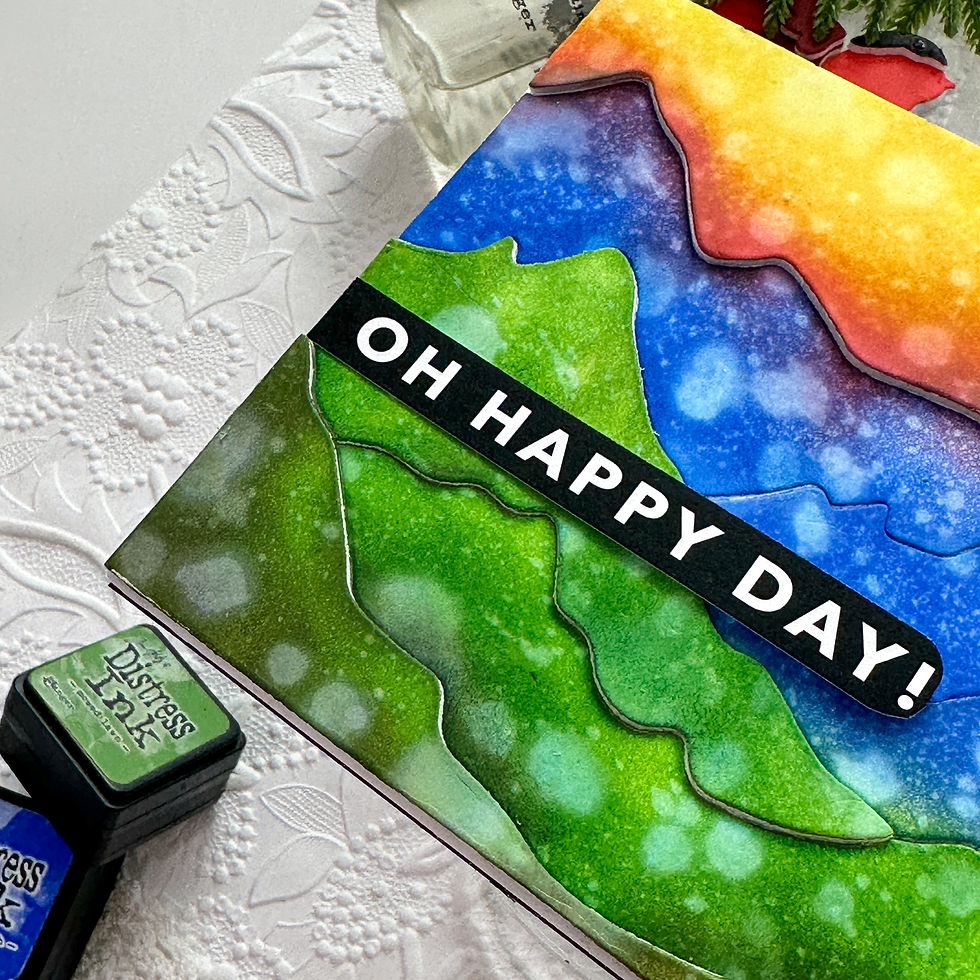
Today, I'm using a golden oldie Distress Ink technique to create a water-splattered effect on the cardstock.
Now, let's take a look at the key supplies.
Click on the image below to check out the ENTIRE release or SHOP THIS CARD in the Supplies section at the bottom of this post:
Today's GIF!
Our magnet will NOT be quite as powerful as this one...
Like this card and my corny GIFs? CLICK BUTTON BELOW
to sign up for blog updates:
MOUNTAINOUS MAGNET - Distress Inking and Layering
Card Base: 4 1/4" x 5 1/2

COLOR PALETTE
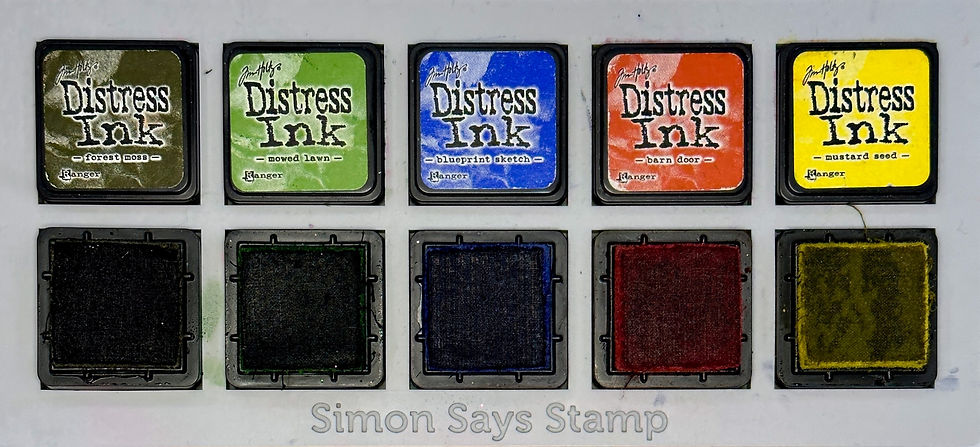
Today's color combo is all from my well-loved Distress palette - Forest Moss, Mowed Lawn, Blueprint Sketch, Barn Door and Mustard Seed.

PICTORIAL GUIDE
Die-cut the Mountainous Cover Plate using 110lb Cardstock. Mark the back of each section with the color that you plan to it with
Spritz each section with water to create the Distress watercolored effect
Die-cut 3 foam sheets using the same cover plate
Adhere the dried sections to their matching foam piece with Craft Tacky Glue
To create dimension, some pieces will get 2 or 3 layers of foam backers adhered to the inked die-cut
Adhere each section to a 4 1/4" x 5 1/2" 130lb Cardstock base
Adhere the fully assembled die-cut to a 4 1/4" x 5 1/2" chipboard base
Adhere the cardboard base to the magnet, trimmed to 4 1/4" x 5 1/2"
Finish with your preferred sentiment!

The water splatters enhance our colorful mountains cape.

All done!


Lovelies, I hope this was a fun detour from our usual cards. I will try my hand at another magnet sometime soon, using a another layered diecut but one that comes with a base that is fully intact, as my birdie was a challenge to assemble and I was too lazy to trace and cut out my own base.
Stay tuned and let me know if you like this project.
Happy Crafting!
SUPPLIES:
I listed the products that I have used below. Please note that these are compensated affiliate links, used at no cost to you. I really appreciate your support. All stamps used today were part of my maker package from Simon Says Stamp. Click on the icons below each product picture to shop with SimonSaysStamp.com.


Kaiser OTC benefits provide members with discounts on over-the-counter medications, vitamins, and health essentials, promoting better health management and cost-effective wellness solutions.
Obituaries near me help you find recent death notices, providing information about funeral services, memorials, and tributes for loved ones in your area.
is traveluro legit? Many users have had mixed experiences with the platform, so it's important to read reviews and verify deals before booking.