

Simon Says Stamp - Mandala Blossoms Friendship Card
- Keisha Diann

- Apr 29, 2025
- 2 min read

Hello Lovelies! This card will always be special to me as I made my FIRST YouTube Card Tutorial for it! I think the video is waaay too long for just one card, but after you take a peek at this post, I hope you'll grab your favorite coffee or tea, check out the video and make along with me.
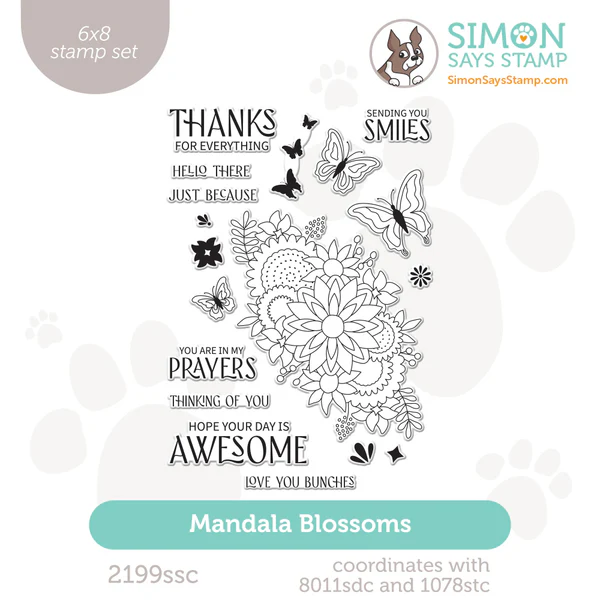
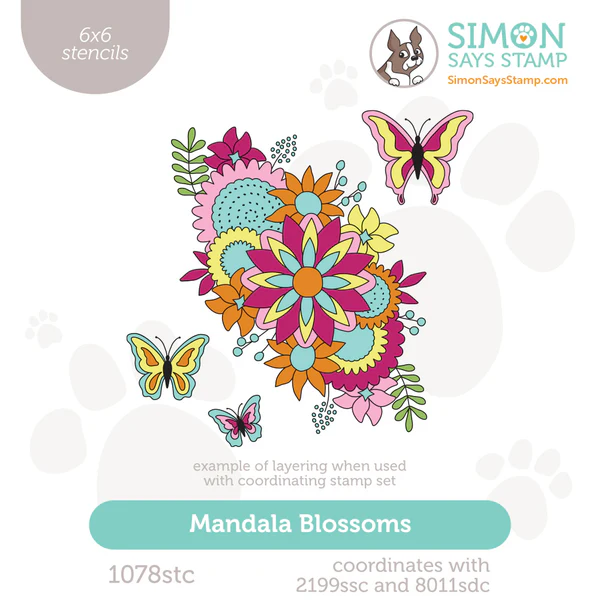
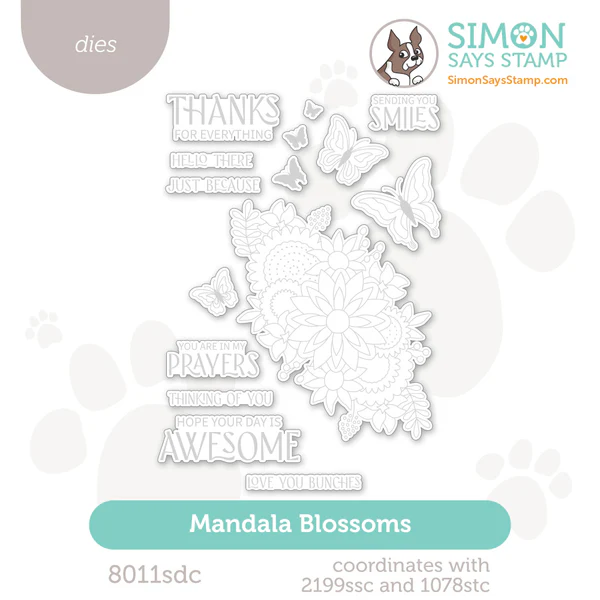
Today's blogpost will share the highlights of the Mandala Blossoms Friendship card to give you a quick overview of how it comes together. The Mandala Blossoms Set of stamp, stencils and dies makes this card easy, and this will be beautiful in so many color schemes!

Key Supplies For Mandala Blossoms Friendship Card!
Get Your Supplies!
Click on the image below to SHOP THE ENTIRE release OR
SHOP the Supplies section at the bottom of this post

Today's GIF!
I think my way of saying Love You Bunches is prettier! :-)
Like this card and my CORNY GIFs? CLICK BUTTON BELOW
to sign up for blog updates:
MANDALA BLOSSOMS FRIENDSHIP CARD - Stenciling, Stamping and Die-cutting
Card Size: 4 1/4" x 5 1/2"

COLOR PALETTE
Simon Says Stamp Pawsitively Saturated Ink Pads - Zest, Cantaloupe, Sweets, Orchid, Royal

Simon Says Stamp Pawsitively Cardstock - Cornflower

CARD HIGHLIGHTS
Stamp the selected images from the Mandala Blossoms Stamp Set in Memento Tuxedo Black ink on a 6" x 6" square of white cardstock.
Stamp the sentiment using Simon Says Stamp Versafine Clair Nocturne ink onto a scrap of cardstock.
Align and secure a layer the Mandala Blossoms Stencil over the stamped cardstock, on top of a Craft Tacky Mat and
Apply selected ink color using a Small Blending Brush.
Repeat until you have used all the stencils to color the flowers and butterflies.
Die-cut the images and sentiment.
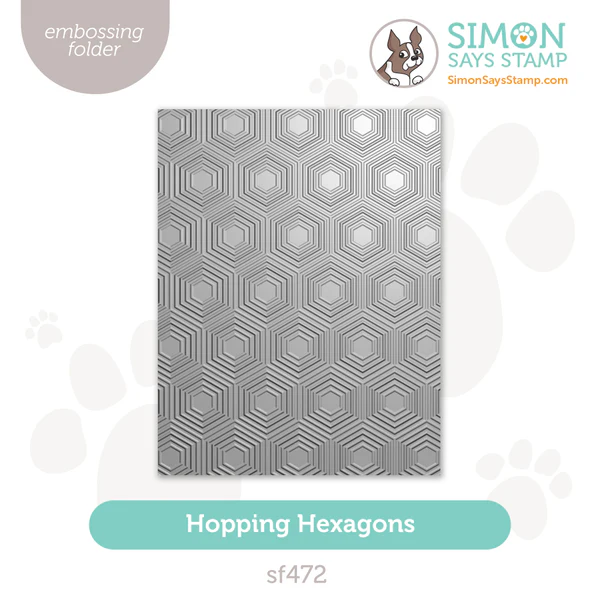
Trim the Cornflower Cardstock to 5 1/2" x 8 1/2" to make an A2 card base and 4' x 5 1/4" for the embossed layer.
Use the Hopping Hexagons folder to emboss the 4' x 5 1/4" piece of Cornflower cardstock.
Adhere the embossed layer using a tape runner to a white foam layer to create dimension.
Adhere the die-cuts and sentiments using Craft Glue and a thin foam squares.
Adhere Duckling Embellishments using Craft Glue to finish.


Last Look!

Thanks for stopping by today! Drop me a comment and say hi!
SUPPLIES:
I listed the products that I have used below. Please note that these are compensated affiliate links, used at no cost to you. I really appreciate your support. All stamps used today were part of my You Are My Favorite maker package from Simon Says Stamp. Click on the icons below each product picture to shop with SimonSaysStamp.com.


This card design is beautifully detailed, and the step-by-step instructions make the process easy to follow. The combination of layered stenciling, embossed texture, and dimensional die-cuts creates a stunning finished project with plenty of visual interest. The color choices and embellishments add a polished touch that really brings the design to life. Creative tutorials like this are inspiring for both beginners and experienced crafters. Similarly, a law course helper can guide learners through complex processes with clear, structured support.
I love how you explained the layering and stenciling process, it makes the whole card feel less intimidating for beginners. I remember trying a floral card once and getting stuck on color blending, so seeing your palette choices really helps. Around that same hectic week, I even looked up Buy Dissertations while balancing studies and hobbies. It’s nice how creative projects like this give a break while still letting you make something meaningful.
I really enjoyed how you broke down the process, especially the stenciling and layering that makes the card look so vibrant yet achievable. I once tried making a handmade card for a friend, and it took way longer than expected but felt worth it. During that hectic week, I even searched for Do My Assignments Helper to manage my workload. Your tutorial shows how creativity and patience come together beautifully in crafting.
I saw a post online where someone upgraded their Tesla Wheel setup and the car looked even more stylish. Tesla’s design always stands out.
This friendship card design looks absolutely beautiful. The mandala blossoms and layered stamping technique really create a soft and elegant effect on the card. While browsing creative blogs like this during study breaks, I sometimes multitask with my coursework as well. At one point I even relied on a US online class taker to manage assignments so I could relax and enjoy hobbies like card making inspiration from posts like this. Lovely project!