

Simon Says Stamp - JUST A NOTE Everyday Card
- Keisha Diann

- Apr 26, 2024
- 3 min read

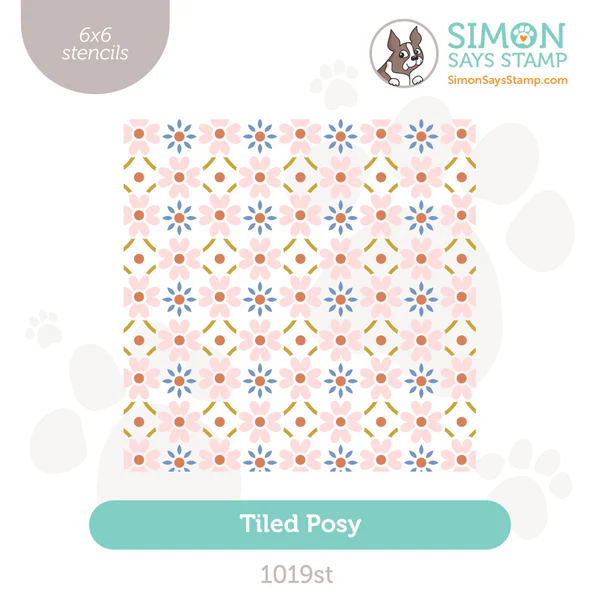
Hello Lovelies! This was my second color scheme for this card. After experimenting unsatisfactorily on my own, I tried out the colors on the Tiled Posy Stencil packaging and fell in love! I added a touch of the new Sky color from Simon Says Stamp's Celebrate Release.
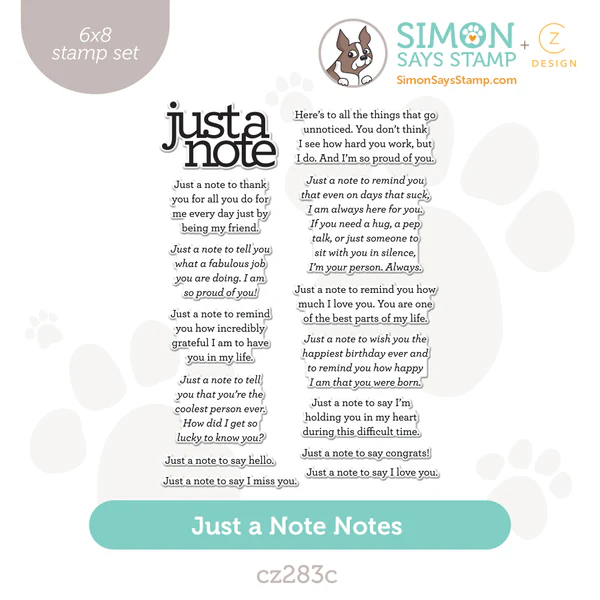
Today's card is retro for me in two senses: the color scheme and stencil pattern; the inside is stamped with the sweetest sentiment from the Just A Note Notes stamp set. When I first started card-making, I added sentiments and decorated the inside of my card and I sharing the surprise and joy hidden inside for the recipient.

Time for Key Supplies!
Get Your Supplies!
Click on the image below to SHOP THE ENTIRE release OR
SHOP THIS CARD using the links throughout the post OR
SHOP the Supplies section at the bottom of this post

Today's GIF!
Now this is a LOT more like the notes I usually take!
Like this card and my corny GIFs? CLICK BUTTON BELOW
to sign up for blog updates:
JUST A NOTE CARD - Stenciling & Die-cutting
Card Base: 4 1/4" x 5 1/2"

COLOR PALETTE
Simon Says Stamp Pawsitively Saturated Ink Pads - Bubblegum, Clay, Honey and Sky

CARD WALKTHROUGH

STENCILING
Adhere a 6" x 6" piece of white cardstock to a Stamp and Stencil Mat.
Secure the Tiled Posy Stencil over the cardstock.
Use a Large Blending Brush and the Pawsitively Saturated Bubblegum Ink to apply color through the openings in the stencil as shown.
Switch out the stencil layers and apply the following colors with a blending brush to the layers as shown:
Sky
Clay
Honey
Leaving the stencil in place, use a dry cloth/papertowel to gently remove any residual ink on the stencil
Remove the stencil.
Trim cardstock to 4 1/4" x 5 1/2". Retain scraps for another project :-)


CUSTOM-COLORED DIE-CUTS
Ink a 4 1/4" x 5 1/2" piece of cardstock directly with the Honey Ink pad and let dry
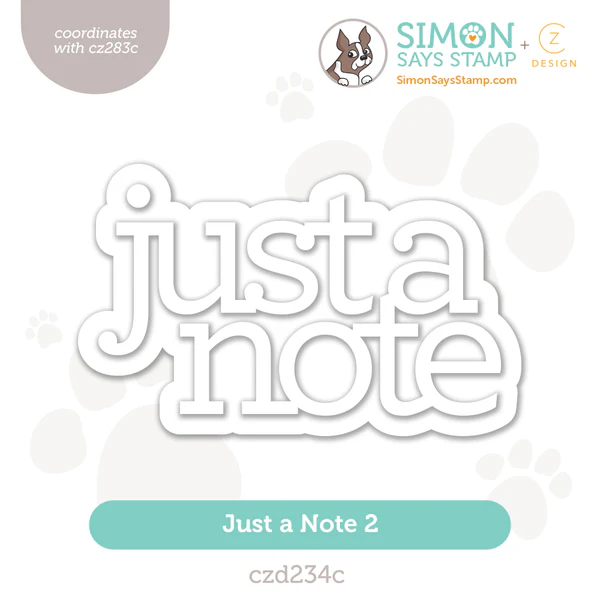
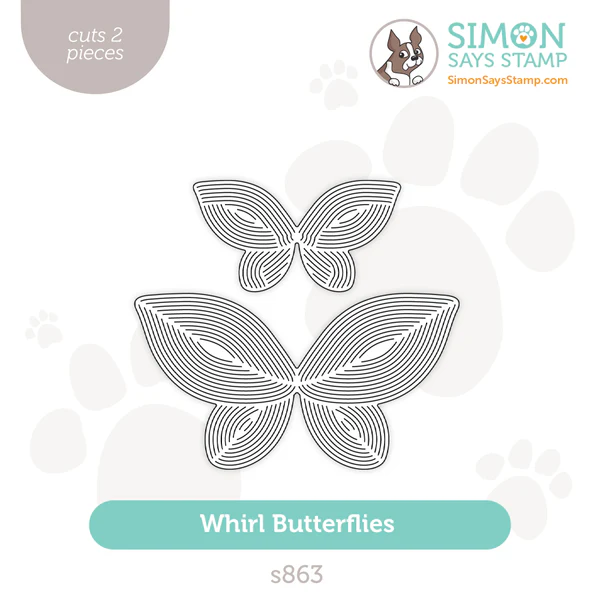
Die-cut the Honey cardstock with the Just a Note 2 sentiment die and the Whirl Butterflies die.
Die-cut the white cardstock with the Just a Note 2 outline and sentiment dies.
Layer the Just a Note 2 die-cuts and adhere with craft glue.

FINISHING
Select a sentiment from the Just A Note Notes Stamp Set, ink with the Sky Ink Pad and stamp on the interior of a card base.
Use foam tape to pop up the stenciled panel
Adhere the stenciled panel to a card-base
Apply craft glue to the sentiment die-cut and adhere to the stenciled panel
Adhere butterflies with craft glue to embellish the card front

This pattern makes me feel nostalgic in the best way. Somehow I am remembering my grandma's clothes that she wore in the 70s. :-)

Just when I thought I'd seen EVERYTHING that could put done with butterflies. This whirl pattern is so cool and contemporary!

Sometimes the card that is for no particular reason can mean the most. Reach out to your loved ones, they are not always going to show when they need you.

Are you stamping inside of your cards too?
Thank you SO much for stopping by! Drop me a comment and say hi!
SUPPLIES:
I listed the products that I have used below. Please note that these are compensated affiliate links, used at no cost to you. I really appreciate your support. All stamps used today were part of my Celebrate maker package from Simon Says Stamp. Click on the icons below each product picture to shop with SimonSaysStamp.com.


Comments