Simon Says Stamp - FLOWER BURST Love Card
- Keisha Diann

- Dec 23, 2023
- 2 min read

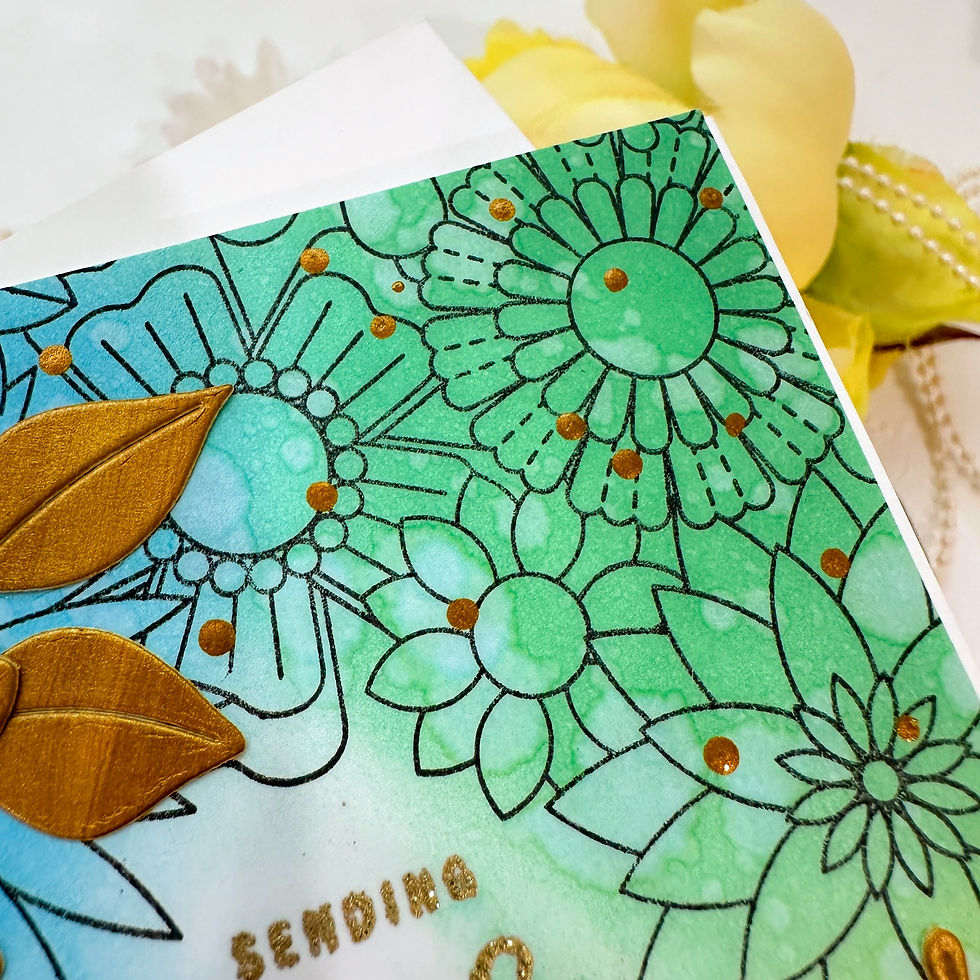
Hello Lovelies! Valentine's Day is not the only time to show someone you care and today's Flower Burst Card is perfect for any time you need to send a paper hug. Flower Burst has a coordinating stamp set also from Simon Says Stamp's Smitten Release, but I'm saving that for a different card!
I thought about embossing the Flower Burst Cling Stamp and then spraying it with my Distress Sprays, but I was running out of the time to finish this card so I opted for basic stamping and a little ink-blending with three cool Pawsitively Saturated Inks.

Time for Key Supplies!
Get Your Supplies!
Click on the image below to SHOP THE ENTIRE release OR
SHOP THIS CARD using the links throughout the post OR
SHOP the Supplies section at the bottom of this post
Today's GIF!
Here's an alternative approach to spreading some flower love!
Like this card and my corny GIFs? CLICK BUTTON BELOW
to sign up for blog updates:
SENDING LOVE AND HUGS CARD - Ink-blending and Distress Paint Accents
Card Base: 4 1/4" x 5 1/2"

COLOR PALETTE
Pawsitively Saturated Ink Pads - Sunbeam, Limelicious, Dublin, Marine Cadette and Royal

CARD WALKTHROUGH
STAMPING AND EMBOSSING
Secure a 6" x 6" piece of 100lb Neenah Solar White Cardstock to the Stamp and Stencil Mat.
Align the Flower Burst Cling Stamp over the cardstock inside your stamping tool and ink with a Tsukineko Tuxedo Black Inked and stamp onto the cardstock.
Dust the cardstock with Anti-static Powder using a Brush Powder Tool.
Align the sentiment in the middle of the stamped Flower Burst image, ink with Clear Ink and stamp onto the cardstock.
Dust the sentiment with Wow Metallic Gold Sparkle Embossing Glitter and heat set with a Heat Tool.
INK-BLENDING
Ink a blending brush with your first ink and start blending patches of each color around the floral image overlapping colors to create the blend until you have used each color
Splatter the inked image with water to create additional variations in the colors.
Trim the inked image to 4" x 5 1/2".

DISTRESS PAINT ACCENTS
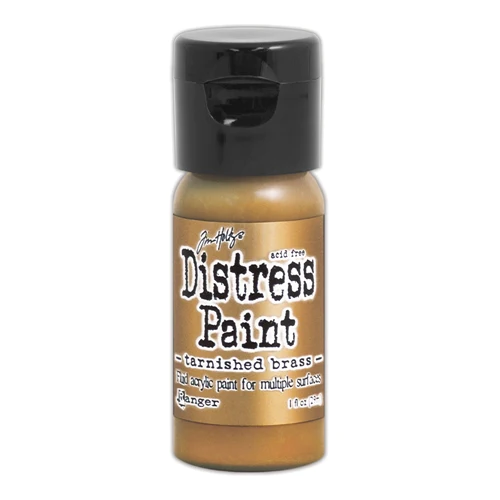
Use the metal end of Place and Score Wand to create little dots all over the inked background, by dipping the tip into a little puddle of Tarnished Brass Distress Paint and gently applying to the cardstock.
Brush the same paint all over a piece of cardstock and let dry.
Die-cut the painted cardstock with the Plentiful Petals die and arrange and adhere selected die-cuts to the card front.
I promised you in the last card that I would be dotting some more and here I am, not being able to resist the dots.

The splattering makes the ink-blending more interesting.

I love the way that the flowers frame the sentiment!

I plan to explore my paints more in 2024, I feel that they are a bit under-used in my craft room and I need to become more adventurous.

Thank you for stopping by and I hope this will have you digging into your paint stash as well!
Happy Crafting!
SUPPLIES:
I listed the products that I have used below. Please note that these are compensated affiliate links, used at no cost to you. I really appreciate your support. All stamps used today were part of my Smitten maker package from Simon Says Stamp. Click on the icons below each product picture to shop with SimonSaysStamp.com.


Kaiser OTC benefits provide members with discounts on over-the-counter medications, vitamins, and health essentials, promoting better health management and cost-effective wellness solutions.
Obituaries near me help you find recent death notices, providing information about funeral services, memorials, and tributes for loved ones in your area.
is traveluro legit? Many users have had mixed experiences with the platform, so it's important to read reviews and verify deals before booking.
Please unsubscribe me from your list.