

Simon Says Stamp - DECEMBER 2023 Card Kit, DON'T FLURRY BE HAPPY
- Keisha Diann

- Dec 30, 2023
- 3 min read

Hello Lovelies! I can't say that I am the biggest fan of how snow feels, but it sure looks pretty and the Simon Says Stamp's Don't Flurry Be Happy Card Kit is all about the beauty of snow and winter landscapes.
I was able to make two cards and a bookmark before I had to desert the craft room for Christmas festivities! This quick post will highlight key steps if you want to give it a try!

Here's a closer look at ALL the kit goodies. Click image below to shop for the kit and the following link to see the full supply list.

Here's the full list of all the crafty goodies that the kit contains:
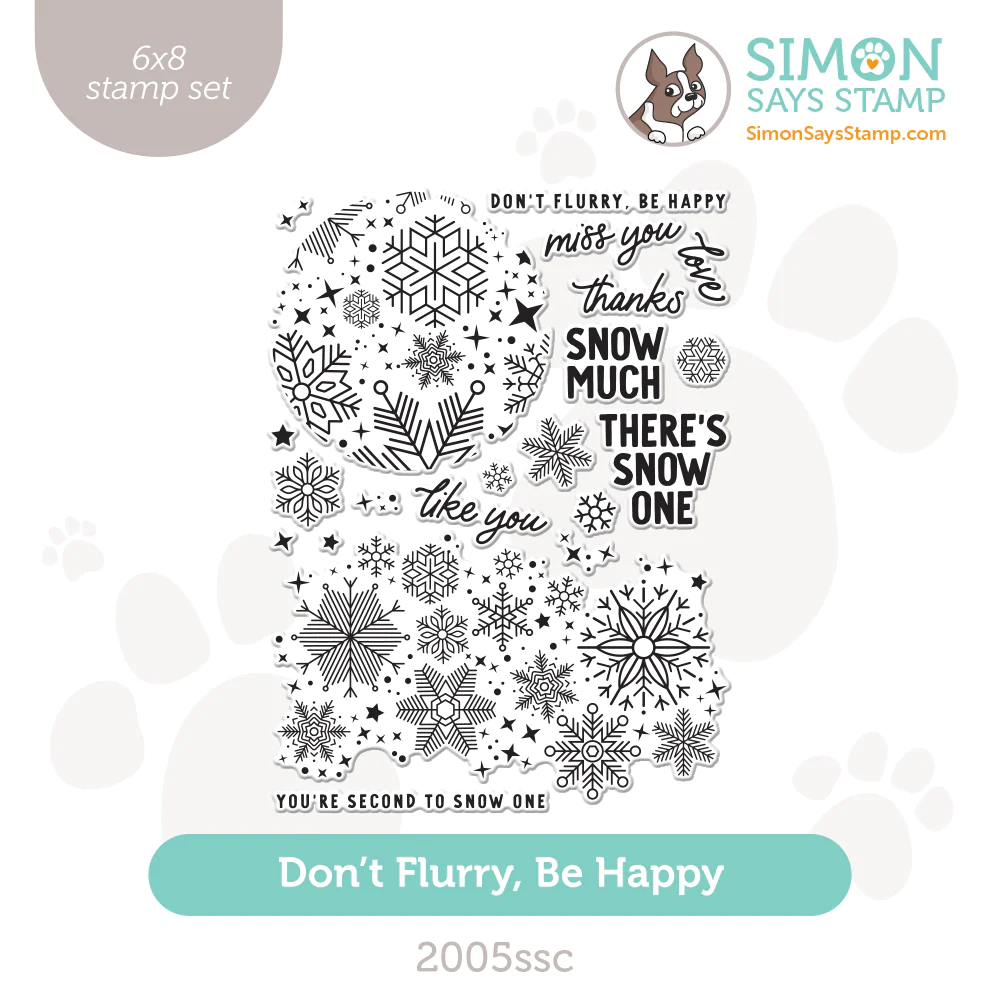
1 NEW and exclusive Simon Says Don’t Flurry, Be Happy 6x8 inch clear stamp set
1 NEW and exclusive Simon Says Stamp Cheery Snowflakes embossing folder
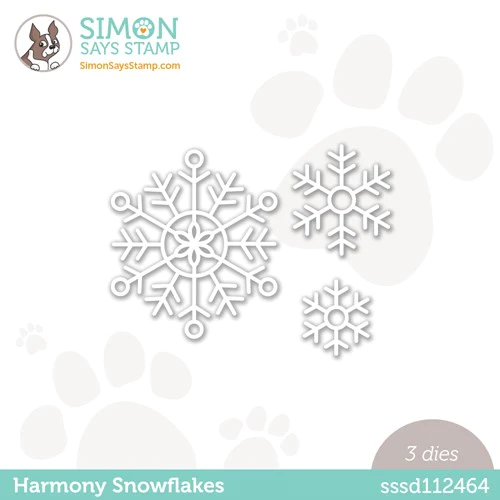
1 exclusive Simon Says Stamp Harmony Snowflakes die set
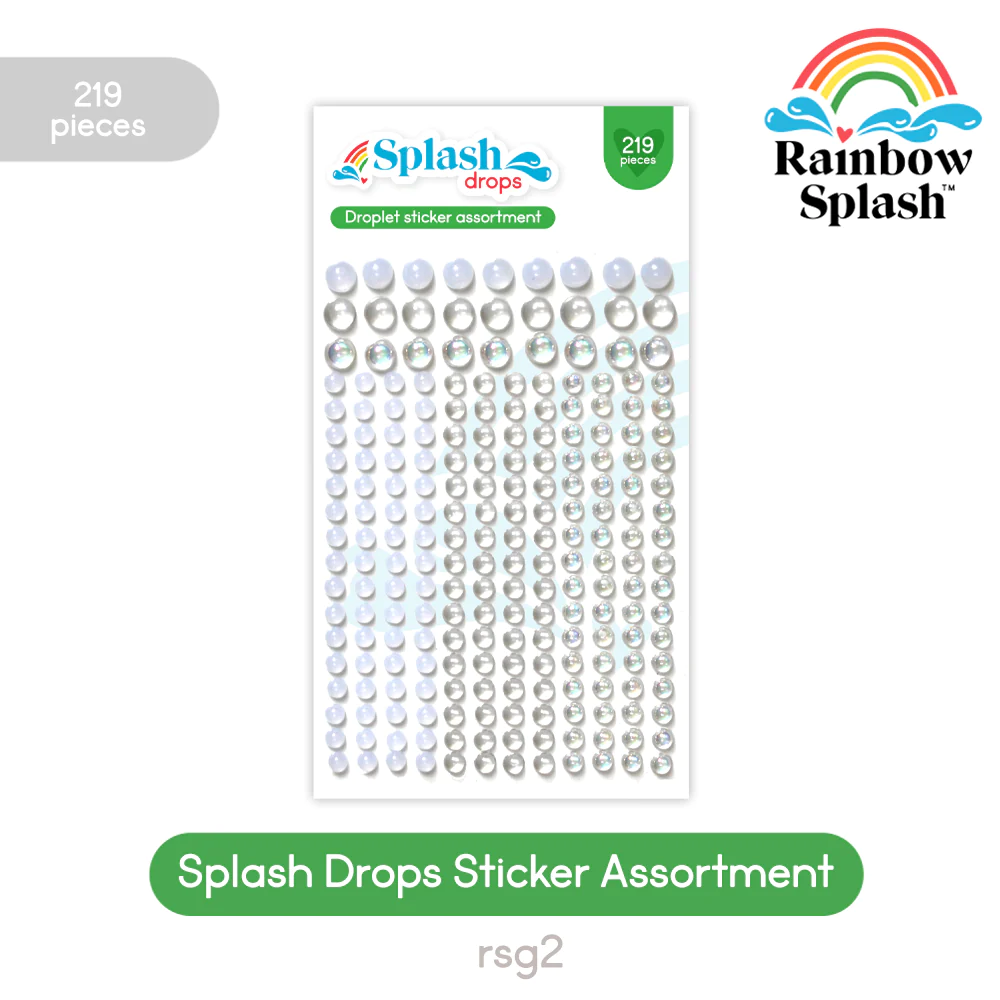
1 NEW and exclusive Rainbow Splash Drops sticker sheet
6 double-sided sheets of 6x6 inch patterned paper from the Paper Rose Enchanting Christmas Basics collection
1 Tim Holtz Ranger Distress embossing glaze (color with vary)
1 Simon Says Stamp Clear embossing ink pad
1 sheet of A2-sized Simon Says Stamp Holographic cardstock
1 sheet of 5.5 x 8.5 inch Simon Says Stamp 100 lb Cornflower cardstock
1 sheet of 8.5 x 11 inch Simon Says Stamp 100 lb Lavender cardstock
1 sheet of 8.5 x 11 inch Simon Says Stamp 90 lb Matte Silver cardstock
1 sheet of 8.5 x11 inch Neenah 110 lb Solar White cardstock
1 Simon Says Stamp A2 Holographic envelope
The items below are the ones that I used most from the kit so far; they are also available separately if you are interested in particular one!

Card Kit Jokes
THIS is how I like my snow, from the inside of a window!
THERE'S SNOW ONE CARD & BOOKMARK - Heat (Wet) Embossing and Dry Embossing
Base Layer: 4 1/4" x 5 1/2"
Patterned Layer: 3 3/4" x 5 1/2"
Featuring:
IN KIT:
1 sheet of 6x6 inch patterned paper from the Paper Rose Enchanting Christmas Basics collection
1 exclusive Simon Says Stamp Harmony Snowflakes die set
1 sheet of 8.5 x 11 inch Simon Says Stamp 100 lb Lavender cardstock
1 sheet of 8.5 x 11 inch Simon Says Stamp 90 lb Matte Silver cardstock
1 sheet of 8.5 x11 inch Neenah 110 lb Solar White cardstock
1 NEW and exclusive Rainbow Splash Drops sticker sheet
ADDITIONAL:
White embossing powder

HIGHLIGHTS:
CARD
Trim the Patterned Paper scene to 3 3/4" x 5 1/2"
Keep the remaining piece for the bookmark
Heat emboss the sentiment in white on the patterned paper. I originally embossed "like you" in silver, but it did not stand out enough, so I redid it in white.
Die-cut and adhere the snowflake using the Matte Silver Cardstock and the Harmony Snowflake
Adhere the snowflake die-cut and Rainbow Splash Drops to the card front


BOOKMARK
Dry emboss a matching strip of Lavender cardstock with the Cheery Snowflakes Embossing Folder to make the other side of the bookmark
Adhere each side of the bookmark together and round the edges.
Punch the top center with a 1/4" hole punch and
Die-cut and adhere a Lavender snowflake around the hole
thread some ribbon or a tassel through the hole to finish the bookmark
MISS YOU SNOW MUCH CARD - Heat (Wet) Embossing, Ink Blending and Stamping
Base Layer: 4 1/4" x 5 1/2"
Patterned Layer: 3 3/4" x 5 1/2"
Featuring:
IN KIT:
1 NEW and exclusive Simon Says Don’t Flurry, Be Happy 6x8 inch clear stamp set
1 exclusive Simon Says Stamp Harmony Snowflakes die set
1 sheet of 8.5 x 11 inch Simon Says Stamp 100 lb Lavender cardstock
1 sheet of 8.5 x 11 inch Simon Says Stamp 90 lb Matte Silver cardstock
1 sheet of 8.5 x11 inch Neenah 110 lb Solar White cardstock
1 NEW and exclusive Rainbow Splash Drops sticker sheet
ADDITIONAL:
Clear embossing powder
Simon Says Stamp Nesting Oval Dies
Tim Holtz Distress Ink - Shaded Lilac, Seedless Preserves

HIGHLIGHTS:
CARD
Use one of the oval dies to cut a hole into a 5" x 7" piece of cardstock to create a stencil
Place your stencil over your card front and use a blending brush to gently ink-blend shaded lilac ink through the opening. Add a few touches of Seedless preserves to make your oval more interesting
Stamp "Miss You" and "Snow Much" onto the card front
Heat emboss the snowflake pattern using clear embossing powder.
Die-cut and adhere the snowflake using the Matte Silver Cardstock, Lavender Cardstock and the Harmony Snowflake
Adhere the small center circles from your snowflakes to embellish the card and add a Splash Drop to finish.
All done! You now have two cute cards and a bookmark!


See you in 2024 Lovelies! Full supply list below for your shopping convenience.
See you soon!
SUPPLIES:
I listed the products that I have used below. Please note that these are compensated affiliate links used at no cost to you. I really appreciate your support. Simon Says Stamps Card Kit products were provided as part of my Design Team package.
Click image below to shop for the Kit ONLY!
Click on the icons below each product picture to shop additional supplies with SimonSaysStamp.com.


Comments