

Simon Says Stamp - Terrace Floral Card
- Keisha Diann

- Jul 25, 2022
- 3 min read
Updated: Jul 28, 2022

Hello Lovelies! I literally do a happy dance every time there is an Embossing Folder in a Simon Says Stamp Release and it gets even better when it has a coordinating die!
I love that I get the best of both worlds with a pretty raised pattern for the background and a die-cut that pops off the page in a perfectly matching style.

We'll need a few things to make this sunny delight! (See what I did there? Cue BIG CHEESY GRIN)
Essential Card Supplies:


Click here to view the full supply list or check it out the one linked in the gallery at the bottom of this post when you have finished exploring this card.
Today's GIF!
This almost hypnotized me, so be careful!
THINKING OF YOU- Embossing, Die-cutting and Detail Ink-Blending
Card Base: 4 1/4" x 5 1/2"
Embossed Layer: 3 1/4" x 4 1/2"
Featuring:
Simon Says Stamp Pawsitively Saturated Ink Pads - Sherbet, Cantaloupe, Sunbeam, Citrine, Lemonade, Limelicious, Pearfection

CARD PALETTE

CARD WALKTHROUGH
EMBOSSING AND DIE-CUTTING

Emboss 110lb white cardstock using the Terrace Floral Embossing Folder.

Adhere the Terrace Floral Die to the matching section of the embossed pattern using Very, Very Low Tack tape and die-cut.
This tape has enough sticking power to keep the die in place without damaging the delicate embossed pattern.
Gently remove the die-cut from the embossed background and set aside for inking.


SPRAYING

Mist the embossed background with Sheer Shimmer Craft Spray.
Note: I used an additional embossed background but it really is not necessary, the left over die-cut one will work fine too.
DETAIL INKING

I used both round and Flat Detail Brushes to ink this flower based on the section of the flower or leaf that I was inking.

First up is Cantaloupe Ink and the Round Detail Brush for the flower center. Ink the brush lightly and apply to the flower center in a gentle circular motion.

Deepen the color with a few touches of Sherbet Ink on the Round brush.

Use the Low Tack Tape to mask sections of the Leaf that you don't want to color when inking the flower petals with Flat Brush and Lemonade Ink.
After inking lightly on the pad, pull the color outward from the enter in light vertical strokes until all petals are covered.
A little close-up so you can see better!


Use the Round and Flat Brushes to ink the leaves in Limelicious Ink.
Tip: The Round covers the small areas quickly and the Flat allowed me to get into narrower areas without messing up the petals too much.

Use a small round paintbrush to add "vein" details on the leaves with Pearfection Ink.
Add some shadows to the flowers also using the paintbrush and Sunbeam Ink.
STAMPING

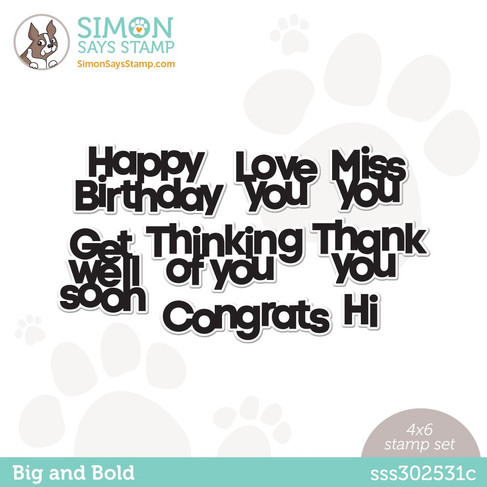
Stamp the sentiment from the Big and Bold set in Sunbeam Ink.

Secure the outline die to the stamped sentiment with Low Tack Tape and die-cut.

Ink the Geo Aria Background Stamp in Citrine Ink and stamp the card background.

Use the smaller 3D Foam squares to adhere the inked flower to your background when assembling the card.
The shimmer on the embossed pattern is everything in the Sunlight.

Pretty details in our sunny ink colors!

Loving this chunky sentiment!

Add some of your favorite jewels for even more sparkle.
Hoping this brightened your day.
Thank you for stopping by and see you soon!
SUPPLIES:
I listed the products that I have used below. Please note that these are compensated affiliate links used at no cost to you. I really appreciate your support. All stamps used today were part of my maker package from Simon Says Stamp. Click on the icons below each product picture to shop with SimonSaysStamp.com.


The Sabrina Carpenter Costume looks absolutely stunning! She always manages to mix playful and glamorous styles so effortlessly. Whether it’s her concert looks or red-carpet outfits, she totally owns every moment.
The The Christmas Chronicles Santa Claus Coat is absolutely stunning! Kurt Russell really brought a new level of charm and sophistication to the Santa look. That luxurious red coat with the fur detailing made him the most stylish Santa ever!
The Drive Scorpion Jacket is one of the most iconic movie outfits ever! Ryan Gosling made that white satin jacket with the golden scorpion an instant classic. It’s minimalist, stylish, and has that mysterious edge that perfectly matches the character.
The The Christmas Chronicles Santa Claus Coat is absolutely stunning! Kurt Russell brought such a stylish twist to the traditional Santa look — that luxurious red coat with the fur trim made him look like the coolest Santa ever.
Kaiser OTC benefits provide members with discounts on over-the-counter medications, vitamins, and health essentials, promoting better health management and cost-effective wellness solutions.
Obituaries near me help you find recent death notices, providing information about funeral services, memorials, and tributes for loved ones in your area.
is traveluro legit? Many users have had mixed experiences with the platform, so it's important to read reviews and verify deals before booking.