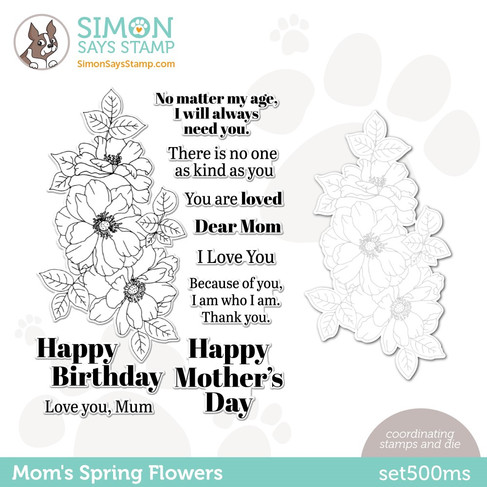
Simon Say Stamp - Mom's Spring Flowers Card
- Keisha Diann

- Mar 21, 2022
- 3 min read

Hello Lovelies! Are you excited as me about the Hello Gorgeous release from Simon Says Stamp? There's a blog hop coming soon, but I'm kicking off my makes with this card for all the Moms!
There were so many sentiment options in looking at all the stamps, dies and sentiment strips in this release, but this Sentiment Strip in particular spoke to me, so I thought it would be perfect for the bright floral card celebrating Mom.

I did some speedy watercoloring and then some very slow fussy-cutting, so I encourage you to consider the matching die here, if you dont have the patience for a lot of scissor work. As usual, I've got your key supplies below for this card so you can take a closer peek:
Card Essentials:
Click here to view the full supply list or check out the one linked in the gallery at the bottom of this post when you have finished exploring this card. I chose to "watercolor" with my Zig Clean Color Brush Pens as the are more forgiving than my traditional watercolors and I needed to finish this card quickly.
Ready to paint with markers???
YOU ARE MY HEART CARD - Watercoloring, Fussy-cutting and Wet-Embossing
Card Base: 4 1/4" x 5 1/2"
Featuring:
Zig Clean Color Brush Pens - persian green, emerald green, turquoise green, yellow green, yellow, lemon yellow, light carmine, pink flamingo, blender

Though we won't do a full pictorial walkthrough, I have a few notes and some photos if you are giving this a try:
PREPWORK

I went fancy for this card embossing both the flowers and the background stamp in gold.
The Mom's Spring Flowers image was embossed onto Distress Watercolor Paper
The Dimensional Quilt Background Stamp was done on Simon Says Stamp Fog Grey Cardstock
I've been loving the Rabbit Hole Designs Embossing Tool for dusting my paper with anti-static powder, before applying the clear ink, to help reduce my pretty embossing powders from sticking where I don't want them to. It's pretty and functional and I couldn't ask for more here!
Once you get your embossing out of the way, time to color!
ZIG WATERCOLORING
Uncap the yellow and coral markers for the flower petals as well as the blender for easy access
To achieve a gradient on the petals, color each petal individually, starting towards the center of the flower and quickly switching from darker to lighter colors for an ombre effect
End with mixing the blender into the lightest yellow color to carry just a hint of yellow into the lightest part of the petal
If there get harsh lines that were not intended, blend outwards with a lighter color or the blender pen
The leaves are a mix of blue towards the bottom and the center of the leaf followed by the darker green with the lighter green towards the tip
I also used a wet small round paintbrush to "muddle" the colors on the leaf for a more free-form look
EMBELLISHING & LAYERING

Fussy or die-cut out the floral arrangement.

Apply foam tape to the back of the fussy-cut florals.
\

Cut little triangles out of the embossed quilt to create a design along the border of the Fog Grey Layer.

Apply Tidepool ink with Small ___ Blending Brush to the "You Are My Heart" Sentiment Strip.

Adhere the grey layer to a white card base and attach floral die-cut as shown.

Adhere Fancy Mom diecut layers to each other and then to the card front.
Adhere sentiment strip with a tape runner.
Adhere gold pearls with Simon Says Stamp Craft Tacky Glue to finish.
All done!

That Tidepool ink color is going on the favorites list! (that favorite's list is getting quite long)

I never get tired of floral images, but who could with these gorgeous illustrations???

I think this card is ready for MOM!

Lovelies, images like this are made for coloring and the possibilities are practically endless on how you choose to color. I selected Zigs as I needed to finish my card quickly and did not have time for precision. It's no masterpiece, but I think it's pretty and should make someone happy.
Thank you for visiting and see you soon!
SUPPLIES:
I listed the products that I have used below. Please note that these are compensated affiliate links used at no cost to you. I really appreciate your support. All stamps used today were part of my maker package from Simon Says Stamp. Click on the icons below each product picture to shop with SimonSaysStamp.com.


Gorgeous card Keisha, I love the colours from the flower image. Zig markers never fail for a bright bouquet. Thank you so much for sharing, stay safe and have a wonderful day.
Beautiful card. The gold embossing really makes the background pop, as well as the flower image.