

Simon Say Stamp - Merry Wishes Card
- Keisha Diann

- Nov 11, 2021
- 3 min read
Updated: Nov 18, 2021

Hello Lovelies! I threw a kitchen sink of crafting magic at this card! I ink-blended, embossed, foiled, sanded, splattered and painted, but it was all easy and all fun!
Blame it on inspiration from Simon Says Stamp's latest release, Handmade Holiday, which among oodles of crafty goodies features new Pawsitively Saturated inks and sooo many gorgeous embossing folders!

Today's card is all about Simon Say's Stamp's NEW Pawsitively Saturated Inks and Pine Tree Meadow Embossing Folder from the Handmade Holiday release.


You'll also need a few other key supplies to cook up some magic of your own. All supplies are linked in the gallery at the bottom of this post for your convenience:


Before we get into the card though, can we pause for just a second to appreciate the magic of the new suite of Pawsitively Saturated Ink colors that were just released.

At the time of this post, the whole set is in stock and available for $99.99
More on that gorgeousness in another post...
Let's get to making!
MERRY CHRISTMAS WISHES CARD - Embossed Ink-blended Cardstock with Foiled Accents
Card Base: 4 1/4" x 5 1/2"
Card Front: 4" x 5 1/2"
Featuring:

Today's card showcases embossing monochromatic ink-blended cardstock, highlighting the embossed image with sanding and Distress Spray Stain and finished with bold, foil sentiments. Say that fast 3 times!!! LOL
Ink-Blending and Embossing
The card starts with the inks and the embossing folder. I used all 3 of the new Pawsitively Saturated green trio, Sprout, Fairway and Field to create an ombre effect that generally followed the image created by the embossing folder. Here, most of the trees are in the background and darker and most of the "lake area" is in the foreground and lighter.


Sanding and Foiling
Once the Pine Tree Meadow embossing folder has worked its magic , it should look something like this and be ready for sanding.


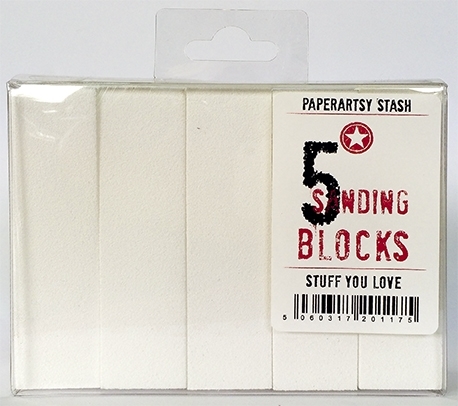
This is where you can now get out the power tools (aka Sanding Block) LOL, and start to highlight the image. To accomplish this, gently sand down through one of the paper layers to reveal the white core in areas where the cardstock is raised to further bring the image to life.
As far as sanding goes, you are rubbing the block across the raised ares until you see the white core of the cardstock. Don't get too over enthusiastic, we will highlight these trees further with Distress Spray Stain!

Now you can heat things up with adding your red hot foil sentiment. You will need a heated foil platform such as the Spellbinders Glimmer System of the Gemini Hot Foil Press to apply the Merry Hot Foil Die to the inked, embossed, sanded cardstock. Please follow the instructions that come with your machine to apply the foil.
The general overview is to:
Heat up the die on the Hot Foil platform;
Apply a strip of foil in your preferred color to the heated plate while on the platform;
Carefully align your inked cardstock and
Run through a die-cutting machine


Splattering and Painting
The final piece of the kitchen sink card is to add paint in the most primitive way! Splattering and finger-painting!


I wanted to isolate the sentiment and not get it all inky so I taped it over the foiled sentiment before I splattered the card front with Picket Fence Distress Spray Stain. The spray stain was easily wiped off the back of the die after the splattering. :-)

Once the splattered Spray Stain is dry, dab your finger unto a bit of that same white ink and run it over the trees to further highlight them, particularly toward the top and very bottom sections of the card front.
Embellishing
To finish, a Reverse Sentiment Strip came in uber-handy and a few sequins and rhinestones from my vast bling stash were a nice touch!

And there we have it...a little Christmas magic!


Lovelies, thanks so much for stopping by! I hope you get a chance to try out the new inks and paired with the embossing folders you will get some gorgeous results.
See you soon!
SUPPLIES:
I listed the products that I have used below. Please note that these are compensated affiliate links used at no cost to you. I really appreciate your support. All stamps used today were part of my maker package from Simon Says Stamp. Click on the icons below each product picture to shop with SimonSaysStamp.com.


Kaiser OTC benefits provide members with discounts on over-the-counter medications, vitamins, and health essentials, promoting better health management and cost-effective wellness solutions.
Obituaries near me help you find recent death notices, providing information about funeral services, memorials, and tributes for loved ones in your area.
is traveluro legit? Many users have had mixed experiences with the platform, so it's important to read reviews and verify deals before booking.
Gorgeous!
This is so cool!!
I so can imagine that you had a lot of fun making this card, it shows in the card and your tutorial. Totally love this awesome card. Another great way to use embossing folders. Thank you so much for sharing Keisha, stay safe and have wonderful day.