

Simon Say Stamp - Etched Butterfly Card
- Keisha Diann

- Dec 27, 2021
- 3 min read

Hello Lovelies! The To The Moon release from Simon Says Stamp celebrates love and to me, that is not just about you sweethearts on Valentines Day, but other loved ones that you need to let know that you care.
Today's card celebrates inking the Etched Butterfly Die, paired with the Geometric Lattice Embossing Folder and Peonies and Leaves Stencil from that release with some of my favorite Simon Says Stamp colors!

The inking brings the die, embossing folder and stencil to life. With the vibrance of the upper layers, I kept the base layer subtle.
If you are replicating this card, here's a quick peek at your key supplies:


Click here to view the full supply list or check out the one linked in the gallery at the bottom of this post when you have finished exploring this card.
Let's get inky!!!
MISSING YOU BUTTERFLY CARD - Ink-Blended Diecut on Ink-Blended 3D Embossed Background with Stenciled Card Base
Card Base: 4 1/4" x 5 1/2"
Embossed Layer Layer: 3 1/4" x 4 1/2"
Featuring:
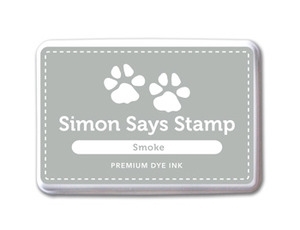
Simon Says Stamp Ink - Sweets, Peachy, Smoke

This simple card only needs a few photos to tell you its story, so I snapped a few along the way to guide you. The one thing that I will encourage you to consider is getting some Simon Blending Brushes to help you achieve this seamless blend and the Wendy Vecchi Make Art Staytion to help you keep your Peonies and Leaves Stencil in place, it works beautifully even with this delicate stencil.
This card started with ink-blending 2 pieces of pieces of white 110lb cardstock with with Sweets and Peachy colors, one sized at A2 (4 1/4" x 5 1/2") , The other other was a 3 1/2" Square. Ink the each piece with Peachy Ink 2/3 of the way down the paper, you will then overlap the middle 1/3rd with the Sweets Ink to create a coral tone. Showing the A2 size below.

Next diecut the square using the Etched Butterfly Die and emboss the A2 ink-blended cardstock using the Geometric Lattice folder.


Stencil the front flap of the card base using the Peonies and Leaves Stencil, with Smoke Ink on the Wendy Vecchi Make Art Staytion to hold the stencil in place:


I honestly felt bad covering up this beautiful stencil, so I will need to make something else with it soon!
Cut the embossed card layer down to 3 1/2" x 4 1/2" and layer as shown:

Time to assemble and add your diecut to finish. Here are lot's of closeup so you can see all the finished details:
Blending brushes doing all the hard work for this card! :-)

The lattice folder creates beautiful texture that will be versatile for many cards...

Etched Butterfly gorgeousness!

So good I had to take 2 pix!

I adore sentiment strips for saying beautifully all the things you want to say.

One last look at our simple, ink-blended, embossed and stenciled card.

Lovelies, I hope that this card sparked some joy for you and please feel free to ask me any questions you may have about how to put it together.
See you soon!
SUPPLIES:
I listed the products that I have used below. Please note that these are compensated affiliate links used at no cost to you. I really appreciate your support. All stamps used today were part of my maker package from Simon Says Stamp. Click on the icons below each product picture to shop with SimonSaysStamp.com.


Sell tickets online now on the leading event ticketing platform.
What a beautiful card
Wow! The awesome Sandi MacIver gave you credit for your beautiful color combination on this card and the link to this gorgeous card of yours. What a beautiful card! I agree with Lori Prince in that the “embossing folder gives it so much pizzazz” I am finally going to buy the SSS Saturated Inks. Thank you so much for sharing.
That embossing folder gives so much pizzazz to your design.
Awesome card Keisha, love the colours. Fabulous embossing folder, indeed very versatile. Thank you so much for sharing, stay safe and have a wonderful day.