

Honey Bee Stamps - Sweet Stems Release
- Keisha Diann

- Jun 17, 2021
- 5 min read

I'm going to say it, you can't stop me! The Honey Bee Stamps Summer Stems release is a favorite for me. Yes, I am a design team member and I know that you are not supposed to have a favorite child, but this may be the one!
I am sharing the details of the cards that I have posted thus far and maybe you will be inspired to give some of these new goodies a go! Not that I am being an enabler or anything!!! LOL

This is just my sample of goodies from the new release:


Though I won't be going step by step, I'll cover the key supplies for the featured cards, share the pictures that I snapped while making for you and note things that may not be obvious from the pics.
You Add So Much Color Card
Crafting is all about color for me so I made a beeline for the Color Buzzword stacking dies when I first saw them!

This is how I celebrate color, doing my two favorite things ink-blending Distress Inks and making a rainbow!

The Color Buzzword Dies Set comes in 3 layers. I used the lighter colors (Spun Sugar, Shaded Lilac, Cracked Pistachio and Squeezed Lemonade) in the top row (see picture above) for the bottom layer of the diecut.

The darker colors (Picked Raspberry, Wilted Violet, Peacock Feathers and Twisted Citron) were then used for the middle layer and the top layer is cut from black cardstock.
I chose a simple repeating pattern stencil for the card base. Honey Bee Stamps Whimsical Hearts was perfect for expressing all the love that I wanted to put into this card. I kept the pattern neutral with Hickory Smoke Distress Ink as my ink color for the stenciling.
A diecut vellum heart is a perfect foil for the bright diecut and platform against the busy stenciled heart background.

Miss You Card
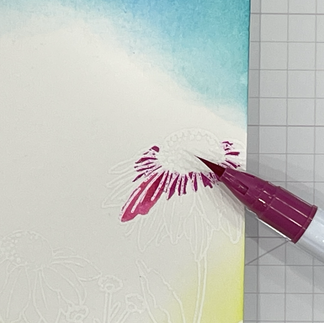
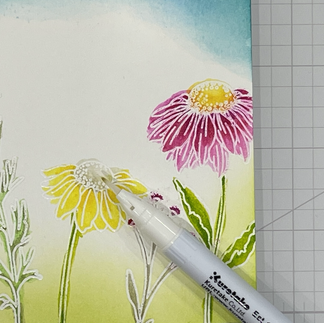
If you have been to my blog before, you know that I love using my Zig Clean Color Brush Markers and the lovely Wildflowers Stamp Set inspired me to try some messy coloring. Yes, I intentionally went outside the lines here! I wanted my coloring to reflect the freedom of the wildflowers in the stamp set.

I have lots of pictures for you on my "messy" coloring technique, but I actually started with creating a little bit of a sky by doing some Distress Ink blending in a slight arc towards the top 1/3rd of the card front using Salty Ocean and Peacock Feathers.

Next, I stamped and heat embossed my Wildflowers stamps in batches or 3 images and then 2 images respectively as shown below so I could place the flowers close together and overlap them.


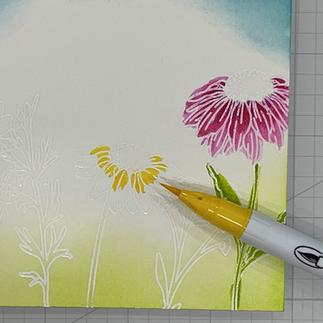
I chose mainly pinks, yellows and green Zigs for my flowers: Peach Pink, Dark Pink, Bright Yellow, Yellow, Lemon Yellow, Yellow Green, Pale Green, Light Green, Gray Tint and Blender.

Zigs blend with very little effort and make it easy for you to correct mistakes, hopefully these pictures are helpful in walking you through it. Before I started using the marker, I decided to blend a little Twisted Citron at the bottom of the card front for my "grassy" area and to help me see the flower stems more easily.


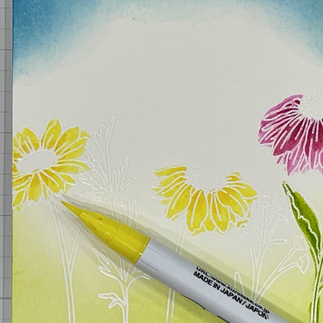


Just a few more pics to finish things up on the coloring:


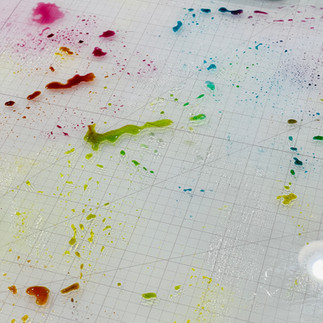
With the coloring out of the way, it was time to add some splatters of water and ink and finish by stamping the sentiment.
I splattered some water on the card front (as shown in the 2nd picture) before I stamped the gorgeous Miss You sentiment from the new Miss You Big Time Stamp Set). Not satisfied with water splatters, I mixed up some Hickory Smoke with water and used that to add additional splatters to the card front.


I cut off about 1/4" off the longest side of the card front before mounting it to the card base.

Picked Just for You Card
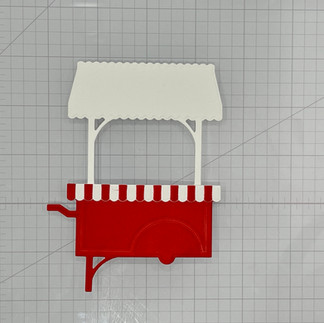
I can be a real lazybones when it comes to crafting and items that have a lot of components sometimes intimidate me, but the Market Cart Die Setwas way too beautiful to pass up.
So I set aside my impatience and got to coloring it with my beloved Distress Inks and putting it together. I started with die cutting all the pieces of the cart out of white cardstock. I am using 110lb Neenah Color White Cardstock for this.

More pictures for you on inking this cart to life.
Cart Body:


Flower Pots (I did not photo everything but I think you can get the gist :-))


Assembly


The card is cart is layered on a sheet from the stunning Summer Stems Paper Pad and finished with the Friend diecut from the Slimline Sentiment Die Set and a stamped sentiment from the ____ Stamp Set.


Crafty Chick Card
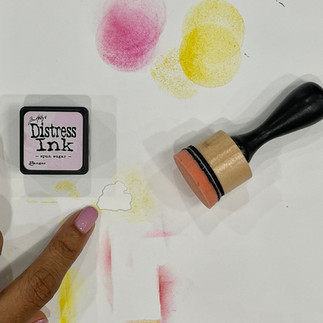
My go-to move when I am stuck creatively is to grab my Distress Inks and make a background!

I understand color theory but I am always surprised by what you can create from 3 colors. I snapped some pics for you, but know that every time you do this its going to be different and I think that makes it beautiful!
I used Seedless Preserves, Peacock Feathers and Mustard Seed which I spritzed generously (3 spritzes on each color) before I started picking it up with an A-2 sized sheet of Distress Watercolor Cardstock.
After one round of picking up all the colors, Seedless, then Peacock and finally Mustard, I dried it with the heat tool and added additional color in each section by dabbing the craft mat with the cardstock or dipping my finger into the ink and adding it in specific places.


I could have done more here, but when it looks this yummy, why bother?

With the base done that, those beautiful diecuts and stamped sentiments finish the card for you. The gold gems are from Honey Bee's Hot Tropics Gems set. A little bling usually does not hurt.

Sending Blooms Card
I grabbed the Zigs I used on the Miss You Card and added a few purple, brown and grey shades to bring my little BEE YOUNG: Blooms girl to life. Though she does not have wings, she definitely reminds me of a little fairy watering her life-sized garden.

I started by laying out my stamps to get a general idea of placement and then because I wanted them close together, I stamped the images one at a time to create the scene. The flowers are from the Wildflowers set that I used on the Miss You card.
Additional Zig Colors: English Lavender, Lilac, Light Violet, Mustard, Light Gray, Pale Dawn Grey, Gray Brown and Gray. Mustard and the Blender are used for the skin tones
The shading (ink-blending) is done last and I am always amazed that it does not disturb the colored images! Distress Ink colors for the background: Kitsch Flamingo, Squeezed Lemonade, Spiced Marmalade, Shabby Shutters and Twisted Citron.
Here are the process pics that I took:


A little close-up!

This is a one layer card sot when you are done with coloring, it's time for the "Sending Blooms" sentiment added directly onto the colored layer and finished with some Summer Stems Gems. Say that 3 times quickly!

Let me know in the comments which card is your favorite today.
Full supply list below for your shopping convenience.
See you soon Lovelies!
SUPPLIES:
I listed the products that I have used below. Please note that these are compensated affiliate links used at no cost to you. I really appreciate your support. Honey Bee Stamps products were provided as part of my Design Team package. Click on the icons below each product picture to shop with SimonSaysStamp.com.


Gorgeous cards Keisha, what a great release. My favorite card is definitely the awesome flower cart card! Thank you so much for sharing, stay safe and have a wonderful day.