

Tim Holtz Stampers Anonymous 2023 Collection - FLORAL TRIMS Shadow Boxes
- Keisha Diann

- May 30, 2023
- 5 min read

Hello Lovelies! To be honest, late April and May went by in a complete blur, but I was find happy to find a little time and peace of mind to make these two shadow boxes using the Floral Trims Stamp Set from Tim Holtz's Stampers Anonymous 2023 Collection.
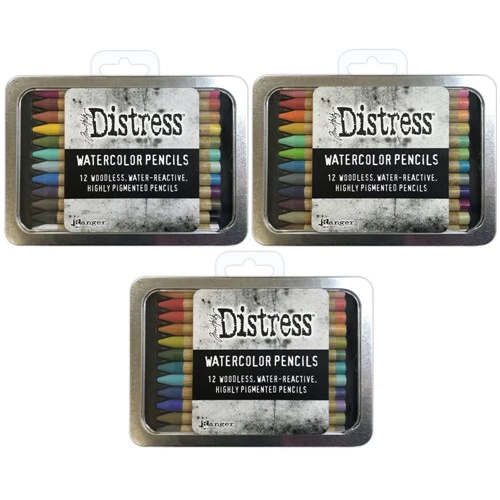
I've got no real skill at water-coloring, but Tim's Watercolor Pencils help me fake it until I can make it, by being easy to use and versatile. LOL Also, I was amazed at what a little bit of Lost Shadow ink and paint did to make this pair more interesting. So buckle up and join me for a detailed pictorial walkthrough of these makes!

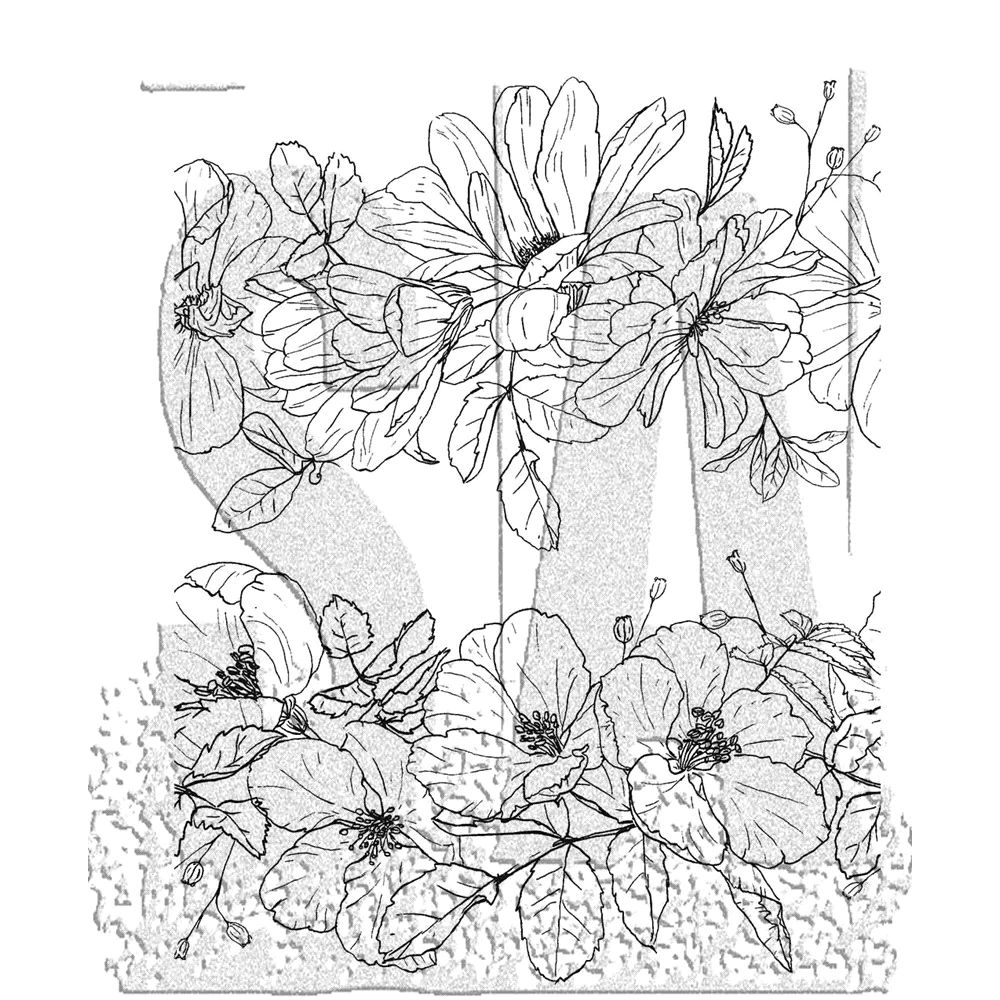
I was truly surprised and thrilled to see this pair of oversized florals in the collection and wanted to make something that would have some permanence in my craft space.
Let's take a closer look at the two sets at some of the key supplies we'll need:

I also waded into my Tim Holtz stash and pulled some metal embellishments and twine to decorate my boxes. These specific elements may no longer be widely available so switch things if you like with favorites from your own stash.
Click here to view the full supply list or check out the one linked in the gallery at the bottom of this post when you have finished exploring this card.
Today's GIF!
Hmmm, this is NOT what I meant by Shadow Box...
Like this card and my corny GIFs? CLICK BUTTON BELOW
to sign up for blog updates:
FLORAL TRIMS SHADOW BOX SET - Stamping, Embossing, Watercoloring
Watercolor Base: 5" x 7"
Featuring:
Tim Holtz Distress Watercolor Pencils SETS 1, 2, 3 BUNDLE Ranger
Tim Holtz Distress Ink Pads - See list below in Project Palette

PROJECT PALETTE
Distress Watercolor Pencils: coloring the flowers
Barn Door - CREATE Flower Centers
Spiced Marmalade - CREATE Flower Petals (middle)
Mustard Seed - CREATE Flower Petals (edges)
Rustic Wilderness - CREATE Leaf Centers
Peeled Paint - CREATE Leaf (middle)
Twisted Citron - CREATE Leaf (edges)
Seedless Preserves - CREATE Panel Berries and Splatter
Seedless Preserves - INSPIRE Flower Centers and Berries
Prize Ribbon - INSPIRE Flower Petals (highlights)
Shaded Lilac - INSPIRE Flower Petals (body to edge)
Rustic Wilderness - INSPIRE Leaf Centers
Peeled Paint - INSPIRE Leaf (middle)
Crushed Olive - INSPIRE Leaf (edges and body)
Twisted Citron - INSPIRE Panel Splatter


Distress Inks: coloring the die-cut letters
Rustic Wilderness
Peeled Paint
Twisted Citron
Mustard Seed
Spiced Marmalade
Fired Brick
Seedless Preserves
Wilted Violet
Shaded Lilac
Prize Ribbon
Mowed Lawn
Crushed Olive


PROJECT PICTORIAL
STAMPING & EMBOSSING
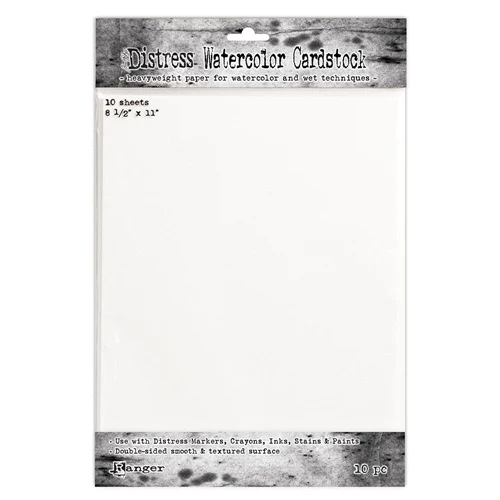
Cut a sheet of Distress Watercolor Cardstock in half into two 5 1/2" x 8 1/2" pieces
Stamp and emboss in white the Floral Trims images onto the cardstock pieces TIP: If you want to give yourself an easier time with the watercoloring, consider using a gold embossing powder instead of white. It was quite interesting to view the images while coloring and you may not want that challenge. LOL


COLORING
For this project, we will mostly apply the dry pencil to dry cardstock and then blend with a wet paintbrush after initially laying down the color.
NOTE: When I started I was a little unsure about how I wanted to color the flowers, so I decided to try to do ONE flower first and then if I was happy with that, I would keep going. You will notice that after getting done with this first flower, I would then apply the selected colors to all of the flowers with the dry pencil and then comeback to blend with a wet brush.
Use the Barn Door Watercolor Pencil to "flick" color outwards from the flower center
Next use the Spiced Marmalade Watercolor Pencil to color from the center towards the middle of the pet in uneven strokes and leaving white patches. This will allow some variations in the orange color as it mixes with the red and then the yellow.
Outline the flower petals in Mustard Seed Watercolor Pencil
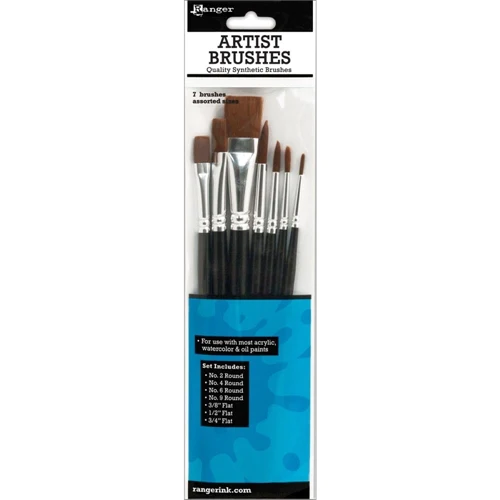
Wet one of the smaller round paintbrushes and "drag" the red color outwards into the orange
Repeat by dragging the yellow color into the orange to blend


Once you are satisfied that you got the hang of that technique, color in the rest of the petals as shown.


CREATE LEAVES
Add Rustic Wilderness Watercolor Pencil along the center and veins of the leaves
Add Peeled Paint Watercolor Pencil next to the Rustic Wilderness filling in more of the leaf
Finish the leaf with Twisted Citron Watercolor Pencil along the edges
Blend the colors with a wet paintbrush


Scribble a little Seedless Preserves Watercolor Pencil onto your non-porous craft surface, mix with a little water to "melt" the color.
Color in the small "berries". Splatter the remaining color all over your artwork.


INSPIRE FLOWERS
Use the Seedless Preserves Watercolor Pencil to "flick" color outwards from the flower center (photos 1 and 2, left to right below)
Next use the Prize Ribbon Watercolor Pencil to add highlights of color along the petal. (photos 3)
Fill in more of the petal unevenly with Shaded Lilac Watercolor Pencil, leaving white patches. This will allow some variations in the purple color as it mixes with the other colors. (photos 4-7)
Wet one of the smaller round paintbrushes and "drag" the Seedless Preserves color outwards into the Prize Ribbon and Shaded Lilac to blend (photos 8 and 9)
Repeat by dragging the Shaded Lilac color in towards the center to blend (photos 8 and 9)


INSPIRE LEAVES AND SPLATTER
Add Rustic Wilderness Watercolor Pencil along the center and veins of the leaves
Add Crushed Olive Watercolor Pencil next to the Rustic Wilderness filling in the remainder of the leaf
Blend the colors with a wet paintbrush
Scribble a little Twisted Citron Watercolor Pencil onto your non-porous craft surface, mix with a little water to "melt" the color.
Splatter the remaining color all over your artwork.


Dilute about 3 drops of Lost Shadow Reinker with on your non-porous craft surface and use the paintbrush to loosely and unevenly outline the flow shapes on the watercolored panels,


CREATING THE SENTIMENT
Apply the each of the selected Distress Ink pads directly to a piece of 3" x 4" cardstock in a circular motion to ink the cardstock evenly (see palette)
Die-cut the selected letters from the corresponding cardstock
Die-cut each of the letters twice from white cardstock
Adhere 2 layers of each white cardstock letter together and then top with the inked letter to finish


CREATING THE SHADOW BOX BACKGROUNDS
Trim two pieces of Chipboard to 5" x 7"
Paint two 5" x 7" pieces of Watercolor Cardstock with Lost Shadow Distress Paint and let dry
Spray the backs of the Lost Shadow painted cardstock with the adhesive and adhere to the matching chipboard pieces
Trim the watercolored flower panels to 4" x 6"
Trim two pieces of Chipboard to 4" x 6"
Spray the backs of the watercolored flower panels with the adhesive and adhere to the matching chipboard pieces
Spray the backs of the chipboard-layered watercolored flower panels once more and adhere to the Lost Shadow painted panels


ADHERING THE DIE-CUT LETTERS
Lightly draw two lines, one at 1 3/4" from the top and one at 1 3/4" from the bottom along the 6" side of the watercolored panels; these will be your boundaries for to place the letters
Layout the letters first before adhering until you are comfortable that the spacing is even
Adhere the letter to spell CREATE
Erase your boundary lines
Repeat for the second panel to place and adhere INSPIRE


Embellish your selected Shadow Box frames with your chosen "enhancements"!

Lots of pix to see all the details!


You made it to the end!!! Whew, I hope you enjoyed this and were inspired to give it a try!
Hope to see you again soon. Leave me a comment with your thoughts please. It means a lot and I am happy to take any questions.
SUPPLIES:
I listed the products that I have used below. Please note that these are compensated affiliate links used at no cost to you. I really appreciate your support. All stamps used today were part of my maker package from Tim Holtz and Stampers Anonymous. Click on the icons below each product picture to shop with Simon Says Stamp.


I absolutely love these! I bought these stamps but have yet to open the package! It’s time to play with watercolor!
These are just gorgeous
Great way to use those stamp sets. Love the loose outlines you created with the Lost Shadow ink color, and will have to try that!