

Tim Holtz - Sizzix Halloween 2021 Release
- Keisha Diann

- Aug 14, 2021
- 5 min read

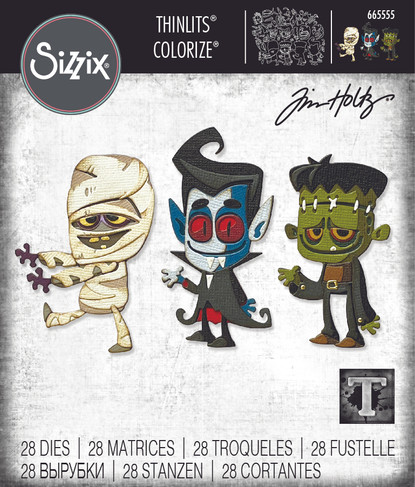
Hello Lovelies! Thank you for stopping by to see more of the Real Boos of Halloween! I given each of these Costume Party characters a name and I am please to share my BOO CREW of Marty the Mummy, Vinny the Vampire and Frankie Frankenstein!!!
I envisioned this little Z-Card as a Halloween decor item that would sit on my desk and keep me smiling during Trick or Treat Season. However, it can be easily re-imagined as a trio of square cards or a mini-album.

I'm going to use the purple and green panels at the back to mat some cute Halloween photos.

The full Tim Holtz 2021 Fall/Halloween is available at Simon Says Stamp, as a bundle for for $289.99 which includes all 11 dies, 3 Texture Fade folders 1 Impresslit and 6 x 8 Sticky Grid Sheets!!! Click here or the image below to shop.

To give you a quick visual on the supplies that I primarily used for this project, check out the grid below:


Feautured Supplies
An expanded supply list is available at the bottom of this post. Please note that the new release item links (e.g. Costume Party Dies) are only available within the post and are not in the supplies section at the bottom.
Today's cards showcase making custom-colored layered diecuts against ink-dusted embossed backgrounds that are accented with more adorable Halloween die-cuts! I've got lots of photos to share the process in case you want to give this a try.
THE REAL BOOS OF HALLOWEEN Z-CARD/MINI ALBUM - Direct-inking Cardstock with Distress Mini Ink Pads and Simple Die-cutting
Z-Fold Card Base: 4" x 12", scored at 4" and 8"
Grey Mats: 3 3/4" x 3 3/4" (x3)
Embossed Backgrounds: 3 5/8" x 3 5/8"
Featuring:
Tim Holtz Sizzix Brickwork 3D Texture Fades Embossing Folder
Echo Park Cupid and Company 12 x 12 Paper Pack - Black Cardstock
Bearly Art Precision Craft Glue
Distress Mini Inks (for coloring cardstock)
Marty the Mummy - Milled Lavender, Aged Mahogany, Scattered Straw, Antique Linen, Old Paper, Squeezed Lemonade, Black Soot
Vinny the Vampire - Prize Ribbon, Tumbled Glass, Black Soot, Shaded Lilac, Wilted Violet, Hickory Smoke, Salty Ocean
Frankie Frankenstein - Mowed Lawn, Twisted Citron, Black Soot, Fired Brick, Mustard Seed, Rusty Hinge, Frayed Burlap
Frightful Things diecuts - Hickory Smoke
Additional supplies linked in the Supplies Gallery at the end of this post

I've only started using my ink pads to make custom colored cardstock recently, and now I can't stop doing it! Its easy, expands the range of colored cardstock that I have and allows me to use small scraps of white cardstock to create the color palette that I need instead of chopping off little sections of the solid colored cardstock.
Tip: I prefer to use my mini inks for directly inking my white cardstock scraps as I find it easier to apply ink in this small footprint, using the little ink pads as I would a blending tool.
PREPWORK
Card Base
Cut 12" x 12" Black cardstock to 4" x 12"
Score black cardstock at 4" and 8"
Fold black cardstock in a zig-zag fashion as shown below


Card Mats
Cut 5 pieces of white cardstock to 3 3/4" x 3 3/4"
Ink the edges of 3 of these pieces with Hickory Smoke Distress Ink to create a grey border
Ink the entire surface of the remaining 2 pieces of 3 3/4" square cardstock with Wilted Violet and Cracked Pistachio ink respectively and set aside to dry. Once dry, stamp with images from the Zombies stamp set and adhere to the card base as shown
Cut 3 additional pieces of white cardstock to 3 5/8" x 3 5/8" and set aside for embossing


Card Front
Ink a 4" x 6" piece of white cardstock with Hickory Smoke and let dry
Once dry, diecut the title "Real Boos" out of this cardstock using the Varsity dies
Diecut "The, of Halloween" out of white cardstock using the Tiny Type dies
Diecut the pumpkin from the Frightful things set out of cardstock pieces inked with Squeezed Lemonade, Carved Pumpkin and Crackling Campfire Distress Inks

BOO CREW Panel Embellishments
Ink a 5" x 6" piece of white cardstock with Hickory Smoke and let dry
Once dry, diecut the ghost, candle, spider, spider web, skull and bones out of this cardstock using the Frightful Things dies and set aside to embellish the "BOO CREW Panels"


Additional BOO CREW Base Layers
Diecut each of base layers of each Boo Crew characters twice out of black cardstock. They will be used to add additional dimension to the assembled BOOs


MARTY THE MUMMY PANEL
Distress Mini Inks (for coloring cardstock)
Mummy Dies - Milled Lavender, Aged Mahogany, Scattered Straw, Antique Linen, Old Paper, Squeezed Lemonade, Black Soot
Frightful Things Dies - Hickory Smoke, Aged Mahogany
Tiny Type "Wrapped" Word - Aged Mahogany

MARTY THE MUMMY
Colored Cardstock Layers
Note: Since I started adding the Distress Ink pads to the photos mid-way, please see the below details confirming the colors used for the photos without ink pads displayed:
Row 1: Old Paper, Antique Linen, Hickory Smoke
Row 2: Scattered Straw


MARTY THE MUMMY
Assembly


MARTY THE MUMMY
Embossed Background
Use the Foliage 3 Texture Fades Folder to create the embossed background
Gently ink-blend Aged Mahogany ink over the raised surface to add some color to the background and showcase the texture of the embossed cardstock

VINNY THE VAMPIRE PANEL
Distress Mini Inks (for coloring cardstock)
Vampire Dies - Prize Ribbon, Tumbled Glass, Black Soot, Shaded Lilac, Wilted Violet, Hickory Smoke, Salty Ocean
Frightful Things Dies - Hickory Smoke
Tiny Type "Treat" Word - Wilted Violet

VINNY THE VAMPIRE
Colored Cardstock Layers


VINNY THE VAMPIRE
Assembly


VINNY THE VAMPIRE
Embossed Background
Use the Brickwork 3D Texture Fades Folder to create the embossed background
Gently ink-blend Shaded Lilac ink over the raised surface

FRANKIE FRANKENSTEIN PANEL
Distress Mini Inks (for coloring cardstock)
Frankenstein Dies - Mowed Lawn, Twisted Citron, Black Soot, Fired Brick, Mustard Seed, Rusty Hinge, Frayed Burlap
Frightful Things Dies - Hickory Smoke
Tiny Type "Boo" Word - Mowed Lawn

FRANKIE FRANKENSTEIN
Colored Cardstock Layers


FRANKIE FRANKENSTEIN
Assembly


FRANKIE FRANKENSTEIN
Embossed Background
Use the Circuit 3D Texture Fades Folder to create the embossed background
Gently ink-blend Cracked Pistachio ink over the raised surface

Once all BOO CREW card panels are assembled, adhere to the card base to finish.

Lovelies, I hope you enjoyed taking a peek at this project. Have you tried Colorize dies before? Which of the costumes are your favorite - Marty, Vinny or Frankie?
See you soon!
SUPPLIES:
I listed the products that I have used below. Please note that these are compensated affiliate links used at no cost to you. I really appreciate your support. All dies used today were part of my maker package from Tim Holtz and Sizzix. Click on the icons below each product picture to shop with SimonSaysStamp.com.


Fabulous! I feel the need to update my Halloween collection based on your projects...those paperpieced characters (Marty, Vinny and Frankie) are a scream!!! I didn't think I needed them, but they wil be coming to me shortly! I really want to remake Vinny into a vampiress - I have a grandaughter that would love her!
Wow!!! Fantastic instructions! I do have a question. How did you do your sentiment strips? The black background with white lettering? Thank you!
Wow Keisha, this is stunning!! It was a great piece for the end of the Live, if it was a fashion show your make would be the Wedding Dress! I love that you gave every page a different colour, love the colours you used, the three are so adorable. Thank you so much for sharing, stay safe and have a wonderful weekend.