

Spooky Vibes & Fiery Shades: Crafting a Halloween Card with Tim Holtz & Stampers Anonymous 💀


It’s officially 100% spooky season, and I am bringing the eerie energy with a fiery side of Distress colors! Today, I’m kicking off a series of haunting makes featuring the brand-new Stampers Anonymous 2026 Fall / Halloween Curations release featuring Tim Holtz.

Today we'll use The Apothecary set from the release to make a Tim Holtz Halloween Card.
Key Supplies for The Apothecary Tim Holtz Halloween Card
Key Supplies Featured | Details |
Stamp Set | Stampers Anonymous / Tim Holtz The Apothecary |
Stencil | Stampers Anonymous | Tim Holtz Flames, Halloween Outlines |
Distress Spray Stains | Carved Pumpkin, Spiced Marmalade, Mustard Seed |
Archival Inks | Crackling Campfire, Spiced Marmalade, Hickory Smoke |
Mediums | Opaque Distress Texture Paste |


Today's GIF!
My skeleton is way cooler.
d
Like this card and my CORNY GIFs? CLICK THE BUTTON BELOW
to sign up for blog updates:
The Apothecary Happy Halloween Card
Now, full transparency: I never thought I’d fall in love with a skull image, but this bone-chilling beauty from "The Apothecary" set absolutely stole my heart. Coupled with glowing layers of ink and dimensional texture paste, this card is packed with all the eerie autumn magic.

PROJECT PALETTE

Card Highlights:
Step-by-Step Process
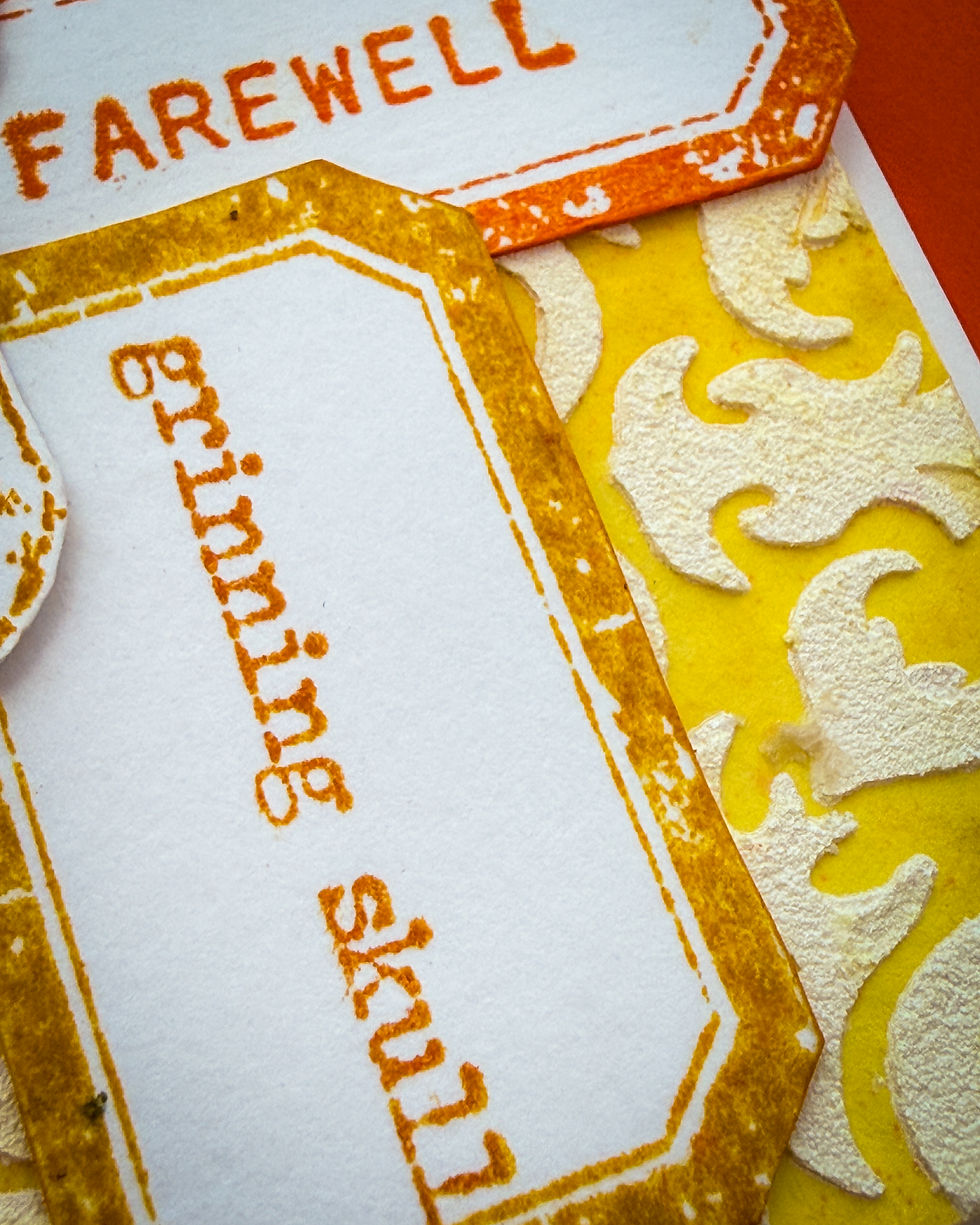
Adding Dimensional Flames I started by laying the "Flames" stencil over a piece of Distress Watercolor Cardstock and spread a layer of opaque Distress Texture Paste and let it dry.
Blending the Fiery Glow To set the background ablaze, I misted the stenciledb cardstock with Carved Pumpkin, Spiced Marmalade, and Mustard Seed Distress Spray Stains. The blend creates a vibrant gradient—from deep pumpkin orange down to a bright, glowing yellow at the bottom. The raised pattern pulls in the warm undertones while giving the entire card dramatic contrast and dimension.
Enhance The Background. Add more visual texture by stamping the delicate handwritten text from The Apothecary set in Distress Archival Hickory Smoke.
Stamping the Focal Apothecary Skull Using Archival Inks in Crackling Campfire Spiced Marmalade and Fossilized Amber, I inked up the detailed skull from The Apothecary set to give it an ombre, sunburst-like glow. Fussy cutting this piece makes it pop right off the textured background.
Layering Sentiments & Wicked Labels To finish the composition, I stamped "Happy Halloween" in rich Hickory Smoke Archival Ink to anchor the top of the skull. Then, I added spooky apothecary labels around the bottom featuring stamped accents like "A WICKED THING," "FAREWELL," and "grinning skull."
Bringing It All Together Once I had each of the elements laid out, I got a little help from some Glad Press and Seal film to hold them all in place, so I could flip them over and add glue and foam dots to adhere the whole composition to the card base.
STENCIL & SPRAY STAIN


STAMP & FUSSY-CUT
ADHERE

UP CLOSE AND CRAFTY


LAST LOOK
Thank you so much for stopping by today—Are you jumping into Halloween crafting early this year, or do you wait until October? Let me know in the comments below!
SUPPLIES:
I listed the products that I have used below. Please note that these are compensated affiliate links, used at no cost to you. I really appreciate your support. All stamps used today were part of my maker package from Alex Syberia Designs Click on the icons below each product picture to shop with SimonSaysStamp.com.


Comments