

Simon Says Stamp - January 2022 Card Kit, Warmest Wishes
- Keisha Diann

- Dec 19, 2021
- 4 min read

Hello Lovelies! Simon Says Stamp's Warmest Wishes Card Kit is ALL about CUTE for me! I was immediately charmed by the darling snowmen stamps and snowflake stencil so they became the focal point of my cards with touches of of texture from embossing and glitter gel.

Click image above to shop for the kit.
Though I went cute, this kit offers you options to take this in a completely different direction with the gorgeous patterned paper that gives you plaid, poinsettia and starts among other things to experiment with... Here's the full list of all the crafty goodies that the kit contains:
1 NEW Simon Says Stamp Warmest Wishes 6 x 8 stamp set
La La Land Crafts Starry Night 6 x 6 paper pad
1 NEW Simon Says Stamp Scattered Snowflakes 6 x 6 stencil
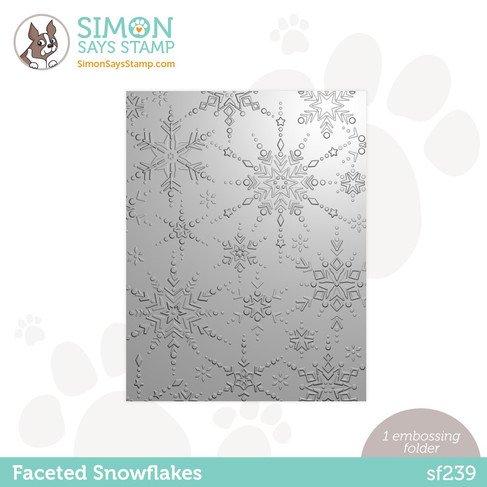
1 NEW Simon Says Stamp Faceted Snowflakes embossing folder
1 NEW Simon Says Stamp Exclusive Seafoam Glitz Glitter Gel
1 Package Pink Gems
1 sheet Simon Says Stamp Soft Navy cardstock
1 sheet Simon Says Stamp Doll Pink cardstock
1 sheet Simon Says Stamp Lavender cardstock
1 sheet Neenah 110lb. Solar White cardstock
1 Simon Says Stamp Doll Pink A2 envelope
1 Simon Says Stamp White A2 envelope
As mentioned, I went for the stamp set, stencil, embossing folder and glitter glitz gel!


I really went to town on the pictures today to tell the story of these cards, so much more of a pictorial than a tutorial. Definitely let me know in the comments if you were able to follow along. The cards are uncomplicated, but have a several adorable steps that take you from start to finished.

Today's projects will start with coloring the snowmen and gifts, so break out your markers of choice and bring these cuties to life. If you are using COPIC Markers, here are the colors that you will need to recreate these colors:


My markers need a bath but I really like this particular rainbow of happy colors!
Stamp out the 4 images that you will need

Color as shown :-)

Don't worry about being perfect, have fun!


Fussy-cut or die-cut your images so they are ready to add to your embellished card fronts.

SENDING HAPPY THOUGHTS... CARD - Ombre Ink-blended Stenciling, COPIC coloring and Glitter Accents
Card Size: 4 1/4" x 5 1/2"
Stenciled Layer: 3 1/4" x 5"
Featuring:
Simon Says Stamp Pawsitively Saturated Ink - Bubblegum, Taffy
Simon Says Stamp Blending Brushes
Additional supplies linked in the Supplies Gallery at the end of this post

Pink and purple and go-to combos for me and I think that these little guys make the cutest pair! Time for the pictorial!
Cut and emboss your cardstock


The plain cardstock colors inspired the color palette for the card. You will need 2 pieces of white A2 cardstock and 1 piece of purple cardstock. A2 = 4 1/4" x 5 1/2". Emboss the purple cardstock using the Faceted Snowflakes folder.
Inkblend using Pawsitively Saturated Bubblegum Ink


Stamp Tree and Snowflakes in Smoke Ink and Sentiment in Taffy


I placed my snowmen on the card front temporarily so I could see where I wanted the trees and sentiment positioned.
Pop up the snowmen with foam tape, attach to the card front and adhere jewels to accent the sentiment


Here's a close-up of the AFTER with the snowmen and the pearls. :-)


Add touches of Stickles to the trees and grey snowflakes to give a little winter frost.

When dry pop-up the stenciled layer on top of the purple embossed card front and adhere to the card base.
LET IT SNOW... CARD - Glitter Gel Stenciling, COPIC coloring and Dry-Embossed Card Front
Card Size: 4 1/4" x 5 1/2"
Embossed Layer: 4" x 5 5 1/4"
Featuring:
Additional supplies linked in the Supplies Gallery at the end of this post

Let's make it Lovelies!
Apply Glitz Glitter Gel through the stencil on white cardstock


On of the things I love about the Glitz Glitter Gel is that it drys so quickly that you hardly have any waiting time! So be sure to give your stencil a bath immediately after you are done applying the gel to the cardstock.
I had an owwie on one of my fingers, so I used a wet rag to clean my stencil than fully immersing it into water.
Die-cut the stenciled card front


Pop-up the oval, snowman and gifts with foam tape


Stamp and die-cut the sentiments on white and smoke cardstock in Surf ink


Layer the embossed card layer onto the card base, adhere the stenciled layer, snowman and gifts

Adhere the sentiments and jewels as shown


All this texture makes me happy!

And I a pop of color makes everything better!

And we are done Lovelies!!!
I'm curious if one card appeals to you more than another. Let me know in the comments which card is your favorite today.
Full supply list below for your shopping convenience.
See you soon Lovelies!
SUPPLIES:
I listed the products that I have used below. Please note that these are compensated affiliate links used at no cost to you. I really appreciate your support. Simon Says Stamps Card Kit products were provided as part of my Design Team package.
Click image below to shop for the Kit ONLY!
Click on the icons below each product picture to shop additional supplies with SimonSaysStamp.com.


Kaiser OTC benefits provide members with discounts on over-the-counter medications, vitamins, and health essentials, promoting better health management and cost-effective wellness solutions.
Obituaries near me help you find recent death notices, providing information about funeral services, memorials, and tributes for loved ones in your area.
is traveluro legit? Many users have had mixed experiences with the platform, so it's important to read reviews and verify deals before booking.
I don't have a favorite. They are both lovely and your craft room is divine. I love white painted furniture. Thanks for the inspiration.
Both are gorgeous and soooo cute Keisha. The pictorial (LOL) is easy to follow but your usual tutorials are too. Although I normaly love brighter colours is my favorite the Happy Thoughts card, beautiful colours. Thank you so much for sharing your inspiration Keisha, stay safe and have a wonderful day.
To be completely honest I cannot pick a favorite as they are both adorable! I loved the step-by-step photos which made following along with your process so easy. Thank you for sharing :)
Terri