

Create Your Own Ephemera With Tim Holtz Correspondence Stamps and Simon Says Stamp Dies
- Keisha Diann

- Jan 31
- 3 min read

Hello Lovelies! I'm so tickled that we are getting even more Coordinating Dies from Simon Says Stamp for some of our favorite Tim Holtz & Stampers Anonymous Stamp Sets. I have a fun card for you today, but I'll admit that my real focus is on making an ephemera stash in your chosen rainbow of Distress Oxides.
A custom correspondence ephemera stash allows me to:
Get a jump start on my crafting by not beginning from a blank page.
Skip to the "fun" part of designing and embellishing whatever I am making.
Have my own personal palette of embellishments

My personal postage ephemera rainbow
Key Supplies for Correspondence Ephemera


Click HERE for the full list!
Today's GIF!
I need a little helper like this in my craftroom when doing all this die-cutting!
Like this card and my CORNY GIFs? CLICK BUTTON BELOW
to sign up for blog updates:
LOVE YOU CORRESPONDENCE CARD - Stamping, Die-cutting, Splattering and Collage
Card Size: ~4 1/2" x 5 3/4"

COLOR PALETTE
Tim Holtz | Ranger Distress Oxide Pads - Tattered Rose, Kitsch Flamingo, Picked Raspberry, Festive Berries, Rusty Hinge, Spiced Marmalade, Mustard Seed, Mowed Lawn.

CARD HIGHLIGHTS
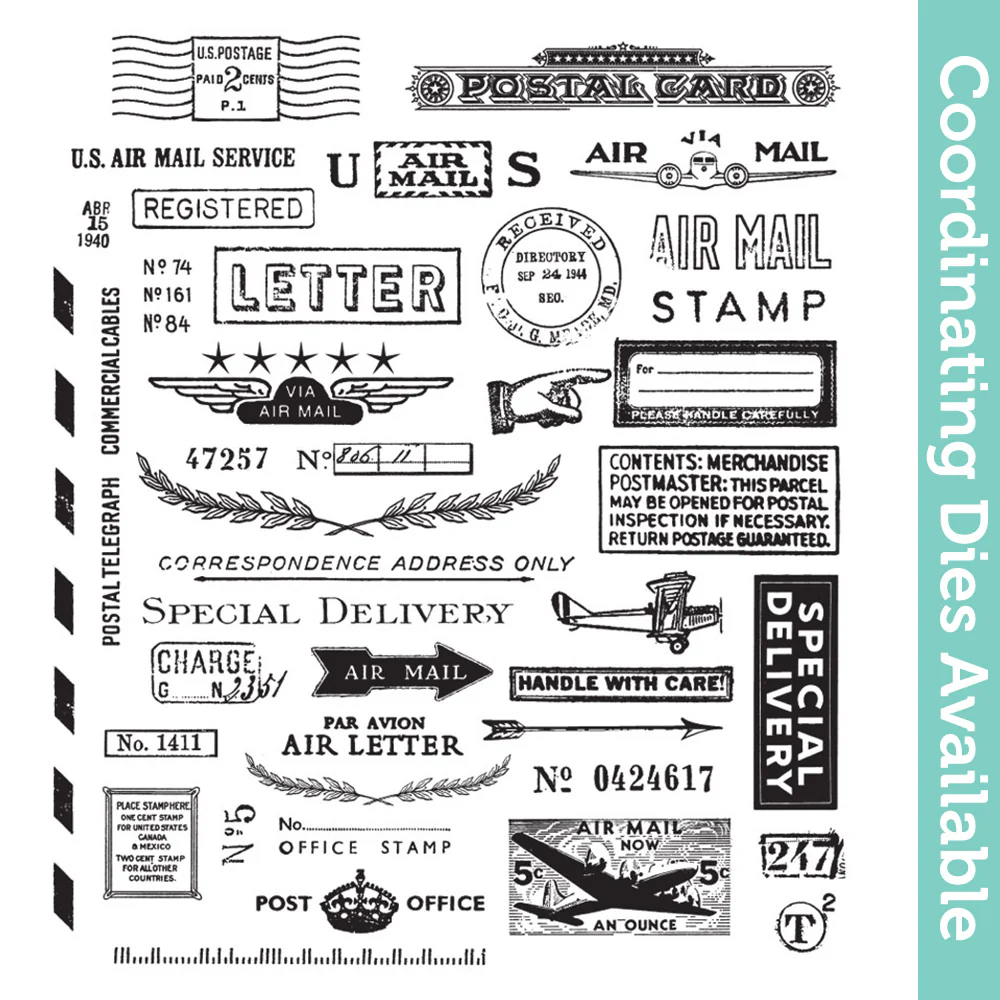
Stamping - Carefully arrange the Correspondence stamps on a 5 1/2" x 8 1/2" piece of white cardstock, inside a MISTI or similar stamping tool. Tip: Leave enough space between the stamps to allow for placing the dies. Ink the stamps with your first color stamp once or twice for even coverage and then repeat with the next color until complete. Stamp card backgound with the text stamp from The Professor Set.
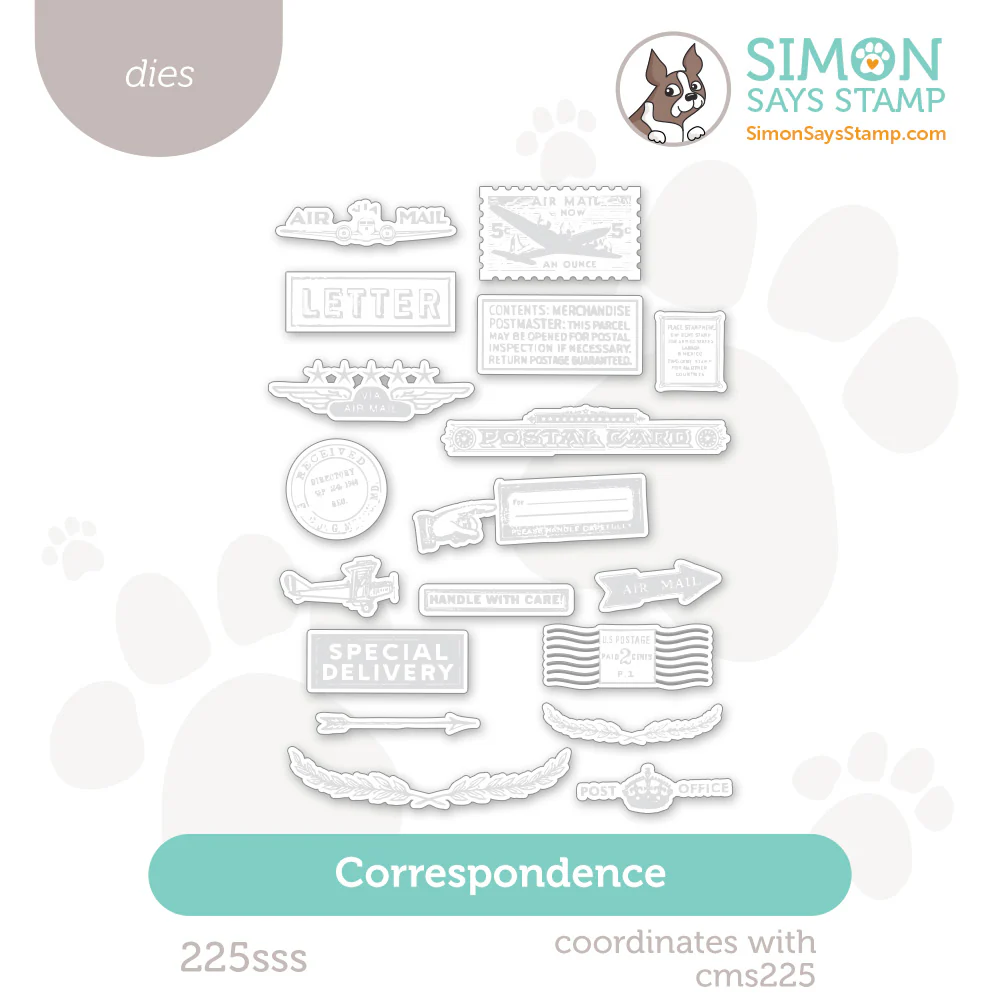
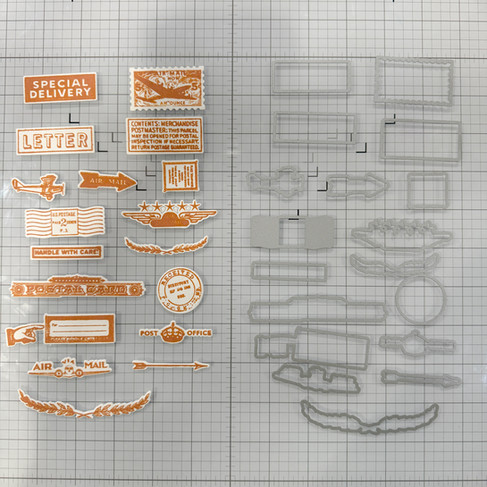
Die-cutting - Use delicate painters or die-cutting tape to secure the coordinating dies in place before die-cutting. Tips: Save the pieces of tape to reuse on the following color. Place the diecuts in a small container to keep colors separted in you prefer. Die-cut the Bold Text Love U sentiment out of black foam or cardstock.
Splattering Card Background - Press the Rusty Hinge Distress Oxide Pad onto your non-porous craft surface and spritz with water. Dip a paint brush into the puddle of color and tap to splatter onto the stamped card background.
Collaging and Assembly - Arrange the rainbow of die-cut ephemera on the card front and finish by adhering the Bold Text sentiment.


UP CLOSE AND CRAFTY


LAST LOOK

Thanks for stopping by today! Drop me a comment and say hi!
SUPPLIES:
I listed the products that I have used below. Please note that these are compensated affiliate links, used at no cost to you. I really appreciate your support. All stamps used today were part of my Heart to Heart maker package from Simon Says Stamp. Click on the icons below each product picture to shop with SimonSaysStamp.com.


Comments